Follow the easy steps below to complete this watercolor rose painting project. If you are working with young children, we recommend doing this faux stained glass rose art project in stages over two days.
Rose Art Watercolor Painting Project
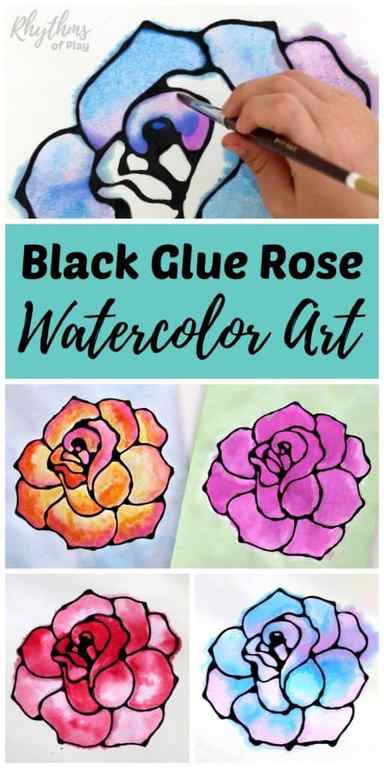
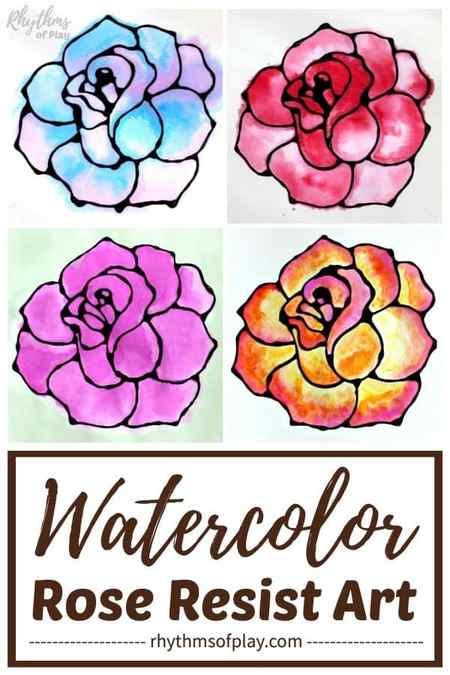
Here’s a fun watercolor rose painting idea for kids, teens, and adults. This easy step-by-step tutorial will teach you how to paint a rose with watercolors and a black resist medium to create gorgeous faux-stained glass art. Painting a watercolor rose bloom is a fun and easy flower painting art project for kids, teens, and adults. Look at this list of fun and easy flower art projects for more flower art ideas.
The rose watercolor painting instructions below include; 1) how to use a black colored resist medium to create faux stained glass rose art, 2) how to make black glue, and 3) basic beginning watercolor techniques to help you learn how to paint a rose with watercolors. You might also enjoy this sunflower art template that you can color, or paint, and make into a flower crown!
Rose Art Watercolor Painting Idea
Invite your children to paint a watercolor rose, and join the fun! I had as much fun painting a watercolor rose as my 4-year-old daughter. Put completed rose art in a frame for an easy gift idea for mom, grandma, or your child’s favorite teacher. Or, try any one of these homemade gift ideas kids can make. You might also enjoy this list of gifts for mom you can buy.

How to Paint Faux-Stained Glass, Rose Art
Before starting your watercolor rose painting, read through the instructions below and allow each painter to decide on the type of resist medium they would like to use; black glue, black oil pastel, or black crayon. If you want to use black glue, follow the how-to instructions in the next section to make it–you can’t get it wrong!
But if you use a black oil pastel or crayon, you can skip learning how to make black glue and move on to the step-by-step directions to paint rose art. Creating and using black glue will require allowing the black glue to dry before painting a rose, so consider that before starting your rose painting. Decide on the art supplies you would like to use from the watercolor rose art materials listed below.
Watercolor Rose Art Materials
- Choose a resist medium to work with:
- Black Glue (white glue mixed with black acrylic paint–scroll down for step-by-step instructions to make black glue)
- Black oil pastel
- Black crayon
- Stockmar watercolor paints
- Liquid watercolors
- Watercolor tubes
- Watercolor paint pallet

Make Black Glue for Rose Painting or Use A Black Oil Pastel or a Crayon
Skip to the step-by-step directions for painting a rose in the next section if you use a black crayon or a black oil pastel as the resist medium to paint faux stained glass rose art. Otherwise, follow these simple directions to make black glue.
How to Make Black Glue:
- Making black glue is simple, and you don’t need to measure. Add a squirt of black acrylic paint to a bottle of white glue and shake well.
- Because white glue dries clear, you don’t need to add a lot of black acrylic paint to make black glue look black. In other words, black glue will look grey when wet but black after it dries.
- Use a chopstick to help mix the color through the bottle if needed.
- We have a small bottle of what was once white glue dedicated to continually mixing white glue and black acrylic paint into it to make a never-ending supply of black glue. We never measure, and it always turns out fine.
- Add white glue and black acrylic paint to the same bottle to make more when needed.
Step 1 – Basic One Stroke Rose
I’m loading my Prima Barton 3/4″ angle brushwith Kraze FX 6 Split Cake Palette-Jalepeno and painting the petals. The darker color is at the inner part, so that we can get that depth to the rose. Sometimes I’ll paint a red circle using a dauber (see next image) just as a guide for petal placement and to avoid those empty spaces between petals.Then when it is dry I’m painting a rose bud,here is important that you watch out for placement and top of the bud should be on darker part of the petal.After that we are finishing up with painting petals around the rose bud.They look like tiger stripes( thin-thick-thin),and they are done also with angle brush.Best way to describe how to paint petals around bud would be that you start painting line with tip of the brush perpendicular to surface and then lean it to the side at the midle and then again back to straight.


With my favorite dauber and Kraze FX Red from the Fundamentals 12 Color Palette, I’m dabbing the base for our second “tiger stripe” style rose. I love this red because it doesn’t stain and has that beautiful deep tone.

Step 3 – Painting “Tiger Stripes” and Finishing the Roses
Using the finger dauber, and the Kraze FX Tardis split cake, I added two smaler roses and then with Kraze FX Black and a round brush No3, I’m creating petals. It is a basic tiger stripe line that goes from thin to thick to thin – it’s fast but still beautiful.Then I added leaves using the Kraze FX Lush Split Cake,and we are done with our two fast roses.


