They come out in different diameters and look as randomly spaced as stars.
How to Paint Space in Acrylic with Kids
Learn how to paint space with acrylics in a simple way that even children can accomplish! This technique works for creating beautiful abstract wall art and decorating craft projects.

If you’ve been around this blog for a while, you might have noticed that we have a fondness for painting the cosmos. Our whole family does. For one thing, it’s beautiful. Gorgeous nebulae and breathtaking galaxies, who can resist those? Not even my son, who is four at the moment. For another reason, it’s actually quite simple to paint. In my opinion, there are a few secrets involved, and we’ve used them in a variety of projects : for making space Easter eggs, a space cutting board for Mother’s Day, and finally some space Christmas ornaments last year.
Space has been an interest for my son for a while. One might wonder, how can a four-year-old be interested in space? I would have, before. But now I know that he can be, just the same way he is NOT interested in knights or dinosaurs. He picks books with pictures of space, draws spaceships and builds them from all kinds of blocks possible, makes up stories about his toys visiting different planets, and together with his dad follows the progress of current space exploration missions. Words like “comet”, “asteroid” or “space capsule” are enough to make him stop doing whatever he was doing and come rushing towards whoever is talking, “What was it you said?!”
A few months back, for his birthday that already featured a space cake, I decided to paint a quick poster of space. The plan was to throw some paint on black paper and then add splashes of white for stars. The painting would act as a centre piece of a kind, and then we would offer all the kids to work on it and create a big space painting. But when I started painting it (just a couple of hours before the party, obviously!), my son joined in.

Then I saw how easy it was for him to paint space with me. He would mix colours around, using paper like a palette, but it all looked good in the end.
The activity was also a hit, and he liked it especially much! Since then, we did five or six more space paintings. We’d paint cosmos first, and after the picture is dry, he would decorate it with aliens and spaceships. We also used them as background for playing with other toys, such as these astronaut paper dolls.

There are definitely a few tricks you can try, but the technique is simple, and you can use it for painting on wood, canvas and even aprons.
Watch the Video
The post includes Amazon affiliate links to the products we used.
- acrylic paints: heavy body acrylic paints are my favourites (they’re vibrant and thick), but any acrylic paints should do – make sure you’ve got a couple of shades of blue, purple, fuchsia, and white
- black paper: we made huge paintings, using rolls of black paper, but poster boards are good as well, and even small pieces of black paper would do – you can also create your own black canvas by painting white canvas solid black
- sponges
- flat brushes
Tip # 1: Choose a Limited Palette
If you look for photos of space, you will see that it is miraculously vibrant. Choosing colours is important. Especially with little kids, you want to eliminate the ones that you will not need and make sure that you have plenty of violet, magenta, and two or three hues of blue. A little bit of golden will take you a long way, but you could also use ochre or yellow instead. Look up pictures of nebulae to see splashes of golden and light blue!
Use the very minimum amount of water possible – or no water at all. The excess of it will wrinkle the paper and make colours too translucent to show well on black.
You can do abstract painting with clouds of purple and blue or find references of different objects in space and try to represent them. Here is the creation of a spiral galaxy that Dad did.

Step 1: Chose Your Colors, Then Spray Them.
Put your poster paper glossy side up (I cut my posters into halves or quarters to make them more manageable). Get an idea in your head of where you want your planets/moons/stars, and also what colors you want them.
Pick two colors for each planet/moon (my colors are yellow and red for my planet and blue and pink for my moon).
Spray the colors on top of one another in the general area you want the planet and moon. It’s okay to spray larger areas than you need, in fact it’s good to do to insure there is no white showing through on the edges of your soon-to-be planets.
Generally speaking it’s best to spray the lightest color first, then the darker one, but you can do it either way.
Add Tip Ask Question Comment Download
Step 2: Making the Pattern
Quickly, before the paint dries, take the magazine or newspaper pages and put them flat on top of the spray painted areas. You may need to use more than one per planet depending on how big it is.
Then pull the pages off after a couple of seconds to reveal the pattern it created.
Using black (or what ever color you want the sky to be) spray a curved line on one side of each soon-to-be planet; this will be the dark side of the planet, so make it the same direction on all of them so they have a common light source such as a near by star.
Add Tip Ask Question Comment Download
Step 3: Making the Sky
Okay, the planet and moon are starting to take shape!
This is where the circular objects come in. They need to be things that you can get spray paint all over. I went to a second hand store and bought some old pot lids, I also use the spray paint caps a lot, and pennies if I need really tinny moons.
Next, with the lids firmly in place, paint the whole paper black (or what ever color you want the sky). Make sure you get all around the lids, sometimes they block areas, and if you don’t get it all it makes your planet look funny.
It’s good to do this with a large piece of scrap paper behind your painting, or you will get it all over the surface behind your painting; like I did on the upper left corner (I forgot about that and need to clean that up tomorrow. )
Add Tip Ask Question Comment Download
Materials You Will Need to Paint a Space Painting with Acrylic Pouring
This post contains affiliate links, which I earn a small comission from. These are provided for your convenience, and the price isn’t increased at all.
Paints:
- Artist’s Loft Mars Black
- Artist’s Loft Titanium White
- Artist’s Loft Metallic Cobalt
- Artist’s Loft Old Gold
- Artist’s Loft Brilliant Blue
- DecoArt Dazzling Metallics Shimmering Silver
Pouring Medium:
Tools:
- Paintbrushes
- Paper plate/ Palette
- Pencil/ Sharpie
- Round things, such as lids and containers, or a compass
Canvas:
- 8in x 10in canvas


Infinity Pour
- You’ll need two cups of pouring paint for this technique. I used warm colors in one cup and cool colors in the other with white in both. I also played on the complementary nature of orange and blue with the copper and blues. My cups were layered as such:
- Cool: white, silver, blue, metallic cobalt, white, silver, blue, metallic cobalt
- Warm: white, copper, gold, white, copper, gold, white
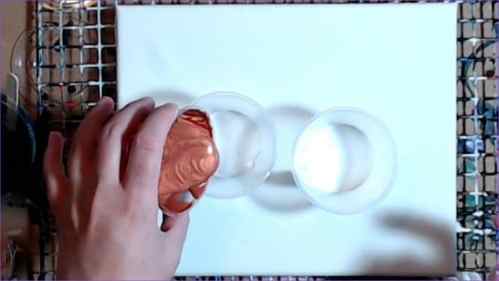
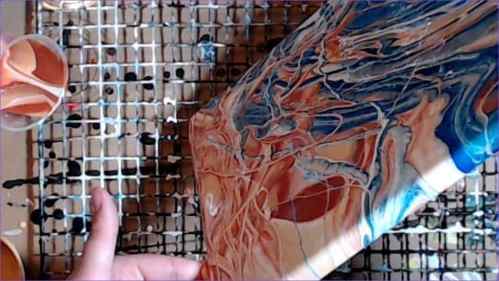
- Pouring the paint onto your canvas, moving your hands in circles, overlapping the paint from each cup into the other’s puddle.
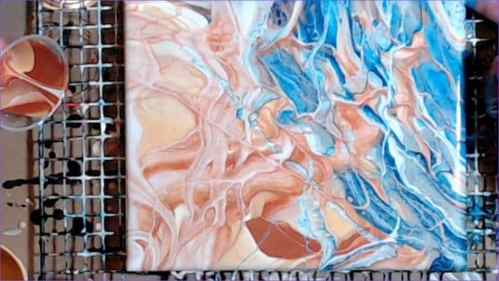
- Tilt and stretch your paint across the canvas until your happy with the way that your painting looks.
NOTE: I used a more diagonal composition for this pour, but you can choose to do it any way that you want.
Add in Your Planets
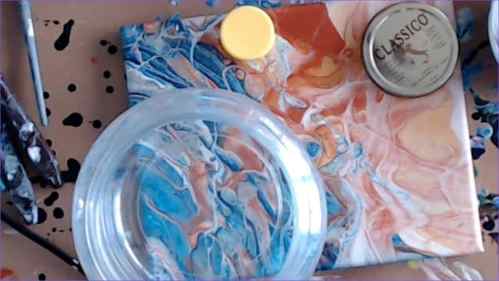

You can freehand, find some round things around your house, or use a compass from your geometry days, but you’ll need to put some circles on for your planets. On the light colors, I was able to get away with tracing cirlces in penil, but on the darker colors, I needed to use a Sharpie.
For composition, I would recommend that you choose one planet to be your focal point, probably the largest one. Put it somewhere that is not the center. Then add two more planets in other smaller sizes. Three objects tends to be pleasing to the eye.
Finish It Off with Space


With a flat paintbrush, fill in the black outerspace around the circles you sketched out for the planets.
Incorporate Some Stars


Cover up your planets, either with paper or the lids and containers you used to trace them, as I did, and create some stars on the canvas by flicking a paintbrush with white paint on it.
Go Forth and Pour!
There you have it! Your very own easy stellar DIY acrylic pouring space painting on canvas! If you’re into the space theme, be sure to check out my moon painting tutorial and my galaxy painting tutorial!


As always, check out my updates on Facebook and Instagram and feel free to peruse Homebody Hall for more fluid art tips, tricks, and tutorials! Also head over to Youtube and subscribe to get my videos sent to you as soon as they come out!!

Art Projects for November: Fantastic Fall Paint Pouring Ideas

Pumpkin Art Ideas for Acrylic Pouring

Using Paint Density to Your Advantage in Acrylic Pouring
Want to remember this space acrylic pour painting? Pin this tutorial to your favorite Pinterest Board!


Primary Sidebar
About
My goal is to share my fluid art experiences with you, my successes and my failures, in the hopes that you can pick up some new ideas and learn from my adventures to save you some time, hassle, and money along the way. I really want everyone who wants to be creative to have that ability, and I truly think that fluid art is an awesome art form to facilitate that!


FREE Printable Color Wheel and 8 Color Scheme Guides!
Tired of using the same colors over and over? Not sure what colors go together? Grab my FREE Printable Color Wheel and 8 Color Scheme Guides and take your pouring to the next level!
You’ll also be signed up to receive awesome projects and helpful info as well!


