Ideally, a single coat of sealant is good enough for most indoor items, but you can apply more if you’re painting outdoor objects like plastic patio chairs.
How To Seal Acrylic Paint on Plastic: Step-by-Step Guide
I’m Rich, and I started Tactilehobby.com (acquired by Gigworker.com in 2023). I’m a hobby enthusiast with a real love for painting miniatures. I also happen to run this site and write the majority of its content!
Updated on: September 25, 2023
Our website is supported by our users. This post may contain affiliate links – which means we may receive compensation from purchases made through links on this site. To learn more, read about our Affiliate Disclosure and Editorial Process.
Using acrylic paint on plastic is trickier than on many other surfaces because it’s too smooth to let the paint stick and settle.
Even if you manage to get that done, you still need to seal your painting to preserve the colors for longer without fading, and that’s where this article comes in handy!
In the following, we’ll show you how to seal acrylic paint on plastic in quick and simple steps in order to give your plastic surfaces a complete makeover.
So without further ado, let’s dive right in!
- Supplies Needed
- Step 1: Make Sure the Surface Is Clean
- Step 2: Sand the Surface Down for Better Paint Absorption
- Step 3: Border the Painted Area (Optional)
- Step 4: Apply Primer to Help the Paint Stick
- Step 5: Start Painting on Plastic
- Step 6: Apply Proper Sealant on Your Painting
- Topcoat Options for Sealing Acrylic Paint on Plastic
- Acrylic Polymer Resin
- Polycrylic
- Polyurethane
- Decoupage Medium
Supplies Needed
- Sponge and soapy water
- Fine grit sandpaper
- A blower or vacuum cleaner
- Masking tape (optional for bordering)
- Plastic primer spray can
- Acrylic paint spray can
- A plastic sealant of your choice (we’ve included our top recommendations below!)
Painting or sealing acrylic over grime will show bumps and make the paint wear or peel quickly.
For that reason, you should always start your process by cleaning the plastic surface where you’re going to apply paint.
You don’t need any special detergents here since scrubbing the plastic with some room temperature soapy water and a sponge will get the job done.
Once you’re done, rinse off any remaining soap and allow the surface to air dry completely.
Step 2: Sand the Surface Down for Better Paint Absorption
As previously mentioned, the smooth surface of plastic makes it more difficult for the acrylic paint to stick.
To solve that, all you have to do is make the surface a little rougher by using some fine-grit sandpaper. Around 120 to 220 grit would be ideal (try this multipack).
This also comes with the added bonus of ensuring a level surface for better paint and sealant application. Remember, you only need to make the surface slightly rough, so you should apply the sandpaper gently.
Unlike wood, you don’t have to sand in the grain’s direction, so you can sand it in circles or straight lines.
When you’re done, suck up the sanded dust using a vacuum cleaner or a blower or wipe it down with a clean piece of cloth.
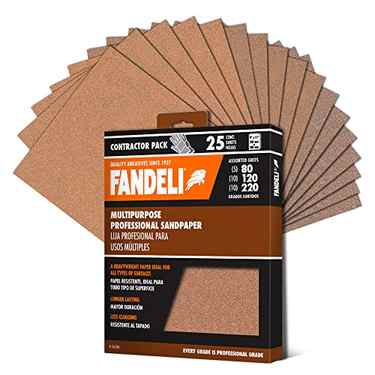
- PRODUCT SIZE AND CONTENTS: The package includes 25 pieces with a choice of 3 grits: 80 (5.
- POSSIBLE USES: Versatile use as it can be used for a variety of purposes such as carpentry.
Using Acrylic Varnish
Another option for sealing acrylic paint on plastic is to use acrylic varnish. Similar to clear acrylic sealer, acrylic varnish is available in both aerosol spray and brush-on bottle forms. This type of sealer will provide a protective layer that can help prevent your artwork from becoming damaged over time.
Acrylic paint is a great option for painting on plastic. It adheres well to most types of plastic, including polyurethane, polypropylene, and polystyrene. However, it’s important to choose the right type of paint for your project.

Using an Acrylic Primer
Some types of plastic are more porous than others, which can make it difficult for acrylic paint to adhere properly. In these cases, using an acrylic primer can help the paint adhere better to the plastic surface. Look for a primer that is specifically designed for use on plastic, as this will give you the best results.
When painting on plastic, it’s important to choose a paint that is specifically designed for use on this surface. These types of paints have better coverage and adhesion than regular acrylic paints. Look for a paint that is labeled as “plastic paint” or “multi-surface paint” to ensure that you get the best results.
Should You Seal Your Acrylic Painting?
Sealing your acrylic painting on plastic is not always necessary, but it can help protect your artwork from damage and keep it looking great for years to come. If you plan to display your artwork in a high-traffic area or in an environment where it may be exposed to moisture or other types of damage, sealing it with a clear acrylic sealer or acrylic varnish is a good idea.
If you’re planning on painting plastic surfaces, it’s important to prepare them properly. A well-prepared surface will ensure that your paint adheres correctly and looks great. In this guide, we’ll walk you through the steps to prep plastic for paint, including cleaning, sanding, priming, and painting.
Cleaning Plastic Surfaces
Before you begin painting, it’s crucial to clean the plastic surface thoroughly. This will ensure that there’s no dirt, grease, or debris on the surface that could interfere with the paint’s adhesion. You can use a mild soap and water solution or a commercial plastic cleaner to clean the surface. Be sure to rinse it thoroughly with clean water and let it dry completely before proceeding to the next step.

Sanding the Plastic Surface
After cleaning, you’ll need to sand the plastic surface to create a rough surface for the paint to adhere to. Sanding also helps to remove any remaining dirt or debris that may have been missed during the cleaning process. Use a fine-grit sandpaper, and sand the surface lightly in a circular motion. Wipe it down with a damp cloth to remove any dust.
Applying Primer
After cleaning and sanding, it’s time to apply a primer. Priming the plastic surface will help the paint stick better and provide a more even coverage. You can use any type of primer, but we recommend using an acrylic-based primer. Apply the primer with a brush or roller, and make sure to cover the entire surface evenly. Let the primer dry completely before proceeding to the next step.


