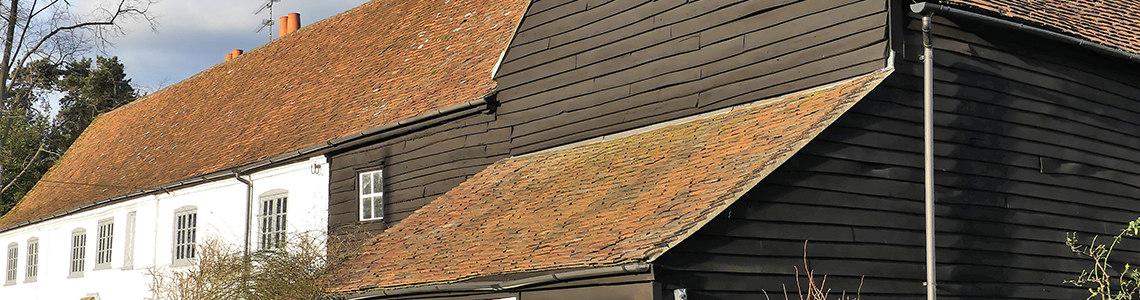
With Spring around the corner, now is the time to start thinking about painting your barn. A lot of guides can be overwhelming, so we have created this handy guide to be as concise and easy to follow as possible. Whether your barn is wooden or metal, feather edge or shiplap, we have the ideal paint for you.
Painting a barn
With an MLive.com subscription, you can gift 10 Subscriber Exclusive articles per month to anyone, including non-subscribers.
Already a subscriber? Sign in
- Zolton Cohen | The Grand Rapids Press
Q. This week: The question you answered last week about painting a house was in some ways, but not all, pertinent to what I’m going to do this summer – paint my barn. What should I use, latex or oil? Do I need to prime the barn before I paint? I’ve got an air compressor and a spray gun. Will this work to spray the paint? Also, how do I deal with the peeling paint and weathered wood on the south side?
D.K. — Vicksburg
A. The standards for painting a barn and painting a house are a little different. For instance, a good tool to scrape loose and peeling paint from the side of a barn is a garden hoe sharpened with a file. The idea is to just get the loose stuff off. You could never spend the time it would take to scrape every inch of the barn’s siding as comprehensively as you would a house with a hand scraper. But if the barn was built before 1978, be sure to capture the paint chips and dispose of them properly. They may contain lead.
As to the latex or oil question, you’re best off using both; oil for the primer and latex for the top coats. The reason is the weathered wood on the south side of the barn. “Weathered” implies wood that hasn’t had paint on it for some time and has oxidized and turned gray in the elements. The gray color indicates wood fibers that are now weakened. Paint applied to that surface could soon fail, because even though the paint will stick to the fibers, the fibers will eventually let go, taking the paint with it.
In this case a primer that penetrates the immediate surface will work better than a primer that lies on top of the sun and water damaged wood. Oil primer penetrates old, weathered wood better than latex primer, so that would be your best bet. Sanding the weathered surface away to expose clean, fresh, solid wood would be ideal, but again, that’s impractical on the side of a barn.
After priming, coating the barn with two coats of good quality 100% acrylic latex paint will yield the longest service life before repainting is needed. Latex maintains its flexibility longer than oil based paint, which becomes brittle with age. Over the course of the seasons the barn’s siding will expand and contract with changes in the humidity and temperature cycles. Latex has a better chance of keeping up with that movement than does oil.
A conventional compressor-driven spray gun is all right for painting cars or other relatively small objects. But you’d waste too much paint trying to paint a barn with it. There’s too much “overspray.” Overspray is paint that is atomized by the sprayer but does not wind up on whatever it is you’re trying to paint.
For a job the size of the one you’re tackling, you need an airless sprayer; one that blows nothing but paint out its tip. They’re available for rent at many paint stores and rental companies, and the speed with which you can get paint on the barn’s siding – and the paint you’ll save – will be very much worth the rental cost.
One final tip: if you have animals in a barnyard next to the barn, confine them until your painting day is over. It is disquieting to have a heifer come up and rub her ribs on the side of your 40 foot ladder while you’re standing at the top with a spray gun in your hand.
Zolton Cohen is a former ASHI-certified home inspector based in Kalamazoo. Write to Zolton Cohen, Around the House, P.O. Box 2007, Kalamazoo, MI 49003, or contact him through Michigan Live at www.mlive.com/forums/homeimprovement/.
If you purchase a product or register for an account through a link on our site, we may receive compensation. By using this site, you consent to our User Agreement and agree that your clicks, interactions, and personal information may be collected, recorded, and/or stored by us and social media and other third-party partners in accordance with our Privacy Policy.
Disclaimer
Use of and/or registration on any portion of this site constitutes acceptance of our User Agreement (updated 4/4/2023), Privacy Policy and Cookie Statement, and Your Privacy Choices and Rights (updated 7/1/2023).
Cookie Settings/Do Not Sell My Personal Information
© 2023 Advance Local Media LLC. All rights reserved (About Us).
The material on this site may not be reproduced, distributed, transmitted, cached or otherwise used, except with the prior written permission of Advance Local.
Community Rules apply to all content you upload or otherwise submit to this site.
YouTube’s privacy policy is available here and YouTube’s terms of service is available here.
Assess and Repair
The first step to take in making a barn ready for painting is to make a full assessment of all the repairs that need to be done. Painting without preliminary assessment and repair will only make the barn appear like an updated error.
Before painting, check your barn for walls that need plastering, windows that have to be repaired, or rotting woods that should be replaced. Repairs and replacements are essential before painting in order not to coat surfaces that will soon fall apart.
Remove Previous Paint
The next step will be to remove previous paint from walls and other surfaces. This step can be skipped if the barn was never painted initially.
Using a paint scraper is a good way to get rid of old paint. But because this may waste time, pressure washing may be done instead, and then the parts which cannot be reached by the pressure washer can be scraped out.
After pressure washing, the wall surface should be left to dry for at least 24 hours. Wooden surfaces may take longer to dry so you should keep that in mind as well. All other surfaces to be painted must be dusted as dust may prevent paint from sticking.
Determine Painting Materials
There are many things you should have in mind before painting depending on the nature of a barn. For example, the color(s) to be used and the type of paint. Some really old barns, especially those made with wood might require a quality oil based primer before painting.
Some kinds of paint contain elements like lead. This can be harmful to both man and animals and should be avoided.
Before you begin to make orders for painting materials, ensure you have made a budget for the work and know exactly what to buy. Even though you are trying to keep costs down, aim for quality materials so the paint lasts longer.
Another great choice is Bedec Barn Paint
Bedec Barn Paint is again water-based acrylic coating, which is super easy to apply and offers resistance against mould and mildew. The paint can be applied to new timber, bearing in mind tanilised timber will need to be sanded prior to application. Bedec Barn Paint will even go over existing paint, stains, plastic, concrete and Creosote.
Advantages
- Available in 4 finishes
- Super flexible – reduces risk of cracking and flaking through all seasons
- Apply with brush, roller or spray
- Supplied in 2.5l, 5l or 20l tins for ultra-versatility and ease of application
Which finish should I go for?
Black Satin is generally the recommended choice of finish for Barn Paint due to its increased longevity when compared to Matt Barn Paint. This is due to it shedding water more effectively. Semi-gloss will last the longest however as the super smooth surfaces will allow water to bead off, therefore reducing the chance that water may damage the wood.
Aesthetically if you are wanting to replicate the finish of Creosote, the Matt Barn Paint is the best option for you. Bedec is a slightly dearer but premium choice of finish, but you definitely get what you pay for!
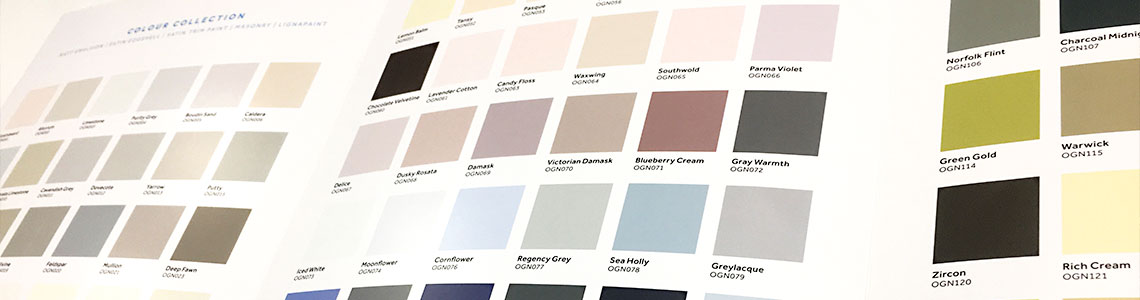
Colours
With Origin’s extensive range of 144 colour choices, you will be sure to find a colour that suits. From classic whites and blacks for a timeless choice to muted pastel colours for a contemporary look, there is a colour for every style. Bedec’s colour range is much more limited, however the paint can be tinted to bespoke colours from ranges such as RAL and British Standard.
How long will the finish last?
If the paint is applied correctly, the finish will not need maintaining for years to come. We always recommend at least 2 coats of Barn Paint is applied for maximum performance and protection.
What are the advantages of a paint over a stain/oil?
- Paint provides a thicker longer lasting protective coating than a stain or oil will
- Paint will last longer without need for maintenance
- Barn paint is flexible and flexes with the substrate
- Barn paint prevents moisture ingress and fungus in the timber
- Bigger choice of colour possibilities

The painting process
Before commencing any painting works, it is of vital importance you check the barn is foundationally sound. Any structural repairs must be undertaken prior to painting. You must also check when the barn was last painted in case lead paint was used. Lead Paint was banned in 1978, meaning any barns painted prior are likely to have used Lead Paint, in which case you will need a professional to remove the paint and dispose of the debris safely. Lastly, check the weather is going to be dry and a minimum of 10°C.
Preparation
Now you have checked the safety of the barn and are ready to paint in dry conditions, you are ready to start your prep work. If the barn is already painted in lead-free paint, we strongly recommend treating any green growth with a fungicidal wash. This will need to left for at least 24 hours. Now, the surface must be cleaned to remove any dirt, grease and airborne pollutants such as carbon deposits. (Please do not use washing up liquid to clean)
Power washing can help remove dirt and loose flaking paint. Any paint left must be sanded back to a sound edge, and any areas of bare timber should be spot primed with a diluted coat of Barn Paint.
Use a jet wash and fungicidal wash to thoroughly saturate the wood and clean the entire structure (do not rinse off the solution, leave it to fully dry instead so the solution will continue working overtime). Drying time should be a minimum of 24 hours before applying the paint.
Application
Barn Paint can be applied by brush, roller or spray. Please ensure you do not attempt to paint at temperatures below 10°C.
Instead of purchasing a separate primer, you will dilute the first coat with 30% water to aid with absorption and adhesion. This will create a good bond, and this coat will be touch dry after about 2 hours, re-coatable after 4 hours at 20°C. Once this is dry, the second coat should be applied to provide a good weathering layer. Mostly 2 coats will suffice, however for new timber we do recommend a single diluted coat followed by 2 undiluted coats.
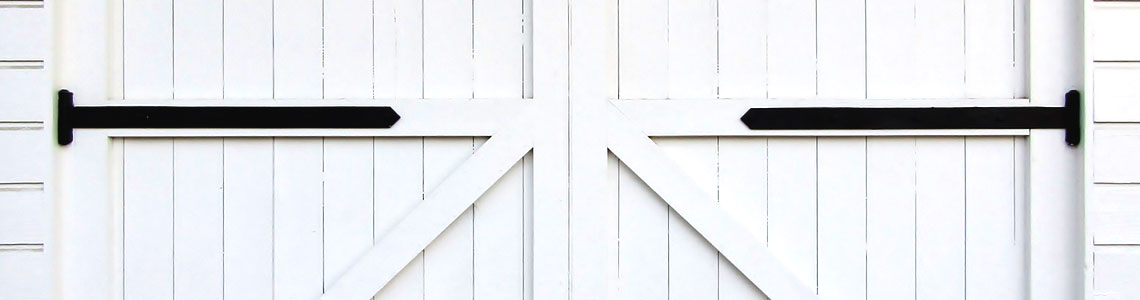
Painting Your Barn Doors
The barn doors can be painted in exactly the same steps as above!
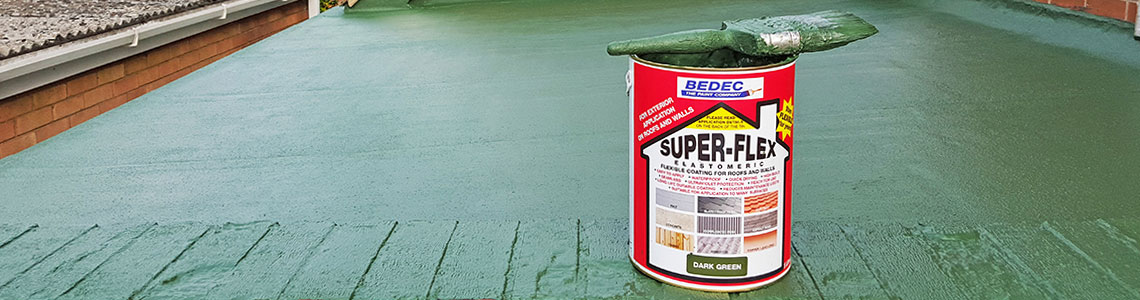
How to paint a barn’s roof
Now we have covered the walls and doors, it is time to paint the roof. Our recommended choice of finish is Bedec Super Flex Roof Coating – a flexible high build water-based elastomeric seamless waterproof membrane. Specially designed for roof tiles, corrugated asbestos roofing sheets, wood, felt, concrete, lead, zinc and copper. The paint is extremely easy to apply with a high degree of resistance to water damage.
Preparation
For Asbestos, Asphalt, Felt, Bitumen, Concrete, Brickwork, Rendering, Slate: Prime with a first coat of Super Flex thinned with 30% clean water
For Plastics: Lightly abrade and apply directly
For Iron and Steel: Prime with an anti-corrosive metal primer (such as Bedec All Metals Primer)
For Lead, Zinc, Copper and Aluminium: Clean and apply direct
Application
Again, please do not apply when air temperature is below 10°C.
If repair involves only small localised cracks or fractures, apply two full coats of Super Flex over the treatment previously outlined. Where the complete roof surface is to be weatherproofed, after necessary preparation as outlined, apply two full coats of Super Flex, allowing thorough drying between each coat.
In ALL cases, the Super Flex finishing coat must be brushed at right angles to eachother.
Roof surfaces: Super Flex finishing coats should be applied to a maximum of 2m2/l per coat. Apply by “laying on” rather than applying like paint.
Gutters: Normally lined with metal, asbestos or bituminous material. Failures will often occur through porosity or loss of fall. To rectify leaking gutters, thoroughly clean and apply sealer, then treat tracks, fractures and joints with tape and scrim membrane as previously specified. Apply two full coats of Super Flex, allowing thorough drying between coats. Do not apply to wet or damp surfaces, or where there is a likelihood of rain before Super Flex has dried.


