You’re seeing this ad based on the product’s relevance to your search query.
How To Paint a Guitar With Acrylic

There’s nothing wrong with wanting to spice up your guitar’s appearance. Who knows? That new look might give you the inspiration you’ve been searching for or the will to start practicing more.
You might have even seen a really cool acrylic design on someone’s guitar and immediately want it for yourself. The only problem is that you probably don’t know how to go about it.
So how can you paint your guitar with acrylic paint?
First, you must prepare the guitar by removing all its hardware and electronics. If the guitar’s neck is removable, it has to go to. After this, clean the guitar’s body and apply a wood primer. Then proceed to draw your design and paint it. And after the paint must have dried, apply a wood sealer for better adhesion.
But there’s a lot more about guitars and acrylic paints to learn. Here, we’ll look into how to prepare and paint your guitar with acrylic paint.
Table of Contents
- How To Paint Your Guitar with Acrylics
- 1. Prepare the Guitar
- 2. Sand the Guitar’s Body
- 3. Apply a Wood Primer
- 4. Start Drawing
- 5. Paint the Design
- 6. Apply a Wood Sealer
- The Bottom Line
- Frequently Asked Questions
How To Paint Your Guitar with Acrylics
As we’ve already stated, painting your guitar with acrylic paint is a delicate and detailed process. Here’s how you do it.
1. Prepare the Guitar
Once you’ve decided to paint your guitar, you’ll have to prepare it for the process. This applies to both acoustic and electric guitars.
Here are the steps to follow:
- Carefully remove the guitar’s strings and hardware. You might need a screwdriver to remove some parts. As you take apart the guitar, don’t forget to keep the detached parts in a safe place where they won’t get mixed up or lost. Also, remember every process you followed because you’ll have to arrange the guitar after painting.
- Fill any holes the guitar might have with an automotive filler and let them dry for 20 minutes. This is especially needed for electric guitars. Bondo is a popular and good filler material you can easily get in your local store.
2. Sand the Guitar’s Body
One of the major qualities of paint is adhesion. Without a body to adhere to, the paint will peel off a surface and fall off like flakes. Your guitar’s existing finish is not a good surface for painting and needs to be removed. You can do this by sanding the existing surface.
However, you can’t sand an acoustic and electric guitar the same way. The wood of an acoustic guitar is usually very thin and plays a major role in the guitar’s sound. So you’ll have to be very gentle with the sanding. You can even start with 80 grit sandpaper and go up from there.
3. Apply a Wood Primer
After sanding the guitar, dust it off with a very dry rag. You don’t want your guitar’s wood to absorb moisture; it will affect its sound.
After cleaning, lay the guitar on a flat surface and apply a wood primer. Use a primer that was designed for metal surfaces. The primer serves as an adherent and will help the paint stick to the wood for longer. Also, it’s not advisable to paint untreated wood.
You might also need to apply two coats of primer. Once the first coat dries, sand it with fine paper and apply another coat of primer. Some people even go as far as adding a third coat; there’s nothing wrong with that.
A common wood primer used for acrylic painting is Gesso.
4. Start Drawing
This is where your creativity comes to life. There’s nothing much for us to say here; draw whatever you feel like.
However, don’t forget to factor in the pickguard when drawing on an electric guitar. You don’t want to spend hours designing a guitar only for a pickguard to cover crucial parts of it.
Editor’s Comments
A pickguard is a piece of plastic placed on a guitar’s body to protect from damages a pick might cause. They are usually placed next to the sound hole and have little or no effect on the guitar’s sound.
5. Paint the Design
After drawing, you can start painting with your acrylic paint. You can use a spray or brush paint, whichever you’re comfortable using.
If spray paint is used, try positioning the spray’s nozzle about 12-18 inches away from the guitar’s body. You can cover up your mistakes with another coat of paint but avoid making too many mistakes. You don’t want to end up with an uneven surface after the paint dries.
Lastly, if you’re applying multiple coats of paints, ensure that each coat dries for at least five minutes before adding another.
6. Apply a Wood Sealer
Once the paint is fully dry, apply a wood sealer. This will extend the paint’s lifespan by preventing it from cracking or peeling. Just like paints, you can apply the wood sealer with a brush or a spray. Spraying is easier and faster.
After the paint must have dried, run your fingers over the painted surface to confirm its smoothness. If you notice any uneven area, sand it with 400-grit wet sandpaper. You can also spray lacquer paint on the painted surface to give it a shiny look.
After completing all these steps, leave your guitar to dry for three weeks. This will allow the paint to cure and reveal its true color.
The Bottom Line
The beauty of art is that you can express it in many forms. There’s nothing wrong with wanting to show your beautiful painted designs on your guitar. After all, there’s no limit to self-expression.
However, you must carefully prepare for it and ensure perfect execution.
Firstly, prepare the guitar by removing its strings, hardware, electronics, and neck (if it’s detachable). After this, sand the guitar’s body and apply a wood primer. Then start your drawing and painting. Spray a wood sealer on the painted surface and allow the guitar to dry for three weeks.
By then, your guitar will shine in its beautiful new acrylic colors.
Nicpro 39 Colors 2oz Acrylic Pour Paint Supplies Kit, Pre-Mixed Pouring Paint High Flow Painting Bulk Set with Canvas, Wood Slices, Pouring Oil, Tools, Gloves, Strainer, Cups, Resin for Beginner DIY
50+ bought in past month
Delivery Tue, Nov 21
Ships to Poland
Overall Pick
Amazon’s Choice: Overall Pick
This product is highly rated, well-priced, and available to ship immediately.

ETERART Copper Foil Tape with Conductive Adhesive for Guitar,EMI Shielding,Electrical Repairs-Enhance Stability and Performance of Electronic Devices,2inch X 20 FT
500+ bought in past month
Delivery Tue, Nov 21
Ships to Poland
Best Seller in Paint Pens & Markers

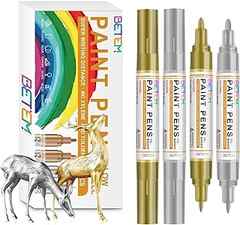
Betem 24 Colors Dual Tip Acrylic Paint Pens Markers, Premium Acrylic Paint Pens for Wood, Canvas, Stone, Rock Painting, Glass, Ceramic Surfaces, DIY Crafts Making Art Supplies
20K+ bought in past month
Delivery Tue, Nov 21
Ships to Poland
More Buying Choices
$14.74 (3 used & new offers)

44 Comments
symbol
Using enamel is your first mistake. And anything over 4 coats will suffocate the piece, it needs to breath period. nitrocellulose lacquer, everything else is shit. I’m a musician, auto painter, and wildlife artist, 60 yrs old and have read every piece of crap scrawls on how Tao’s for years stick to lacquer, seal the bare wood that has been sanded with 2000, seal with a lacquer primer, put enough on to cover the wood let dry 1-2 hrs wet sand down until you can see where you might take all the primer off and stop. Now the lacquer primer has bonded to the wood , now put two heavy coats on and wet sand again drawing from the experience of the first sanding you can and have to guess to remove one coat the closer to the wood the better. let dry over night tack with a tack cloth and apply color, color coats are thinner, now heres the trick let the first color coat dry, over night then wet sand with 678 or 900 wet dry tack add final coats 3 should do let dry over night wet sand 678-900 just skiff the surface using a flat sanding board, I just use my metal diamond fret leveler and tape the paper to it try to get one of the coats off let dry and hand buff, M rubbing compound is the best that I have found its not as abrasive as all the others so it cuts a little slower but a hell of a lot better. In this stage take your time, when you have done all you can with the M (and it will tell you when to stop and thats why I love the stuff) go to a turtle wax polishing compound very fine stuff clean and leave alone DO NOT WAX WAX IS A SEALER AND YOUR PIECE WONT BREATH. I also put mine in the oven off and on fore a few days on very low heat no hotter than a hot summer day because alto of guitars out there are cut by machines sealed with ploy f______urethane you might as well use barn paint if you go that rough. take your time, take your time. Set up so you can rotate it in front of you, this is a fine piece of wood you have give it some attention. Also the neck has to fit snug no paint in the neck cavity teak oil after checking tolerances 0 tolerance. I take my steel flat bar with 400 wood sand paper not wet and dry and skiff the surface of the bottom of the cavity, take a pencil and cover the bottom of the cavity BE CAREFUL take some plastic from a milk carton and use it for a bumper in the front of the cavity so you dont bang dints in it 0 tolerance is the goal, a ton of tone is transfered throngh this cavity TAKE YOUR TIME you might want to build the header (the front barrier closest to the pickup in the neck position 1-16 or 1-64 thousandths to fill here and sand find a small hardwood trim board with the sand paper (400) on the face portion to sand the filler because it has rounded edges and is better (less gouging) use carpenters wood filler by Elmers it is finer and any fine filler will work. check the screws set the neck and you should be just a fraction foreward and this will draw up forward toward the head. They say the best is the natural wood but your not going to find that on one guitar in the known universe Elmers will transfer tone. Get the cavity right and its like a neck through that you can take off and go kick some ass on the weekend unless your playin have fun lioke thissight
Zombiwolf
Mark
Hi, i’ve got a few questions about this article, if your okay to answer them please? 1) At the start do you sand down to the wood or just the top layer of paint to rough up?
2) What type of primer are you using?
3) What gage of sandpaper are you using to sand the primer down?
4) What type of lacquer are you using? I’d be very appriciative if you could help.
Shredaholic
Sure thing Marc! 1) You can do either really, it’s up to you. What you want is a good ‘key’ for the new paint or primer to stick to. Some people argue that the less paint, the better the tone, or that its a neater job when you remove all existing paint, but it’s really up to you – either will be fine. 2) I used generic grey acrylic automotive primer when I was using acrylic paint, but when painting Nitrocellulose finishes, I always use the white primer that Steve Robinson sells (http://www.manchesterguitartech.co.uk/lacquer.html). Primer is used really for both providing a good colour base, and a uniform surface, so whatever ticks those boxes for you should be ok. 3) I used 400 then 600 grit to make go a little faster, but 600 grit alone works fine too. Remember, you need an even surface for the primer, thats it – the colour coats will cover any scratches made with 600 grit or finer, so going higher isn’t necessary, and may make it harder for the colour coat to stick. 4) I used to use Acrylic as it’s cheap and so easily available, but ideally I’d always like to use Nitrocellulose as I really like the quality of finish it gives (and vintage-ness). Now that I build guitars less often, I make it count and go for Nitro.
Mark
Thanks for that! One more question… I’m looking to do some retouching to a beautiful black Gibson SG, the back has many surface “buckle rash” scratches. It’s too risky a job to completely repaint it (without first lots of practice). Is it sensible (i.e. is there a better chance of getting a good finnish and/or not making a mess of what is in fact a pretty nice looking guitar), if I sanded off the lacquer and reapplied and polished without painting it?
Shredaholic
You could do that, although I’d recommend taking off all the hardware first and also that you use a fine airbrush (spray gun) – that way you will really limit how far the paint travels. It might end up being a messier job than you think though, and while black is the easiest colour to blend in when touching up, it’s still going to have 2 different finishes on it., and because you can’t detach the neck easily on a set neck guitar (your SG), you risk having a lot of unwanted overspray on the neck. It’s a choice between whether you think you’d do a neater job painting the whole thing, or just part of it. If it was my guitar, I’d probably sand the entire back surface of the guitar body down to an even finish (whether that means there is paint left there or not), and just paint the entire back of the guitar’s body with black nitrocellulose lacquer. If you do a good job of it, and blend it in nicely with a perfect polish, in theory you’d have an indetectible repair. Don’t use acrylic paint for a Gibson SG though, Gibson always use Nitro and using anything else will destroy the value of the guitar. You know the method of touching up this buckle rash is really close to how people repair scratches/scrapes on cars – have you thought about honing your skills first by asking someone to let you have a go at touching up paint imperfections on their car?
Manny Ali
Great site, love it! I’m getting all the bits together for a repaint job on my Fender Squire. I’ve bought some bits from Halfords White Acrylic Primer
Acrylic Paint
Acrylic Clear Lacquer
Wet Dry Sand Paper (180-600 grit)
Electric Car Buffer (2 pads, towel and soft cotton fluff) What else I think I need is, and what my questions are is: Wood Sealer – do I need acrylic based primer so it sticks to everything else? Polish/Rubbing Compound – Will a rubbing compound polish the final scratches out of the laquer or do I need a polish as well? Can I use the stuff from Halfords? Do I just apply the compound to the seasoned lacquer and buff it off with the electric car buffer?
Shredaholic
The composition of the sealer shouldn’t really matter, if it’s thoroughly dry – its how rough the surface is that depends whether the coats on top stick to it. Too smooth and the paint won’t stick. I’ve used polishing compounds like T-Cut to finish guitars, but what also works well is those sanding packs Halfords sell in the yellow packaging, A4 sized. Not sure if they still offer this one, but I used to get something around 800-2000 grit – if you finish off at 2500 grit (or use a compound after 2000 grit), you’ll end up with a mirror finish if its done well.
rab cessford
hi there i am going have a go at painting my strat but first i will paint a old squire body.
and see how it turns out .it looks like i can follow your quick-fix re-spay guide
cheers RAB
Latiass
I have a quick question regarding painting – how easy is it to totally mess up your guitar? I mean I do all the little maintenance things myself with the exception of truss rod, even having installed my own pickups, so none of the electronics scare me. I want to do this to my nice Ibanez instead of my old run down Squier, but at the same time I don’t want to be out of my favorite guitar.
Petter
Interesting project. I’m really new to guitar finishing.
If I would use nitro, would it all blur out if spraying clear coats on the pattern? Considering nitro dissolves it self.
Wayne
Hi, I have a slightly different twist on this – how do I paint my les paul matte black? Currently she’s all completely sanded back to bare timber, ready for the first step – primer? I’m just a little unsure about the matte black because there is no top clear coat, so is there any special way or paint to use? Advice would be appreciated, cheers
Ssss
so… this may be a little off topic, but i want to know how to best go about putting a design on my guitar. it’s an epiphone les paul, and its fairly new, so the paint’s in good shape. i don’t want to repaint it if at all possible… i just want to decorate it… maybe put a tribal-tattoo style phoenix or sparrow in the corner with some swirls around the edges. my question would be mostly how would you sand this without damaging the paint surrounding the design? would a design (in one colour… prob silver) over the original even need sanding? and the best paint to use over the original since its still really new and shiny? thanks.
Shredaholic
Latiass – I’d highly recommend doing it on a guitar that isn’t your favourite first, to get some skills built up. Petter – always use the same paint type for colour and clear, in this case nitro. When you do your first few coats of clear, make it a very light mist coat to be safe. Wayne – yes, use primer first then your matt coat. You should be able to still use clear coat, as you can get clear coats with a matt finish. I used to use them when I was a kid and made model aircraft, in order to blend in the decals with the paint. Ssss – you could try getting one of those DIY decal kits online for use with an inkjet printer. Draw your design on paper, scan it to a PC, then print it off as a decal and apply it. That way if you don’t like it you can just take it off, and if you do really like it, you can do it again with paint.
Pete
Can the poly paint on a guitar be sanded down to the 1st layer of paint, just above the primer, and then painted over with acrylic. I have a basswood guitar that is soft, and needs a super thick finish (its stock poly) to armor it……I think I can go right over the top of the bottom layer of paint with a different color and build it back up to the original thickness without risking sanding the super soft basswood…………….
Shredaholic
I’d advise doing exactly that. You wouldn’t believe how hard polyurethane paint is to get off. I once tried to strip a Strat body, no amount of paint stripper would do it. Even serious chiselling only got half the paint off, and I’ve just given up on it. The best way is what you suggest, except I’d just sand it a bit to get a nice key and then prime with acrylic, finally painting colour and clear over that.
cris
I’m trying to paint a B.C Rich warlock sky blue. it is originally black and i dont know how to do this, ive done it before, only to screw up. please help me!
Peretz
Hi, I have a some questions about nitro and alternatives. I am seriously considering building a custom Tele, and i wanted to showcase the wood. So my questions are: a) how durable is a nitro finish b) how hard is it to apply. c) does it require any special equipment at all, because I’ve got access to a wood shop, but not to any painting equipment whatsoever. d) what cheaper alternatives to nitro are there e) how can i stain the wood the color of my choice for a low price, so you get the color, but still see the grain pretty clearly f) how would i maintain such a finish? g) am i being a pest? Thank you!
Shredaholic
a) takes a bit of time to cure but it’s durable once hard. it won’t survive blows from a hammer like thick poly finishes, but they used to use it on cars so it’s obviously not that fragile. b) in my experience, just as easy as acrylic. the only thing easier would be using a paintbrush, which for obvious reasons won’t give you the finish you want. c) do some googling, you will find it in tins and rattle cans. you can use tins with the most basic of equipment. however, use a ventilated area AND a mask, not a dust mask but a proper respirator mask. they’re not that expensive from a hardware store. d) acrylic, natural finishes, shellac might also work out cheaper but requires totally different skills to do e) buy some generic diy-store wood dye, i’ve had great results with ‘antique pine’ on maple necks. f) use lacquer over it g) nah, asking questions is the best way of learning. just make sure you pay back the karma by answering questions to people seeking knowledge on our forum!
Chris
reccomendations to paint a epiphone LP Jr.: over the factory silver (metal flake” rough” finish) and how to tape the fret board and maybe epoxy”Fix” the bolt on neck..Thanx C
mitchell
hi i am 15 and building my dads old marlin sidewinder and i have started to sand it down and there are a couple of small dents will this matter and wats the best way to paint it…
Dean Pham
Caution! lacquer can only be applied on top of water based paint. Do it on top of enamel or oil paint, you are in trouble
that guy
kay, so i bought a squire bullet strat of my sister for £15 for to repaint it cos i was bored.
im planning to paint it transparent emerald green with a white pinstripe round the edge.
ive got all the paint off and am down to a clear layer, i think its like wax or something. should i revome this waxy layer all together and is it vital to replace it?
and what sort of paint should i use to get a deep green colour but still be able to see the grain of the wood? cheers
Thanks for the info.I was wondering what type of primer do you use?
Rick
Hello, i have been reading a lot of guides for finishing guitars as i am building a custom tele. I was just wondering why there is no wet sanding required in your guide? Most of the other guides say you need to wet sand between each color coat and clear coat.
Shredaholic
“should i revome this waxy layer all together and is it vital to replace it?” – probably a coat they use to fill the wood grain. don’t worry about it, leave it on or off, even half sanded will be fine, as long as the surface you start with is flat and even. Joe – depends. For acrylics, halfords grey primer works okay (white primer for white paint though). For nitro I usually use a white primer by whatever firm I’m using for the rest of the paint, so I know it matches well. Rick – you don’t NEED to wet sand, but it can help. As the guide is aimed at beginners, I’ve tried to keep it simple, and a good finish can be obtained with light coats of colour, and then clear coats that are well sanded. The thing is, sometimes you can’t wet sand between coats, such as when using metallic paint – it ruins the luster. I would say it’s more necessary between clear coats than colour, but ultimately it depends on the job.
painter33
I’m painting a Strat and Tele; stripped the Strat (converting a trem to hard tail) with a heat gun to get down to the wood (lots of “issues” there) as no stripper in the world would even scratch the sealer coat, but I bought a new raw Tele body. I’m going the way recommended by John Gleneicki of Paint Your Own Guitar fame and using a 2K Spray Max sealer, a high build Spray Max primer, urethane auto paint, and 2k Aeromax (don’t ask – same stuff, more expensive) clear. Reading his e-book and what I found online makes me want to do the best job possible. He’s also answered a number of my questions through e-mail – great guy. It will be more work but I’m in no hurry – just have to get through this humid summer before spraying anything. It does give me time to fill where necessary on the Strat and to make the cavity blocks almost disappear (epoxy: some wood epoxy and some marine) and drill all the new holes exactly where they should be. The Strat will be Surf Green and the Tele will be ’54 Chevy Fiesta Cream, both with maple necks/fretboards. There will be wet sanding at the clear coat level. My biggest fear is the timing between coats of sealer and the clear as there are finite windows of opportunity in the material. I can’t decide how to finish the necks but I’m thinking gloss everywhere but fretboards and doing satin there.
Ryan
I am building my own Frankenstrat and I was hoping someone had a site where I could get a template for the taping for red paint. I have taped and sprayed white and I am now relicing, but I am nervous about taping the red. Any site, template or info would greatly help. I just cant get enough by looking at the original pictures. Thanks for your help, Regards,
Ryan


