Alisha Hieb
Basic Brush Handling Techniques Oil Painting for Beginners
There are a number of factors why brushes create so many endless possibilities: the bristle type, the way you hold the brush, the brush size, and brush shape. I’m going to explain the bristle types and how to handle the brush in this blog, this should cover the majority of the possibilities you can achieve with oil painting.
Types of brushes:


There are two main types of brushes in painting, hard and soft bristled brushes. The stiff bristled brushes are mostly made from animal hairs such as hog. They hold more paint and also hold their shape while painting. Because they are more stiff, they allow more precise and bold marks in your paintings.

The second type, the softer bristled brushes, made mainly from nylon, polyester, or sable, paints a lot smoother with cleaner strokes, which are great for rendering details and painting clean lines.

I won’t go over the details of different brush shapes, but if you are just starting off, I would recommend sticking to the filbert brush as they are the most versatile in painting organic objects, you can paint large areas, draw lines, dots, and different shapes with a filbert brush. I recommend choosing two large and two small filberts (size 4 and 2), so when you’re working on an area, you can focus on a dark and a light, working your way from big to mall.
How to hold your brush
How you hold your brush and where on the handle you hold the brush can yield many different possibilities. A mistake many artists make is holding their brushes the same way throughout all their paintings and the paintings end up looking very static, where there’s no contrast between bold and loose marks versus tight and small details.
The key is that the closer you hold your brush to the bristles the more control you will have on the fine details. And vice versa, when you hold your brush further back, you’re able to create more bold and assertive straight lines, which are best for sketching out masses of shapes.
Holding The Brush Near The End

This is usually best applied with a stiff bristled brush, where you are holding it like a magic wand for bold paint marks. This is great for line control, and allows you to focus on the proportions and angles of what you’re painting. You’re using your whole arm, and some artists even prefer standing, to be able to capture the full image of what they’re painting. You’re really sculpting an image onto your canvas
Holding The Brush Near The Middle

This can be a hard or soft bristled brush. When you’re holding it near the middle of the handle, you are also focusing on proportions and lines but with a lot more control. You can hold it like a pencil or a wand. The wand grip allows you to maintain that control over proportions and angles, where the pencil grip allows you to focus on details. When you are holding the brush handle near the middle, your arm is stabilized and your movement comes from your wrist.
Holding The Brush Near The Bristles

This is typically with a soft bristled brush, where you are holding it like a pencil, and focusing on fine details, precision marking, and rendering. This is the most intuitive for most people because it’s similar to how we write. One thing to keep in mind is to not start your painting with this grip because you always want to paint from big to small.
As a tip for stabilizing while you’re rendering, you can use your other hand to prop up your painting hand, or use a Mahl stick to allow your hand to rest, which allowing more stable rendering without touching other wet areas of the painting.

How to use brushes with paint:
In terms of what you can achieve with the brush, here are the different possibilities: you can do an under sketch, apply a thin layer of paint, apply medium thickness of paint, apply very thick paint, glaze, and you can also dry brush

Sketching When you are sketching, using a hard bristled brush, hold the brush near the middle to the end of the handle, especially if you are painting from life and need to focus on proportions and angles.


Thin coverage – When you are painting a thin layer of paint, for example in the initial layer of your painting, using a hard or soft brush, hold it at a right angle to the surface. If you are painting on canvas, you can scrub the canvas and really push the paint into the creases, this makes sure the surface is fully covered. If you are painting on wood, don’t scrub too hard because it will dull the brush really fast.

Medium thickness – When applying a medium thickness of paint, you can use a hard or soft bristled brush. You don’t have to scrub, but instead brush the paint in an alternating direction, at an angle that’s smaller than a right angle. You can still feel the canvas under the brush as you paint.
If there’s wet paint underneath and you’re holding it at a right angle, you might be scraping the paint off. That’s why when you’re layering paint on top of existing paint, be mindful that you’re not scraping wet paint off of the previous layer.

Very thick paint – When applying really thick paint, you can use a hard or soft brush. In this technique, you can barely feel the canvas as you paint, the brush is almost flat against the canvas as if you’re applying icing on a cake.

Glazing – When it comes to glazing, I recommend using a soft brush to avoid brush marks on the painting. This is when you are painting with more proportion of oil medium to oil paint, using a transparent color. This allows you to add a transparent layer of color to existing dry paint without covering it completely.


Dry Brus h – Dry brushing in oil painting is a technique where a dry soft brush is lightly brushed over existing wet paint to smooth out unwanted brush marks, or to fuse colors together. I recommend using a dry sable brush and remember to always keep it dry, wiping it clean after every stroke and wipe it thoroughly after every use on a towel. Never clean it in solvents. This brush must always be kept dry.
Keep in mind that this is different from blending colors, because you are not using this brush to mix two colors together. The key to oil painting is not to blend colors on your painting, but to apply every changing color individually, and using a dry brush to smooth it out if necessary
Holding a painting brush with precision


NEXT TO Trim
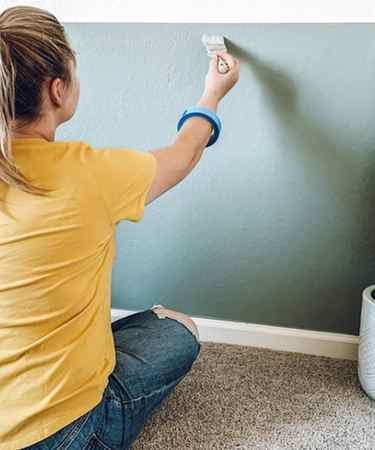
There are many different types of paintbrushes , but the best paintbrush for cutting in is designed specifically for painting next to trim. Our best cutting in paintbrush is exactly what you need to paint along all types of trim, as well as corners where the wall and ceiling meet. O ur precision cut-in series of paintbrushes are the perfect choice when painting NEXT TO or cutting in on any trim – on doors, walls, or baseboards.
A cutting in paintbrush isn’t just useful for painting along trim. It can also be used to paint around electrical outlets. In fact, any of our precision cut-in brushes are the perfect choice when cutting in next to electrical outlets on the wall. If you have an outlet in a tight space like on a kitchen counter, the stubby handle on our cutting in paintbrush will allow you to maneuver with ease when painting around the outlet. Get the best cutting in paintbrush, and you can use it to paint around trim and electrical outlets regardless of where they are located.


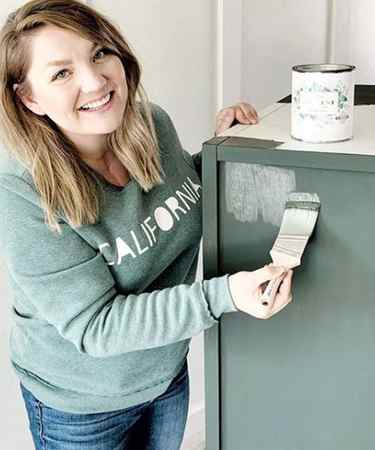
NEXT TO Door Molding
If you are painting a room with cabinets, such as your kitchen or bathroom, or if you are painting around doors, you need the best paintbrush for cutting in. Our precision cut-in series of paintbrushes are a great choice when painting NEXT TO or cutting in next to trim or molding on doors or cabinet fronts. This brush is included in many of our paintbrush kits that include other important painting accessories you need to successfully complete your project.
Tag us, #zibrainspo
@lemon.and.bloom

@katiecloud
Alisha Hieb
@lemon.and.bloom
@lemon.and.bloom
@katiecloud
Alisha Hieb
@lemon.and.bloom


