TEXTURED CAT
Free patterns for painting snowman
PAINTING
projects, lessons & videos
This page includes some of my videos on home decor paintings, plus links to pages that contain patterns to use with some of my youtube paitning videos. To see all of my free painting videos, go directly to my youtube channel:
Christina Sherrod Art Youtube
NOTE : I mention mugmi.com on some of my youtube videos. Rather than sell the patterns on that site, they are now available FREE on this site 🙂 Scroll down to find the painting / pattern.
FEATURED PROJECTS
Spring Tulips Free Video
Bring spring into your home with a beautiful, textured semi-abstract tulip painting. Bright and beautiful, people have always called this my “Happy Painting”. Glendale, Arizona classes in June.

3D SEASIDE CLIFFS
Learn how to use texture and varnish to create a 3D landscape of pounding surf, windblown tree and rugged boulders.
click for seaside cliffs pattern
The pattern is a jpg. Print and enlarge or shrink to the size you need.

TEXTURED FLORAL
Highly textured floral using 3 different texture mediums, various brushes, gloss varnish, stencils, and palette knife. Step by step directions.
click for jpg pattern
The pattern is a jpg. Print and enlarge or shrink to the size you need.

TEXTURED CAT
Learn how to use wall patch and palette knife to create a colorful, semi-abstract cat painting.
click for instructions & pattern
The pattern is a jpg. Print and enlarge or shrink to the size you need.
Textured Cactus

TEXTURED CACTUS VIDEO
Highly textured cactus using several texture mediums, various brushes, gloss varnish, stencils, and palette knife. Step by step directions.
click for jpg painting pattern
click for jpg flowers pattern
These patterns are jpg files. Print and enlarge or shrink to the size you need.

SEASIDE TREE
Learn how to use a palette knife, finger painting, and brushes to create a colorful, peaceful seascape painting. This tree was actually by a neighbor’s property here in the SW desert. I placed it in a seascape.
click for jpg pattern
The pattern is a jpg. Print and enlarge or shrink to the size you need.
The following are now available on our new site.

ROCK PAINTING – CACTUS GARDEN
Decorate your patio or interior with colorful “no-care cactus”. The cactus and ladybug are actually painted rocks!

SNOWMAN DUO
This project has moved to our new site.
free Snowman Painting Project – instructions and free snowman patterns
Same owners – new site.

HELLO FALL
This project has moved to our new site.
free Pumpkin Palette Painting Project – instructions and free pumpkin patterns
Same owners – new site.

HALLOWEEN WITCH
This project has moved to our new site.
free Witch and Ghost Painting Project – instructions and free witch and ghost patterns
Same owners – new site.

SOUTHWEST HALLOWEEN
Moonlit night featuring cactus; pumpkins; old, dirt road; and moon lit hills. The video teaches about the painting, plus features a segment on creating a print of the painting onto a mug.
This project has moved to our new site.
free Southwest Halloween Painting Project – instructions and free patterns
Same owners – new site.
These patterns are jpg files. Print and enlarge or shrink to the size you need.
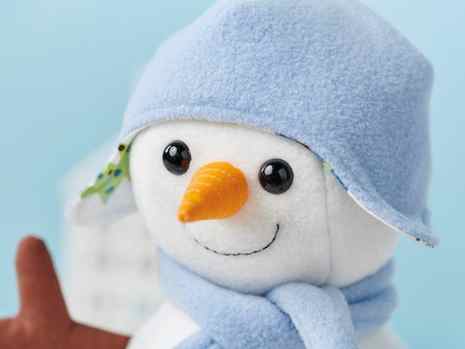
Things to know before you start making your snowman
Notes
- Approx 30cm (12in) tall with the hat or 26cm (10in) tall without the hat.
- Use a 6mm (¼in) seam allowance unless otherwise stated.
- The templates include seam allowances where necessary.
- Arrows on the pattern pieces indicate pattern/pile direction for marking and cutting out.
- When the pattern specifies to cut two or more of a pattern piece, after marking out half of the pieces required the template needs to be turned over to mark out the remaining half so that the pieces are cut as mirror images.
- This snowman has been made mainly using stretchy fleece fabric so clipping into internal curves and making notches around external curves is not always instructed for fleece. When clipping always take care to avoid any stitching.
- Due to the curved shape of the snowman using cotton fabric is not recommended, with the exception of the arms, nose and hat lining.
- As the arms are sewn directly into seams, sew over the joins so they are well secured and to reduce the likelihood of them being pulled out.
If you’re new to sewing, you may find it helpful to check out our how to guides before you get started.
Materials
Looking for materials to make this snowman sewing pattern with? We’ve found some suppliers below to make it easier for you to get started…
- Buy white fleece fabric from Minerva for £9 per half metre
- Buy brown cotton fabric from Etsy for £4.50 for half a metre
- Buy orange cotton fabric from Etsy for £4.50 for half a metre
- Buy pale blue fleece fabric from MyFabrics for £8.95 for half a metre
- Buy black plastic safety eyes from Amazon for £2.83
- Buy polyester toy filling from Amazon for £6.45 for 1kg
- Buy wadding from Amazon for £3.99 for ¼ metre
Your snowman sewing pattern – step by step instructions
Advertisement
You Will Need
- Fabric A (50x50cm (20x20in)) , white fleece fabric for the main body
- Fabric B (22x22cm (9x9in)) , cotton fabric for the arms
- Fabric C (10x10cm (4x4in)) , cotton fabric for the nose
- Fabric D (25x56cm (10x22in)) , fleece fabric for the hat and scarf
- Fabric E (16x36cm (7x14in)) , cotton fabric for the hat lining
- 12mm black plastic safety eyes (a pair)
- Black embroidery thread
- Polyester toy filling
- Wadding/felt scrap (21x12cm (5x5in))
- Pair of buttons (18mm (¾in) diameter)
- Basic sewing kit
Total time:
One day
Step 1
Download, print out and then cut out the templates.
Step 2
We recommend that you draw out the pattern pieces onto the reverse of the fabric before cutting.
Step 3
Cutting out your snowman pattern pieces
From Fabric A, cut out the following pieces:
- Face: Cut one.
- Side head: Cut two.
- Tummy: Cut one.
- Side body: Cut two.
- Base: Cut one.
- Hat pom pom: Cut one.
Step 4
From Fabric B cut out:
Step 5
From Fabric C cut out:
Step 6
From Fabric D cut out:
- Hat outer: Cut one.
- Scarf: Cut one measuring 7x56cm (2¾ x 22 1 ⁄8in)
Looking for more festive craft projects to make?
Step 7
Step seven From Fabric E cut out:
Step 8
Making your snowman toy’s head
With the right sides (RS) together, sew a side head piece to its corresponding side of the face.
Repeat to attach the other side head to the remaining side of the face.

Step 9
Close the dart in each of the side head pieces with RS facing, tapering the end.

Step 10
Sewing your snowman toy’s body
Sew a side body piece to its corresponding side of the tummy with RS together.
Repeat to attach the other side body to the remaining side of the tummy.

Step 11
Place two mirror-image arm pieces RS facing and sew around the sides, leaving the bottom end open.
Clip the seam allowance at the internal corners and clip V-shaped notches around the external curves.
Turn it RS out, stuff and then tack the end closed.

Step 12
With RS together, fold the dart over in a side body piece and sandwich the arm in place – checking that it is facing the correct way up – at the bottom of the dart, pinning in place if necessary. Sew the dart closed.
Step 13
Repeat for the remaining arm and side body pieces.

Step 14
Assembling the snowman sewing pattern
Sew the bottom of the head to the top of the body with RS together.

Step 15
Starting at the back of the body, sew the base to the bottom of the body with the RS of the fabric together and ensuring that the markers line up.

Step 16
Make the smallest holes possible through which to allow the shank of the eye in the face piece where marked.
Fit the eyes into place according to manufacturer’s instructions. Sew the back of the head and body, leaving a 6-8cm (2-3in) opening in the back.

Step 17
Turn RS out and stuff.


