Because watching snow fall is magical.
Mixed Media Snowman Process Video & Tutorial
I painted this in my Dylusions Art Journal. First, Gesso the page. Then, put 3 different blue paints and some white paint on your palette. (I used Golden fluids Ultramarine Blue, Pthalo Blue Green Shade, & Anthraquinone Blue with Titanium White.) Use a gift card, old credit card, or catalyst wedge to scrape and mix the paints on. Use Deli paper to protect your surface or under pages if needed.
There are several ways to give your piece a richly textured look and feel. First, spray the paint while it’s still wet with a water bottle and then cover and press a paper towel over it to lift the water droplets off, revealing speckles of the under paint colors. Second, scrape paint on the bottom third of the page to create a horizon line. Then, use stencils to add more texture to the background. (I used Golden fluid Paynes Grey through a harlequin stencil & a script stencil). You can also paint white paint onto bubble wrap and stamp it on the background for more texture. Lastly, water down your paint and splatter it onto the surface to create a snowy effect.
Focal Point
Use a medium sized brush to paint in your snowman body on the right third of the page. Darken the snow underneath the snowman to integrate it into the snow on the ground. Shade the sides of the snowman to give it some dimensionality. Use an orange Stabilo All pencil to sketch in his nose and a black Stabilo All pencil to outline the snowman and sketch in other features. Dip a small brush in water and use it to activate the Stabilo All lines and create shadows. Sketch and paint hat and add color to scarf. I used a purple to continue the cool color scheme.
To give your piece a polish, continue to add details and stragegic colors. Choose a complimentary color to add a pop, interest, and some dimension. (I used Golden Fluid Cadmium red mixed with Golden Fluid Indian Yellow.) Apply it to the base of the snowman for more contrast, the horizon line for definition, and the nose for opacity. Use a small brush to touch up details. Go over anything that faded and needs to be redefined and separate the snowman from the background if there isn’t enough contrast in places.
Don’t forget to sketch and paint in the snowman’s arms once the background is done. Then, use a small detail paint brush to add snowy highlights to any piece of the snowman that would protrude and collect snow. Finally, put in final details on the snowman’s accessories and touch up any places that don’t look right to you. Trust your artist’s eye.
Journaling
Add journaling if you like. I used a die cut machine to cut out ‘Let it Snow’ and then used my Xyron to turn it into a sticker. Add some final sticky back pearls for decoration if you like (totally optional, of course).
All of the materials are linked in the tutorial above. Please note they are affiliate links meaning that I get a tiny percentage of a payout for recommending the products. The price is the same for you with or without the links, so I appreciate your support in using them.
What is Pointillism Art?
When I was in college and took the mandated Art History courses, I discovered and then fell in love with Pointillism.
Maybe it’s because it reminded me of those Hidden Magic Eye Puzzles from the 90s.
My professor showed us a tiny, zoomed-in piece of art and all we saw was dots.
Little tiny dots.
Then he zoomed it out to the gloriousness that is A Sunday Afternoon on the Island of La Grande Jatte.

And once I saw the painting hanging in the Art Insitute of Chicago, I was sold.
The tiny dots that magically turn into gorgeous art is mesmerizing.
I ran across the street from the museum and bought my tiny daughter the board book, Sunday With Seurat

And when my kids were older, we graduated to these kid-friendly art history books on Seurat.
This awesome YouTube Video of Art with Mati and Dada and Seurat is a great way to further explain Pointillism to our kids.
If you have younger kids who don’t have the fine motor skills for Q-tips, get them these Dot a Dot Art Markers and they can create their own art.
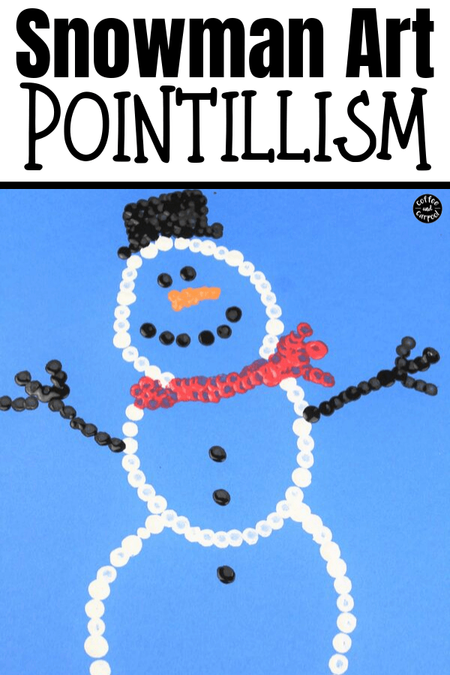
And since we love winter and snow and I love Pointillism, we connect winter and all things snowmen to pointillism with this snowman craft made entirely out of dots.
Want more books to connect to this project?
Here are our favorite Snowman books:
Supplies Needed to Make Snowman Art with Pointillism

- blue cardstock paper
- Q-tips
- red, white, orange, and black acrylic paint (tempra paint is fine for the cardstock paper)
- pencil
Want More Pointillism Projects?

If you are using acrylic paint, let your kids know it’s “forever paint” for clothes.
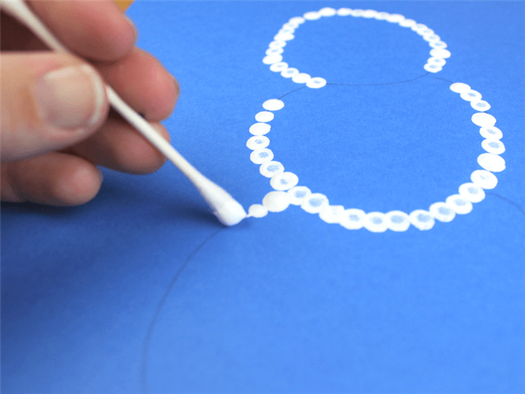
And remind your kids not to smear the paint by using the Q-tip like a paint brush. Instead, show them how they can make tiny dots close together to make it appear like a line was formed.
1. On the blue cardstock, lightly draw three circles for the snowman’s body. Leave room at the top for his hat.
Use the white paint to dot the outline of the snowman’s body.
2. Use black paint to create a top hat for the snowman and two eyes.
3. Use orange paint to create a small triangle to be a carrot nose.

5. Use black paint to create a smile on the snowman.
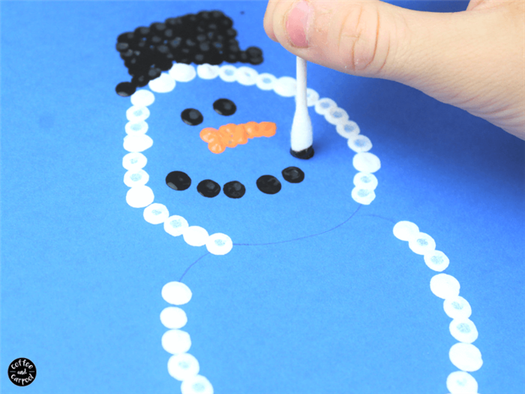
6. Use black paint to create sticks for his arms.
7. Use red paint to create a scarf for the snowman.

8. Use white paint to give the snowman some snow to stand on so it doesn’t look like he’s floating.

Bring the snowmen inside or create these snowmen if you live somewhere sunny and warm this winter.
9. Name your snowman!

Use this Snowman Name Printable to name your snowman.
Sponge Painted Snowman
![[Sponge Painted Snowman]](/images/14/creating-painted-scarf-A08FBE9.jpg)
Kids 5 and under love to get creative with different painting techniques. Painting with sponges is a simple and fun way to explore basic shapes to paint and cut out. Get creative with this cute and easy winter art project to keep kids busy during the holiday season.
All crafting activities should be supervised by a grown up.
As an Amazon Associate we earn from qualifying purchases.
SUPPLIES NEEDED:
![[Sponge Painted Snowman]](/images/14/creating-painted-scarf-2A82.jpg)
- Colored paper (sky blue, green/yellow, brown, & orange )
- Paint Palette or Plastic Plate
- White Poster Paint
- Scissors
- Liquid Glue
- Black Marker
- Used Sponge
Directions to make Sponge Painted Snowman:
1. Trim your used sponge to create a round shape.
![[Sponge Painted Snowman]](/images/14/creating-painted-scarf-D9542.jpg)
2. Place your white poster paint onto the paint palette.
![[Sponge Painted Snowman]](/images/14/creating-painted-scarf-F865E21.jpg)
3. Dip your sponge onto the white poster paint and press it onto the paper. Repeat step until you create a small circle for the Snowman’s head.
![[Sponge Painted Snowman]](/images/14/creating-painted-scarf-848E3.jpg)
4. Do the same step to create the Snowman’s body. This time, create a bigger circle connecting from the small circle. Leave the paint to dry.
![[Sponge Painted Snowman]](/images/14/creating-painted-scarf-BD17218.jpg)
5. Using your colored papers, cut out different shapes for the Snowman’s body parts. Cut two twig hands using a brown colored paper, cut one small triangle using the orange colored paper for the nose, and cut out three rectangular shapes using either green or yellow colored paper for the scarf. You can actually use any colors you’d like so be creative.
![[Sponge Painted Snowman]](/images/14/creating-painted-scarf-83560.jpg)
6. Assemble the scarf by overlapping the two rectangles together and glue it at the back of the remaining rectangle.
![[Sponge Painted Snowman]](/images/14/creating-painted-scarf-B63DEAA.jpg)
7. Glue the cutouts onto the snowman’s body.
![[Sponge Painted Snowman]](/images/14/creating-painted-scarf-49657.jpg)
8. Draw the snowman’s eyes and mouth using a black marker. If you want, you can also draw a hat or cut one out and glue that too. When you’re all done, be sure to hang your masterpiece on the ‘fridge!
![[Sponge Painted Snowman]](/images/14/creating-painted-scarf-8B8A.jpg)
More Crafts
![[Christmas Elf Puppets]](/images/14/creating-painted-scarf-799B3C.jpg)
These Christmas Elf puppets are so cute and even more fun to make. A perfect Christmas craft activity to keep you and your own little elves entertained during the Holidays.
![[Christmas Heart Ornament Craft]](/images/14/creating-painted-scarf-DD00.jpg)
Share the love this Christmas with this easy-to-make Christmas Heart Ornament Craft that requires only a few items you’re likely to already have on hand. Use them as a tree ornament or as a loving extra touch to your gift wrapping.
![[Christmas Paper Ornaments]](/images/14/creating-painted-scarf-98D1C5.jpg)
These adorable North Pole Times Elves are the perfect DIY ornament for kids to make and hang on the Christmas tree!
![[Christmas Pop Up Cards]](/images/14/creating-painted-scarf-0FA6.jpg)
These DIY Christmas Pop Up Cards are fun and simple to make. Choose from a variety of elves and characters direct from the North Pole to make a unique gift that is loads of fun to share with friends and family.
![[Clothespin Snowman Craft]](/images/14/creating-painted-scarf-854263.jpg)
This fun little Clothespin Snowman craft is super easy to make and just as versatile. Glue them to presents to make a cute gift tag holder. Clip them to your tree for a fun kid-made ornament. Or hide them around the house and have your very own Christmas Snowman Hunt just like you would for an Easter egg hunt.
![[Elf Hat]](/images/14/creating-painted-scarf-DD97.jpg)
This colorful paper Elf Hat is super easy to make with our printable elf hat pattern. A fun way to keep kids occupied during the season.
![[Hand Print Christmas Wreath]](/images/14/creating-painted-scarf-DC804B.jpg)
A wonderful DIY Christmas craft for toddlers and preschoolers. This easy-to-make Hand Print Christmas Wreath is super cute and makes a beautiful decoration, keepsake, or gift to keep the house festive all season.
![[Holly Elf Binoculars Craft]](/images/14/creating-painted-scarf-DF8CD.jpg)
The Holly Elf Binoculars Craft is a perfect way for kids to keep busy during the holidays. Not only will they enjoy making these “Holly Elf Approved” binoculars, they can also assist her in spotting Santa, or other elves, when duty calls!
![[North Pole Times Christmas Village Craft]](/images/14/creating-painted-scarf-758C32.jpg)
Recreate the magic of Santa’s secret village with this North Pole Times Christmas Village Craft. Complete with the Toy Factory, Post Office and the North Pole Times Newsroom, among others, this project is sure to keep everyone busy.
![[Paper Chain Christmas Countdown]](/images/14/creating-painted-scarf-85653.jpg)
More fun than just looking at a calendar each day, this Paper Chain Christmas Countdown craft is so easy to make and takes no time at all. And, as an added bonus, you’re more than likely have everything you need at home already.
![[Paper Cone Christmas Tree]](/images/14/creating-painted-scarf-0580B4.jpg)
This fun DIY paper cone Christmas Tree craft is super easy to make and a perfect holiday decoration to show off.
![[Paper Tube Santa Claus Craft]](/images/14/creating-painted-scarf-F1CA1.jpg)
This adorable Paper Tube Santa Claus Craft for kids is great for preschool and older kids! The best part is that toilet paper rolls can be recycled into a wonderful Christmas craft.
![[Popsicle Stick Gingerbread House Craft ]](/images/14/creating-painted-scarf-8D22A4.jpg)
This Popsicle Stick Gingerbread House Craft is the perfect Christmas craft to stimulate that imagination and get those hands moving. Kids will also develop their creative skills while keeping occupied during this busy season. In addition, this craft will help to develop fine motor skills, which will assist your kids with their writing.
![[Reindeer Headband Craft]](/images/14/creating-painted-scarf-83CB0.jpg)
This Reindeer Headband craft is just too cute and would be perfect headwear for watching Rudolph the Red-Nosed Reindeer.
![[Rudolph Reindeer Photo Ornament]](/images/14/creating-painted-scarf-5F322A.jpg)
A Rudolph Reindeer Photo Ornament that is sure to make your kids stand out this Christmas.
![[Santa Paper Plate Mask]](/images/14/creating-painted-scarf-B7E5A.jpg)
This adorable Santa Paper Plate Mask craft is a great craft for your child using things you most likely have around your home.

It’s the most wonderful time of the year but it wouldn’t be complete without Santa in his sleigh.
![[Sock Snowman]](/images/14/creating-painted-scarf-2E650.jpg)
Looking for a fun craft idea to keep the kiddos busy this holiday season while on holiday recess? This cute little sock snowman might be exactly what you need! Other than being an adorable decoration, it’s also a cool way make use of old socks.
![[Super Secret Decoder Wheel]](/images/14/creating-painted-scarf-61F9A7.jpg)
Pass on secret codes that only you and your fellow spy detectives can decipher. This Super Secret Decoder Wheel is SO secret that. We’d tell you more but, it’s a secret! 🙂 A great way to build analytical skills.
If you would like to display one of our North Pole Times crafts on your blog or website, you may include 1 picture with a visible link back to the original post. Do not share the full instructions.


