Thank you! I had just been looking for this type of tutorial this week and was getting conflicting tutorials. I have a whole set of ornaments from last year that I never got around to using so I’m excited to do it this year!
How to Paint the Inside of an Ornament

I love making DIY Christmas ornaments with vinyl cut on my Cricut, but often the colors I find on pre-colored ornaments are just not my colorful jam. Traditional red and green are perfect for most people, but I’m over here having a pink and teal Christmas. Which means I need to color my own ornaments.
Table of Contents
Common questions about painting the inside of an ornament:
What Kind of Ornaments Can I Use?
Both plastic and glass sphere ornaments work for this craft. I am using flat spheres since they are easier to work with when applying vinyl, but basically…if it’s clear and you can access the hole at the top, you’re good to go.
What kind of paint should I use?
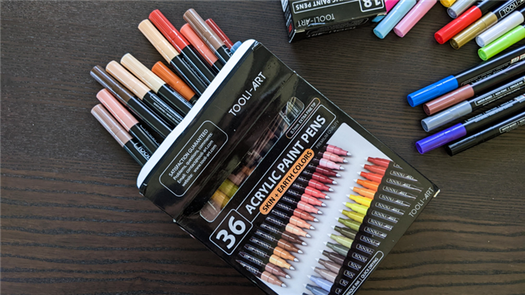
I prefer acrylic craft paint for the inside of an ornament. It’s inexpensive and comes in every color you could ever want.

You can also glitter your ornaments, using my Glitter Ornament tutorial.
How much paint should I use?
While using a lot of paint will help you coat the inside of the ornament more quickly, I have found that using a smaller amount—about a tablespoon—allows you to get full coverage while wasting paint and increasing drying time. You’ll also be shocked (shocked, I tell you!) with how much extra paint runs out of your ornament when you set it to dry.
How long does it take for the paint to dry?
I usually wait 24 to 48 hours before re-inserting the ornament cap into my ornament. The paint has had time to fully cure, minimizing the risk of scratching the paint when you insert the cap.
How do I keep my paint from cracking?
This is a question I’ve had from readers but never actually experienced myself. So I did a little research, and here are two suggestions. First, you can drop some rubbing alcohol into the ornament before you paint. Swish it around and let it dry. This should prep the surface and help the paint stick.
Second, I think using new paint that you shake before using is key. New paint generally hasn’t separated or dried out at all—this will make for a smoother coating with less cracking.
How to Paint the Inside of an Ornament
- Clear glass or plastic ornaments
- Acrylic paint in your favorite colors
- Rubbing alcohol (optional, see above)
- Paper towel or plastic cup
Ornament Painting Supplies

Directions
Start by removing the top of the ornament.

To prevent your paint from cracking, swish around some rubbing alcohol in the ornament, dump out, and allow to fully dry.
Once dry, squeeze about half a tablespoon-ish of craft paint inside the ornament, and another half tablespoon on the opposite interior side. This helps get better coverage than just putting it all on one half.

Then place a piece of paper towel on top of the ornament to prevent the paint from coming out and move and shake the ornament until it’s completely covered on the inside.
Be patient, paint moves slowly. I find a combination of shaking, waiting, and mumbling curse words under my breath works the best.
Then set the ornament upside down to drain out the extra paint. I’m using flat sphere ornaments and find a paper towel works best. Every few minutes move the ornament to a clean spot on the paper towel—you’ll be surprised how much extra paint is in there.

If you have a round sphere ornament, you can place it in a plastic cup that’s slightly smaller than your ornament and the extra paint will drip into the cup. Much tidier but it doesn’t work as well with the disk ornaments.
After 24 to 48 hours, replace the lid and your painted ornament is done! If you want to add vinyl, you can do it well before the 24 hours is up—just as long as there isn’t paint dripping everywhere.

This is a quick and easy way to perfectly match your ornaments to your decor, or to custom-make ornaments for gifts or sale!

How to #simpycreate Christmas ornaments

Easy step by step tutorial with Simply acrylic art supplies on how to paint lovely Christmas ornaments, presented by artist Amylee Paris.
How to paint Christmas ornaments with acrylic paints
Easy step by step tutorial with Simply acrylic art supplies on how to paint lovely Christmas ornaments, presented by artist Amylee Paris.
Simply mini stretched canvas
Simply pallet
Simply fine point brush
3 Simply tubes of acrylic paint (black, gold, red)
Simply container with water and paper towels
1 roll of masking tape
OPTIONAL: 1 roll of string and 1 eyebolt to screw

Your step by step guide

Making Santa’s coat
Cut 2 pieces of masking tape and glue them crosswise as in the photo of the demonstration, with the offset cross down.
Next step
Making Santa’s coat
Cut 2 pieces of masking tape and glue them crosswise as in the photo of the demonstration, with the offset cross down.

Santa’s coat
Then take the brush soaked in red paint and apply the paint to places without masking tape as in the photo opposite. GOOD TO KNOW: Remove adhesive tapes before the paint is completely dry, then let dry after all tapes have been removed.
Next step
Santa’s coat
Then take the brush soaked in red paint and apply the paint to places without masking tape as in the photo opposite. GOOD TO KNOW: Remove adhesive tapes before the paint is completely dry, then let dry after all tapes have been removed.

Adding black details
Apply black paint over the entire horizontal strip. Leave to dry.
Next step
Adding black details
Apply black paint over the entire horizontal strip. Leave to dry.

Button and belt details
Using the photo opposite, add two black circles to form the buttons of the coat. This time take gold paint and draw a square in the centre of the belt to form the belt. Let it dry, hey looks like Santa is coming!
Next step
Button and belt details
Using the photo opposite, add two black circles to form the buttons of the coat. This time take gold paint and draw a square in the centre of the belt to form the belt. Let it dry, hey looks like Santa is coming!

Decoration to hang
Once the paint is completely dry, it is possible to add a fixing system to hang everything.
Next step
Decoration to hang
Once the paint is completely dry, it is possible to add a fixing system to hang everything.

Result and inspiration
Take a small eyebolt to screw and push it into the edge of the mini canvas. The wood is soft, no need to use a specific tool, the fingers are enough. All you must do is slip a nice string through the hole in the piston. And there you have it, a new idea super easy to achieve, which will have the most beautiful effect once hung on the tree!
Next step
Result and inspiration
Take a small eyebolt to screw and push it into the edge of the mini canvas. The wood is soft, no need to use a specific tool, the fingers are enough. All you must do is slip a nice string through the hole in the piston. And there you have it, a new idea super easy to achieve, which will have the most beautiful effect once hung on the tree!
Paint Pour Ornament Supplies
- Clear glass ornaments
- Shatterproof is a good option too (read about my oopsie)
Step 1: Pick your paint pour colors
The first thing you want to do is pick your paint colors to mix. You can go with traditional Christmas colors, or you can go with some modern mixes.
I’ve loved seeing the pinks and cream combinations in the stores this year so that was one of the color mixes I chose.
Step 2: Gather your paint pouring supplies and prep the ornaments
This might get messy (or am I the only messy one?) so it’s best to have some small containers handy. You’ll need some for mixing the paint and some for letting excess paint drain.
I used yogurt jars lined with sandwich bags for the dripping, and small votive candle holders to mix the paint.
You could use plastic cups but if you have glass it’s easy to clean up and you can reuse them over and over.
You’ll want one small enough on which to rest the ornament.
I read that swishing Alcohol inside the ornament is good to remove residue from the factory. Shake out the excess and let dry.
Wax paper is great for catching drips and keeping your work surface clean.
DIY Paint Pour Christmas Ornaments Color Combinations
Here are the color combinations I used
- Folkart Baby Pink
- White
- Metallic Rose Gold
- …and this combo…
- Turquoise
- Metallic Antique Gold
- White
- …more combinations I made and love
- Color Shifting Green Flash
- DecoArt Eggplant
- White
- ….and this combo too…
- Red Barn
- White
- Silver Glitter Finish
Getting started with paint pouring clear glass ornaments
Step 3: Paint Pouring Christmas Ornaments – let’s do it!
Ok, now for the fun part. I tried a few different methods. Squirting paint right into the glass ornament, and doing a mix, what they call “dirty pour” method.
The latter is what I’ll illustrate.
- Pull the metal tops out of all your ornaments and replace then in the box
- Select your paint colors and open the caps. I found that 3 colors worked best and adding a little white creates a nice contrast.

- Into your votive, or other pouring container, layer the paint colors. Squirt three rotations of the colors until you have about 3 tablespoons of paint.

- Hold the glass ornament or rest it on a jar or votive holder at an angle.
- Slowly pour the paint into the neck of the ornament so that it will roll down the inside.

- As you pour the paint slowly rotate the ornament.
- Roll the ornament around to let the paint cover the inside fully. Add more paint as needed.

- If more paint is needed use a craft stick to coax the rest of the paint out of the votive.

- Alternatively you can also squirt a little paint directly into the glass ornament bulb.
- If you want a more subtle look to your paint pour Christmas Ornaments cover the end of the ornament with wax paper and give it a little shake to cover all remaining spots and blend the paints a little.
Step 4: Finishing off your ornaments
- Wipe the outside of the ornament’s neck with .
- Turn upside down and let excess paint drip out into a plastic baggie lined votive or small glass jar.
Warning: I thought I could skip much of the dripping process and immediately insert the bulb tops. Big big mistake, while taking pictures, two days later, one rolled off my desk onto the thin throw rug…..
Break and splat, pink paint all over my blue rug. So I pulled the tops off all the ornaments I made to let them dry completely before reinserting the bulb top.
- When all the paint has dripped out turn them upright and let them dry overnight.
- Insert the bulb tops by squeezing tightly on the metal prongs and insert into the painted bulb without scratching the paint from the sides.
- White ornaments clean with a damp cloth.
Here’s what the paint looks like after you’ve poured it into the ornament. One set I made used Green Flash and Eggplant with a touch of white paint.
It’s my favorite combination but they were so hard to take good pictures of because of the iridescent bulb I used on some.
I took some pictures of them by the window the day I made them. Here’s a rough shot of what this beautiful combo looks like.
Isn’t it gorgeous? This is the best picture I could get, I had to hide the camera reflection in the top of the ornament. I’m going to make more of these in clear glass.
When you make your DIY Paint Pour Christmas Ornaments buy clear bulbs and not iridescent. It’s harder to see the paint pour effect through the iridescent bulbs.
Add some sparkle to your beautiful paint pour ornaments
Tie a beautiful ribbon for hanging that compliments your Paint Pour Christmas Ornaments color. I used some thin silver ribbon for these and purchased some pink ribbon the other set you’ll see below.
Get ready for some over sharing, because I love them #notsorry Below you can see the set of Pink, Rose Gold and White that I made.
Here are he Pink ones I made using Baby Pink , Rose Gold and White paint.
I really love them, the combinations are endless. I made sets of 3 in various colors but check out this solo ornament I made using all the paint that dripped from the other Pint Pour Christmas ornaments I made.
As promised, below are the links to over 20 DIY ornaments made by my friends. You’re going to be so inspired!