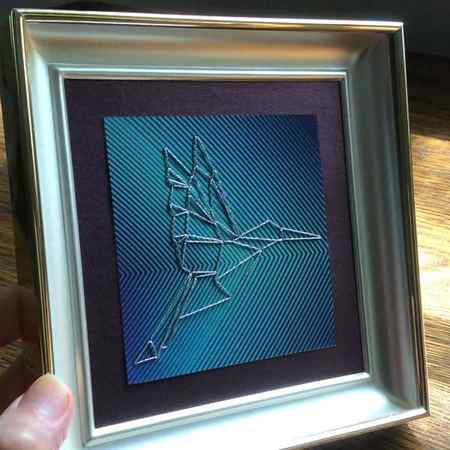
How to Hand Stitch on Paper – Hummingbird Pattern
As promised in last month’s paper stitching geometric star tutorial, today I have another paper embroidery project for you. a pretty hummingbird. Why yes, I do love a good geo design! Tip. just Google geometric clip art of whatever it is you’re interested in stitching and you’ll probably find a pattern.
Someday when I look back on 2020, rather than remembering being in the midst of a pandemic, I’ll prefer to think about the hummingbird feeder my husband and I enjoyed watching all summer long. In June he installed a video camera on the same tree branch as the feeder and soon we were hearing a ping on his phone each time a hummer landed in view of the lens. They’re fascinating little creatures and surprising territorial! If you ever need a distraction, I highly recommend installing a bird feeder near a window, and if you’d like to lower your stress level, find a seat nearby and have a go at paper stitching. A project doesn’t take long, is very easy to do, and you’ll have something nice to display when it’s finished.
You will need:

Printable hummingbird pattern – I printed mine to a width of 3.25 inches (8.26cm)
[Note that all PNGs from the site PNGFuel are for Non-Commercial use, no attribution required, meaning you may stitch this design for personal use only. You may not make multiples to sell.]
Paper or card stock on which you’ll stitch the design – I recycled an invitation that came in the mail because it was too colorful and unusual to throw away. Similar here and here
Pearlized paper or pearlized card stock on which to mount your stitched design – optional
Cardboard square as a backing in the frame – if needed
Pencil – to mark your papers for measuring
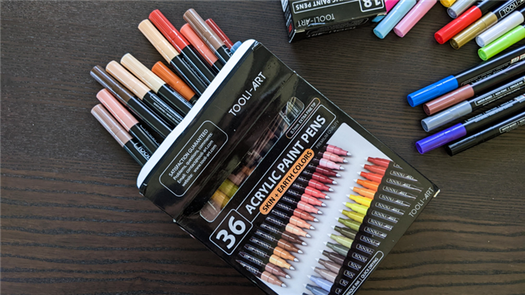
Sewing needle – choose a slim one with an eye that is large enough to accommodate your metallic cord or floss
How to make paper hummingbird

Hummingbirds are fascinating birds, both by their small size and by their speed of movement.
We put a hummingbird feeder in our yard, but no birds have come yet. We may have to try another food mix. By the way, I will be glad to hear from you if you have any advice to attract these lovely birds in my yard.
While waiting to see real hummingbirds flying around the house, I made some paper hummingbirds to decorate inside.
It’s a lovely and easy craft to make. You can hang your paper birds on the window or attach several to make a mobile. Tell me, where would you like to display these cute paper hummingbirds?
[ This post probably contains affiliates links, our full disclosure policy is really boring, but you can read it HERE ]
Materials you will need to make paper hummingbirds
- Paper ( preferably drawing pad or watercolor paper)
- The free hummingbird template (If you already are a member, click HERE for direct access to download your template)
- Watercolors
- Brush
- Scissors
- Craft knife
- Nylon thread
- A needle
- Glue
- Binder clips
- Craft dowels (If you want to make a mobile)
The FREE hummingbird template is available in my resource library along with a bunch of other great prints and patterns. All you need to do is fill out the form and check your inbox for a welcome email with the password in. Click here to get in >>>> FREE LIBRARY ACCESS

The first thing to do to make your hummingbird craft is to download and print the bird template.
Fold the paper sheet in the middle following the line and cut out the bird body and the wings.
I decided to paint them with watercolor, but you can use any technique you like: pencils, acrylic, brush pens, sharpies…
I suggest you to use a thick drawing paper. If you don’t feel comfortable with all that artistic part or if you want to make the hummingbird craft with kids, you can just print the bird shapes on colored cardstock paper.

I only used watercolors a few times, so I’m definitely not an expert. The last birds I painted turn out way better than the first…Let’s just say that learning is the essential unit of progress.

Once the birds are painted and dry, or decorated as you like, cut a slit in the middle of the bird body following the rectangle mark. The easiest way to do it is by using a utility knife and a ruler.

Fold the wing and slide it into the bird body.

Put some glue inside the bird at the place of the head, beak, and on the wing base. Don’t glue together the lower part of the body or the tail.

Fold the bird body, hold it with a paper clip and let it dries.

The last step is to pass a thread to hang your hummingbird. With a needle, pass a thread on each wing. Hold the thread on the wings with a dot of silicone glue.

If you want to hang your hummingbirds on a mobile, cut two dowels pieces of 12′ long. Attach them together with thread to make a cross shape. Hang birds at each end of the dowels and one in the cross. Add a threat from the cross center to hang your hummingbird mobile on the ceiling. And done!
I love the bird bright colors. It’s quite relaxing to look at them moving slowly with the air. I hope you like it and don’t hesitate to share your hummingbird art project in the comment section!


Want to remember this? Save this Paper hummingbird craft in your favorite Pinterest board.
You will find all the tutorials featured in the video on my “Best DIY” page.