- Firstly, cut your ice cream cone and scoop from recycled cardboard. You can free draw or use shapes around your home to make your ice cream.
- Secondly, mix equal parts of liquid white glue and foam shaving cream together. Add any color food coloring then mix.
- Using a ruler and brown marker, draw lines on your ice cream cone. Then use hot glue to attach the scoop and cone together. Make sure an adult is using the hot glue gun or older children are supervised for this step.
- It’s time to paint! Dip your paintbrush in the DIY puffy paint then cover the entire scoop of ice cream. Smaller children may get a little messy but that’s fine. Keep a wet towel nearby to clean up the little ones.
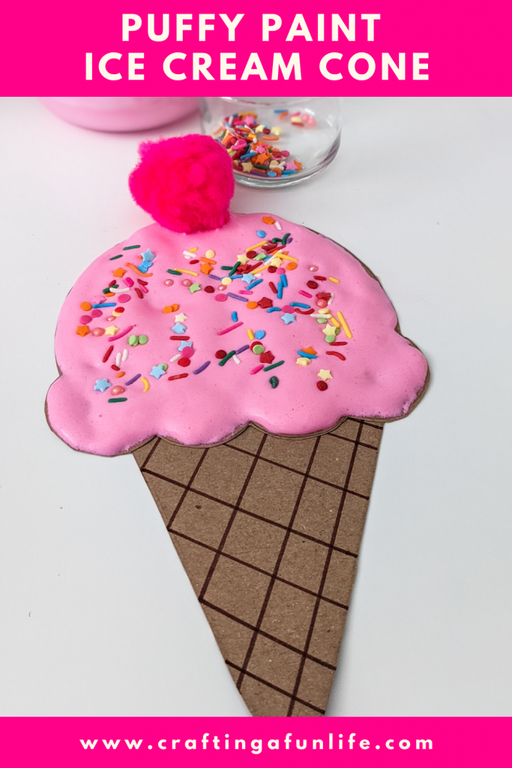
- Finally, it’s time to add the toppings! We used real sprinkles and a pom pom for the cherry. Get creative with your ice cream. Once finished, set aside to dry. This will take a few hours. Then they can show off their puffy paint ice cream cones!
How to Make Awesome Puffy Paint Ice Cream Cone


Summer is almost here! I thought it would be fun to create this puffy paint ice cream cone with my kids. Your child can create their own flavors for their frozen treat craft. Also, this art project only requires a few supplies that may already be in your home. It’s a great summer activity for toddlers, preschoolers, elementary kids, teens and adults.
Love this puffy paint ice cream cone? Make sure to subscribe via E-mail to stay updated on the latest posts. Also, follow me on Facebook, Instagram and Pinterest for more amazing content. This post contains affiliate links. As an Amazon Associate I’ll earn a commission, at no additional cost to you. This only applies if you click through and make a purchase. Thank you for your support!
Supplies for Puffy Paint Ice Cream Cone
- Recycled cardboard
- Liquid white glue
- Ruler
- Foam shaving cream
- Bowls
- Paintbrush
- Pom poms
- Food coloring
- Scissors
- Brown marker
- Sprinkles

Directions
- Firstly, cut your ice cream cone and scoop from recycled cardboard. You can free draw or use shapes around your home to make your ice cream.
- Secondly, mix equal parts of liquid white glue and foam shaving cream together. Add any color food coloring then mix.
- Using a ruler and brown marker, draw lines on your ice cream cone. Then use hot glue to attach the scoop and cone together. Make sure an adult is using the hot glue gun or older children are supervised for this step.
- It’s time to paint! Dip your paintbrush in the DIY puffy paint then cover the entire scoop of ice cream. Smaller children may get a little messy but that’s fine. Keep a wet towel nearby to clean up the little ones.
- Finally, it’s time to add the toppings! We used real sprinkles and a pom pom for the cherry. Get creative with your ice cream. Once finished, set aside to dry. This will take a few hours. Then they can show off their puffy paint ice cream cones!


This was such a fun art project to set up for my kids. My oldest plays with shaving cream at school so he was excited about this activity. If your child tends to make a lot of mess during craft time, place a tray on the table before they start painting.

Check out this mini tutorial on my TikTok page! You can also show some love to my pin by saving it as well as sharing it with your friends or family.

Looking for more summer crafts for kids? Check out these adorable art projects and fun activities:
Supplies you will need
- Watercolour paints
- Watercolour paper
- Paintbrushes
- Water jars
- Paper towel
- Yellow Ochre
- Burnt Umber
- Permanent Rose
- Lemon Yellow
All the watercolour paint I use is Winsor & Newton Professional.
You can use any colour you like for your ice cream, but I find that it works best with light colours.
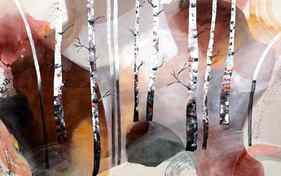
How to paint an ice cream cone in watercolour – step by step
- Start by creating the top of your cone – paint a semi circle in a light brown mixture, then add a cup underneath and another smaller semi-circle. Add a little bit of darker brown paint underneath and around the edges to create shadows.
- Outline your cone with a rounded bottom and fill in lines that criss-cross on the diagonal. Fill in the bottom tip, While still wet, I like to add a bit of pink to the cone to mirror the ice cream – use whatever colour you’re adding for yours.
- Now it’s time for your scoop of ice cream! Load up with a light colour and start from the bottom, just above your cone. Drag your brush from side to side, leaving gaps and whie space between strokes for highlights. Make sure the scoop bulges at the bottom to make it look anchored in the cone.
- Add a second scoop on top in the same way, leaving lots of white space and making sure the top is rounded.
- Using darker pink and yellow paints (or whatever colours you’re using) add splodges to your ice cream, allow it to blend out naturally.
Now you can paint your own ice cream cones in watercolour! Why not try different colours and create a range of flavours?
More delicious painting tutorials
- How to paint avocadors in watercolour
- How to paint strawberries in watercolour
- How to paint cherries in watercolour
Even more tutorials
- Tutorial: How to paint snowdrops in watercolour
- Tutorial: How to paint watercolour holly
- How to paint a toadstool in watercolour
- Tutorial: How to paint bluebells in watercolour
- Tutorial: How to paint watercolour delphiniums
- Tutorial: How to paint peaches in watercolour