You will note I got his wings a bit wonky but I fix them at the end of the video. Learning to fix things is all part of learning to paint!
Paint Bunnies in Acrylics

You can paint bunnies in acrylics with the kids or do it for yourself and just enjoy painting Spring! I had so much fun creating this that I know I am going to do more “easy enough for kids” painting lessons.

This post contains affiliate links. If you make a purchase after clicking a link I may make a small commission at not added cost to you.
Let’s start with our supplies: (you can use whatever colors you have this is just what I used in the demo, a printable list is available at the bottom of this post)
- 12″ x 12″ Cotton Canvas (I get mine at Michaels)
- Plaid Folk art Paint:
- Medium Blue
- Blue Lullaby
- Wicker White
- Classic Green
- Citrus Green
- Purple
- Magenta
- Linen
- Cameo Pink
- Burnt Umber
- True Blue
- Brushes
- Donna Dewberry Brush Set
- cotton swab
- sponge
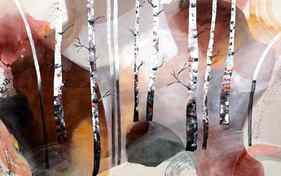
Base paint Canvas for bunnies
Using a sponge or large paint brush base paint the canvas. Double load the sponge or brush with Medium Blue and Lullaby Blue.
Using long vertical strokes to create a streaky background.

This background is very similar to the one used in the Beach Painting .
Each persons will be different, don’t try to make this perfect just have fun with it. It is merely a backdrop and not the star of the show.
Let this dry. To hasten drying place in front of a fan or use a blow dryer. It will be dry in minutes.

Transfer design to canvas
A downloadable pattern / traceable is available in the Resource Library. See form below to gain access. If you are already a subscriber your password is in every email I send you.
Transfer your design to the base painted canvas. If you need help with how I transfer designs I have an explanation here.

NOTES TO BE SUCCESSFUL TO PAINT A BUNNY CANVAS:
- Set up each work station with a 12 x 12 square pallet, paint pallet, a water cup, paper towels and brushes.
- Add paint colors one at a time to pallets as needed. Do NOT put all of the paint out at once.
- Use acrylic paints. My preference is DecoArt’s Americana paint collection.
- Use a clean, dry brush for each color change.
Paint the head of the bunny first by mixing gray with white paints.

Add Ears with the gray and white paints.


Add Pink to the inner ears.

Paint pink cheeks. Use a sponge brush for perfect circles. A regular brush works too and will create darling mix-matched cheeks

Paint green grass on the bottom half of the canvas.

Paint the top half blue. Add white dots if desired.

Paint a black nose and eyes.

Add details like whiskers and maybe darker green streaks in the grass.

Ta Da! Let it dry then sign your work.
Why Painting with Kids is a Good Idea
Painting with kids is so much more than a craft project or simple activity. It is a way for kids (of all ages really) do many very important things. Here are some fabulous reasons to get kids painting.
- It helps them convey ideas and share.
- Painting gives kids an opportunity to express emotions — even ones that might be hiding deep inside.
- It uses several senses to paint and through that kids make connections.
- Exploring color, the process and the outcomes teaches cause and effect.
- When kids made handmade masterpieces, it boosts confidence.

Preparation Steps for Painting with Kids
One of the biggest factors in creating successful paint crafts with kids lies in the prep. Here are four things you can do to prepare for a great time crafting.
- Expect a little mess. Prep your area knowing that paint can spill, drip and splatter. Cover your work are with kraft paper before starting.
- Provide aprons for the kids. If you don’t want to but them, they can wear old adult sized shirts as aprons.
- Have paper towels nearby and ready if needed.
- Know the dry time of the project before starting. If there are several steps, there might be a dry time involved. Have a puzzle or activity on hand to do during that in between time. You can grab free ones here on the blog.