Below I share a few ways that you can draw roses. You can find more Bullet Journal doodle tutorials here
How to Draw a Roses Doodle
Learn how to draw a great looking Roses Doodle with easy, step-by-step drawing instructions, and video tutorial.
By following the simple steps, you too can easily draw a perfect Roses Doodle.

Complete Roses Doodle drawing
Doodling can be fun! Would you like to learn how to draw a roses doodle? This easy, step-by-step flower drawing tutorial can help you quickly master the roses doodle outline.
You can use it to adorn your diary, notebook, or whatever you like.
For thousands of years, flowers have been a fixture in art. At times, flower motifs have been simple decorations because of the inherent beauty of the plants.
At others, they have had deeply symbolic meanings.
Scroll down for a downloadable PDF of this tutorial.
Flowers don’t just appear in sculptures, paintings, and other works of fine art, however. They are also popular doodles when you’re bored!
Did you know? “Doodling helps relieve boredom and frustration and the urge to doodle gets stronger as stress levels rise.
Doodling is like a safety valve that allows pressure to be dispelled in a playful and creative way.” Some researchers even say that doodling helps you concentrate.
For more easy and fun guides, see the How to Draw a Money Rose or Parts of a Rose Drawing tutorials.
Step-by-Step Instructions for Drawing a Roses Doodle

How to Draw a Great Looking Roses Doodle for Kids, Beginners, and Adults – Step 1

1. Begin the roses doodle outline by sketching the first rose flower. First, draw a curved “Y” shaped line. This forms the overlap of the outer petals.
To one side, use overlapping curved lines to enclose the shape of another outer petal. Then, use more overlapping curved lines to enclose the shape of the flower bud around the “Y.”
Easy Roses Doodle Drawing – Step 2

2. Add more details to your first flower. Draw a spiral line in the center, with wavy petals around it. Use wavy lines to enclose additional large outer petals.
Then, draw another rose as if you are looking down on it from the top. Start with a spiral line in the middle then draw additional petals around it.


Easy Roses Doodle Drawing – Step 3

3. Use overlapping curved lines to add more large outer petals to your second flower. Then, begin the third flower.
Use overlapping curved lines to begin sketching the petals. Do you notice the heart shape of one petal?
Easy Roses Doodle Drawing – Step 4

4. Complete the third rose flower. Use an irregular spiral line in the center, with overlapping curved lines enclosing the surrounding petals.
Then, sketch a rosebud above the other flowers. Use a “U” shaped line to trace the outline of the bud. Let the lines of the petal tip intersect the “U.”
Easy Roses Doodle Drawing – Step 5

5. Complete the rosebud, using a spiral in the center and overlapping curved lines for the petals.
Easy Roses Doodle Drawing – Step 6

6. Draw the fifth flower. Start with a “Y” shaped line in the center to indicate the overlapping outer petals. Then, use overlapping curved lines to trace the petal edges.
Easy Roses Doodle Drawing – Step 7

7. Complete the rose with a spiral line in the center and curved lines enclosing additional petals. Then begin sketching another rosebud.
Use a “Y” shaped line in the center to indicate the overlapping outer petals and surround the “Y” with a “U” shaped line and additional curved lines.
Add More Details to Your Roses Doodle Picture – Step 8

8. Complete the rosebud with a spiral line in the center and curved lines enclosing additional petals. Then, sketch a number of leaves all around the flowers.
Start with pairs of nearly parallel curved lines that meet at a point at one end. These indicate the leaf veins.
Around each of these narrow “V” shapes, draw two curved lines that meet at a point, outlining the edges of the leaves.
Complete the Outline of Your Roses Doodle Drawing – Step 9
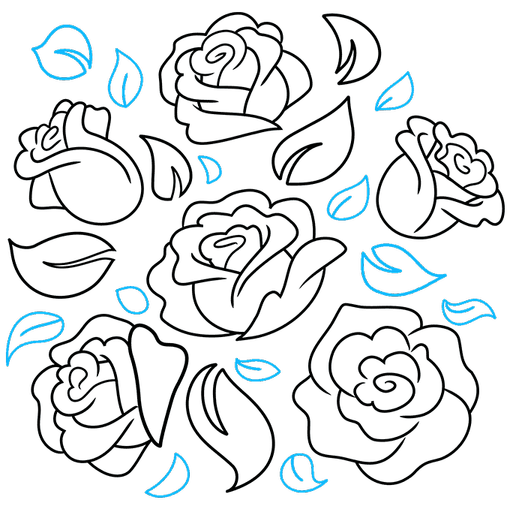
9. Complete your roses doodle outline by drawing additional small leaves. For some leaves, use a curved “V” for the vein; for others, use a simple line. Now you’ve got an entire rose bush!
Color Your Roses Doodle Drawing
Color your doodle of roses. We’ve colored our cartoon roses red. Can you create variations of this doodle to form the shape of a heart or make a border around your page? Try it out – be creative!
For more great Roses drawing tutorials, see the 50 Best Roses Drawing Tutorials post.
For more easy rose drawing tutorials, see the collection of 50 Easy Ways to Draw Roses.
For all flower drawings, see the Ideas to Help You Draw Flowers Quickly page.
Easy, step by step Roses Doodle drawing tutorial

Click HERE to save the tutorial to Pinterest!
Roses Doodle Drawing Tutorial – Easy & Fun Printable Pages
Join now and get immediate access to thousands of printable drawing instruction and practice pages!


MEMBER TROUBLESHOOTING
Still seeing ads or not being able to download the PDF?
First, check that you’re logged in. You can log in on the member login page.
If you’re still not able to download the PDF, the likely solution is to reload the page.
You can do this by clicking the browser reload button.
It is a circular arrow-shaped icon at the top of the browser window, typically found in the upper-left side (you can also use keyboard shortcuts: Ctrl+R on PC and Command+R on Mac).
Tips on how to draw a rose
Here are some tips to help you improve your rose drawing skills:
- Pencil First. It might seem obvious but improving your drawing skills takes time and you have to practice and erase several times before you come up with a design that you love.
- Check out the steps to draw a rose below. The instructions below are here to help guide you into the steps you need to take to draw a beautiful rose.
- Have a real object to draw. After you have practiced from the instructions below get a vase and roses to draw that will be your inspiration.
- Don’t be afraid to make mistakes. We might get caught up on how to draw a perfect rose that we end up forgetting to enjoy ourselves while drawing and making the most of all the benefits of drawing.
Summarizing, follow the steps to draw a rose for beginners below and practice, practice, practice!
YOU MAY ALSO LIKE
Ultimate List of Bullet Journal Doodles
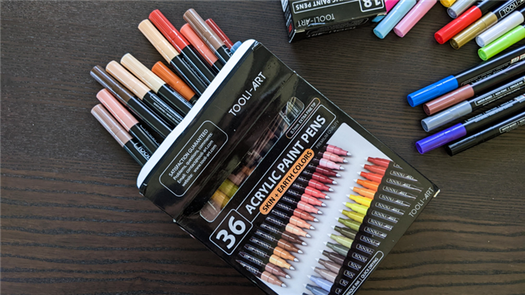
Simple rose drawing supplies
You don’t need many supplies to draw roses, a basic pen and paper will do. I also use my bullet journal to draw doodles. But if you are interested in what are some good supplies to draw and doodle, then please check out some of my favorite supplies below:
Follow the tutorial below to learn how to draw a rosebud.
Yield: 1
How to draw roses

Super easy rose drawing tutorial. How to draw a rose step by step for beginners.
Prep Time 1 minute
Active Time 2 minutes
Total Time 3 minutes
Difficulty Easy
Materials
Instructions
- Start with a simple petal shape. Think of a tear or raindrop with one end small and pointed and the other round.

- Next add another petal. The same shape but larger and with the pointed end facing the opposite way to your first petal.
- This part looks complicated but it is actually super simple. This spiral will be the centre of your rose. Just go from the centre of your rose and draw a spiral ( like a snail shell) and end with a slightly curved line that joins your first petal shape.
- Next you need to add two simple lines. One curved that closes your spiral and joins the second petal you drew and the next goes from the closed loop of your spiral to join the first petal you created.
- Next you will add the outer petals. These are just two curved lines. Draw the one on the left first with an end touching the second petal you drew and the other end touching the centre of the rose. The next outer petal is a curved line touching the new petal you created and the petal from step 1.
- Lastly add the stem. You can add extra leaves if you want. On my doodle I have just done one leaf but you can be as creative as you like.
© Diary of a Journal Planner
Project Type: Tutorial / Category: Doodles
And here is how you can color your rose, I chose red but it could be any other fun color.

Rose outline drawing and coloring
Here I am linking to other tutorials that you might also enjoy!
How to draw a simple rose doodle

How to draw a rose (step by step)
How to draw a small rose
How to draw a realistic rose
Love this how to draw a rose tutorial? Want more doodles to try? Why not try our fun doodle challenge
Other easy drawing posts you will enjoy:

How to draw a dandelion

How to draw a lavender flower

How to draw a bunch of flowers
Share this post:
PIN FOR LATER!