To use your pen for the first time, hold it against a piece of scrap paper at a 45 degree angle and press the tip firmly into the pen. You may need to hold it there for a minute or two the first time the nib is used to achieve saturation of the nib with paint.
DIY paint pen art projects
Menu
For #MondayMadeIt today, I have a really cool DIY project I want to share with you.

If you follow me on Instagram or Facebook, you may have seen this picture yesterday:

I picked them up at Michael’s when they were BOGO 50% off. Even still, they weren’t exactly cheap, but this was a project I’ve wanted to try for awhile.
Since it is Christmas break and I have all of this time, I figured what better time than now to get crafty.
SUPPLIES NEEDED:
- 15-pack Sharpie Paint Pen Fine Point
- 15-pack Sharpie Paint Pen Medium Point
- Washi Tape
- Clear Stacking Bins
- Clear Bins with Lids
All you need for this project are the Sharpie Paint Pens and some clear, plastic containers. The containers can be any size or shape, but for this MMI post you’ll need to use clear ones.
The Sharpie paint pens come in different point tips. The thicker ones I used were medium tip and the smaller pens are the fine tip.

The first step is one that you need a computer for (unless you have super good drawing skills or are a calligrapher). Open up PowerPoint, or whichever program you use to create.
To keep my scale correct, I create a 1″x1″ square on the page I’m working on. I always seem to make things way bigger than they need to be, so this helps me make sure that my wording and clip art pictures won’t be ginormous when I print it out.

If you only want to write your name in a pretty font, then you can just type what you want and print it out. If you want to add cute pictures and things to your container, you’ll need to use the black line versions of the clip art.
Since I am a clip art hoarder lover of all things clip art, I had a lot of designs to choose from.
I went with an ocean themed box, since I love the beach. The nice thing about this is that you don’t need to make the page look cute, you just add and resize them on the page.
I added way more than I could use, but I wasn’t sure exactly what I wanted to box to look like yet. Once you finish your page, print it out.

Then cut out the pieces.
Now you’ll need some tape. I used washi tape because it sticks well enough, but doesn’t leave the sticky reside on the container when I peel it off.

I always start with the writing first. You’ll tape the paper on the inside of the box so you can write on the outside of the box. Then you can trace the writing.

TIP: If you mess up during this part, try using a Magic Eraser on the paint pen marks. I’ve also heard that Expo markers will take off the marks.

After the writing, I move onto the clip art. Now, there are two ways you can go about tracing and coloring in the clipart.
For this project, I colored the main image first and then traced and added the layers in black.


Take off the taped paper and that’s it!
I also created these two bins for markers and crayons.

I picked the plastic containers up at Michael’s and the bins (shown above) at Office Depot. I purchased the Sharpie Paint Pens at Michael’s too.
What would you use these paint pens for in your classroom? Tell us in the comments below!
Crafting with children of different ages
The skills are different in the different age groups of kindergarten age. A three-year-old child still needs support for individual steps, while a five-year-old child is able to do much finer work and can do a lot of things himself.
What is set up as a project with should always be matched to the abilities of the children, so as not to overwhelm them. They would then quickly lose the fun of the thing. Undemanding projects, on the other hand, would lead to boredom.
As an adult, you should always discuss with the child about what might come out of the different materials: give suggestions, but let the child live out their imagination and share their ideas. Then you can implement them together, whereby the child should of course do everything they can on their own. Support them only where help is needed.
Skills vary not only with age, but also within age groups. But this is not bad, because through the playful learning during craft projects, they are further developed and refined.
Why paint marker craft projects are perfect for children
One of the beauties of using acrylic and oil-based paint markers with kids is that they are easy-to-use tools that introduce them to the world of painting in a simple, clean, and exciting way, which makes paint marker craft projects ideal for the young mind and hands.
Another wonderful benefit of paint markers is that it makes painting on anything incredibly easy. Wood, rock, or plastic surfaces are great mediums where kids can cut loose with their markers. Creating art on different surfaces will also fuel their creative energy into overdrive. At the same time, these art projects allow their young minds to develop artistically with the same mediums and tools that professional artists use around the world.
5 great paint marker craft projects for children to try
Below are 5 paint marker craft projects you can do with your kids to introduce them to the wonderful world of paint markers and put their young, artistic minds to work.
1. Ceramic dishes and mugs
Drawing on ceramic plates with acrylic paint pens is a wonderfully simple and fun project to do with children of any age. This is a fantastic opportunity for children to create a special keepsake as a gift or personal item of their own that they can use and enjoy for many years to come, and look back on the special time they had while making it. Dishes, mugs, and cups are relatively inexpensive and can be purchased almost anywhere.
To start, cover your work area with newspaper. Let the children paint freehand over the items or encourage them to sketch a preliminary design or picture with a pencil that they can then paint over. After the painting is finished, let it dry for 24 hours. Then place the ceramic items in the oven at 350 degrees Fahrenheit for about 30 minutes. Remove the items, wash, and enjoy!
2. Rock doodles
Painting on rocks with oil or acrylic paint markers is another simple and fun art project to do with toddlers as young as two years old. Painting round, smooth, river stones with flat surfaces are probably the best choice of rock as they are small, don’t have sharp corners, and can be found along nearly any neighborhood sidewalk. You can even buy them online at Amazon.com or other art supply stores.
Preparation for painting rocks is similar to ceramics. Since rocks are more abrasive, take extra precaution to make sure the work area beneath the newspaper is also protected, if necessary. Either let the children go wild with their imagination or once again let them trace a design with a pencil.
Stringing words or phrases together by painting single letters or words on the stones is one fun idea. You might also consider painting a single element of a much larger picture on individual stones, then let the kids put them together as if they were solving a puzzle. Be sure to let the paint dry for 24 hours.
3. Create a ‘Mix and Match’ game
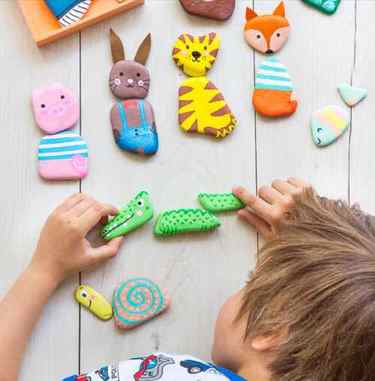
This project takes rock doodles to the next level! There are countless stones on the riverbank and they have sparked the idea to make something beautiful out of this natural material. The result is a fun mix & match game, where the kids can put together individual pieces – huge puzzle fun!
Suddenly the bear’s head can get a hare’s body or the crocodile’s tail. Afterwards, everything can be put together in the right place again.
For the Mix & Match figures, flat stones in different sizes and shapes are particularly suitable. At home you sort your finds and put the flat stones together into different animal characters. Before you paint the stones, they should be cleared of dirt and sand.
Acrylic and oil-based paint markers are particularly suitable for stone painting as they cover the surface very well. First paint the stones with a base color. Allow to dry well now before continuing to work to create the the faces and other features. For a few extra features such as ears, cut them out of matching felt and glue to the stone with a little liquid glue.
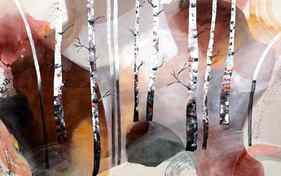
4. Paint on canvas
Paint pens are great to use on canvas. They are the perfect tools for kids because they are easy to use and easy to clean up afterward. Allowing kids to paint on canvas may also help them feel more “grown up” as they create on the same surface that “real” artists use. You can buy small canvas squares for them to paint on, or perhaps buy a large canvas and let the kids collaborate on a shared design in which they can all participate.
No matter which project you decide to start with, there’s no question about how excited your kids will be when they get to open their new set of paint markers and start exploring with them. Creating art together also means creating fun memories, stronger relationships, and exercising an artistic side of the mind they won’t experience any other way.
5. Handy travelling projects
Just take a few acrylic or oil-based paint pens with you on your next holiday. The pens are easy to transport, and can be used for many entertaining projects while you are in transit or after you arrive. Again, using stones, driftwood or other items found during the holiday, you can have the children each decorate one with something that reminds them of the holiday destination and becomes a ‘souvenir’ of the trip. When you return home, these can be assembled into a ‘story board’ picture about their holiday, and hung on the wall as a great reminder.
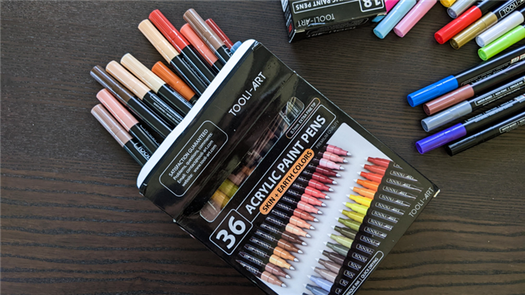
Where to find the best paint markers
There are many cheap markers around, but they are generally very poor quality. Pintar Art Supply offers the highest-quality acrylic and oil-based paint pens on the market. The company is synonymous with exceptional performance, vibrant beauty, and peerless quality among veteran and amateur artists alike. See some of the stunning things created with these markers on the Pintar Instagram page.
With what kind of paint can I fill my empty paint pen?
I have had customers report good results in filling their paint pens with acrylic paint, automotive lacquer and enamel, latex paint, alcohol-based paint, and watercolor paint solutions. Any paint with a viscosity equal to or perhaps just slightly above that of water will work well with these pump valve paint pens. These DIY paint markers are also excellent for use with liquid chalk, although most customers prefer a squared off larger tip.
To use these as a latex paint marker you will definitely need to thin the latex. One of my customers was good enough to send me some notes and comments on using his refillable paint pen for walls that were painted with latex. Check there for a photo of his job and some details about use.

Industry standard aluminum barrel perfect for paints, inks, stains, and liquid chalks.
Grab a great deal now. 14 pens $15 free shipping!
Need a different quantity? Use the dropdown right below.
Standard Paint Pen Features
- Make your own paint pens.
- Pick your own colors.
- Easy to assemble.
- Aluminum body.
- 4.5mm (3/16th inch) nib shaft diameter
- Replacement tips available.
- 12ml+ fluid capacity.
Save big and get exactly the colors and tints that you want. Make your own paint pen and make your art projects POP. When you use DIY paint pens you get exactly the colors YOU want and never settle again for using just those commercially available.
These paint pens are made of aluminum and are great for acrylic paints, watercolors, alcohol-based paints, liquid chalk, latex and more. They are easy to fill and easy to use. Finish projects quickly and still have precise control over application with the 4.5mm round tip nibs in these pens.
Not only can you make paint pens with acrylic, latex, or alcohol-based paints, they work well with liquid chalk. Touch up your furniture and kitchen cabinets and counters, or use them to add grain to a newly finished wood project. They are ideally suited for low viscosity liquids like stains, and allow a very precise and neat application with no brushes to wash and minimal if any cleanup.
Funnels make everything easier when you mix and pour paint and stain

You’ll use these funnels all the time not only for paint pens but also pouring glitter, colored sand, small beads, all sort of craft items.
20 funnels for only $12.50!