Read on:

By Jacqui Ma March 07, 2021
Decorating your bicycle is a fun activity. Other benefits of decorating your bike is to make it less attractive to thieves, as well as more recognisable to you.
Decals
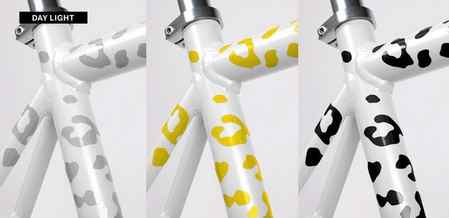
Decals or stickers are a great way to decorate and personalise your bicycle frame. Swedish company Bookman do a range of reflective decals that are weatherproof, perfect for pimping your ride.
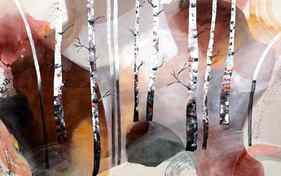
You can also get decals especially made for you using artwork uploaded to specialised decal companies. Here are some examples. They can either have your name on them or graphics that you like.

Tape
Similar to using decals and stickers, tape such as gaffer tape is another way to decorate your bicycle frame. Tape can also be a way to protect parts of the frame that may be affected by rust.

Playa Festival Bike
You will be redirected back to this guide once you sign in, and can then subscribe to this guide.
Close
I’ve ordered my LED supplies and enclosures from the Adafruit store! While I wait for the UPS guy, I’ll start by decorating the bike.

I want to paint the bike before I add lights, and then add bling and other exciting add-ons after the lights are on.
The first step is to disassemble the bike as much as possible so I can spray paint the frame. I want to paint the basket also, so I left that in place. I started with a couple coats of white primer, so my fancy paint is a lot less likely to flake off.

I chose three anodized paint colors — a brilliant blue, shiny purple, and metallic green. I want them all intermingling with each other and shining prettily. The label emphasizes that this paint looks best over metallic shiny chrome.. so my next layer of paint was shiny silver. I used Mirror Effect paint as well as regular silver paint to cover up the primer on the bike.


Finally, once the silver dried, I sprayed the three colors of metallic paint on, blending them willy-nilly so the bike has a flowing, gradient-style “mermaid” look to it.
This stuff is really gorgeous. The photos don’t quite do it justice. Painting over the silver really does give it a depth that I’m quite happy with.

Once the paint dried, I wanted to add some fun fur to the seat. I found a scrap of rainbow fur in my closet and glued it onto the existing seat with a generous amount of E6000. I didn’t worry too much about getting a perfect “fit” — there was no sewing involved, I just sort of draped the fabric over the top of the seat and then trimmed around the edges, making sure to get plenty of glue all around the sides.


I’ve got a lot more bling to add, but I want to wait until the electronics are in place before going any further. The UPS guy just knocked on my door, so the next step will be planning out where my lights are going and where to mount enclosures and batteries. It’s also time to do some wiring diagrams and figure out exactly how to lay everything out.
This guide was first published on Jun 18, 2019. It was last updated on Jun 18, 2019.
This page (Painting & Decoration) was last updated on Jun 14, 2019.
Text editor powered by tinymce.