Let the paint dry for ten minutes. Touch the surface of the guitar to make sure that none of the paint transfers to your hand. The paint may still be sticky and you’ll still be able to see the sealer under the basecoat that you just sprayed.
How to Custom Paint Your Electric Guitar
This article was co-authored by wikiHow Staff. Our trained team of editors and researchers validate articles for accuracy and comprehensiveness. wikiHow’s Content Management Team carefully monitors the work from our editorial staff to ensure that each article is backed by trusted research and meets our high quality standards.
There are 7 references cited in this article, which can be found at the bottom of the page.
wikiHow marks an article as reader-approved once it receives enough positive feedback. This article received 11 testimonials and 88% of readers who voted found it helpful, earning it our reader-approved status.
This article has been viewed 1,303,163 times.
If you’re tired of the look of your old electric guitar, a custom paint job is a great way to switch things up and revitalize it. However, painting your guitar isn’t as easy as just taking a brush with paint to the body of the guitar. Before you start painting your guitar, you’ll need to take it apart and remove the old paint. From there, you can apply a coat of sealer, base color, and finally a clear gloss coat that will make the finish shiny. If you do everything correctly, you can transform the old color on your guitar to something new.
Steps
Part 1
Part 1 of 3:
Removing the Old Finish
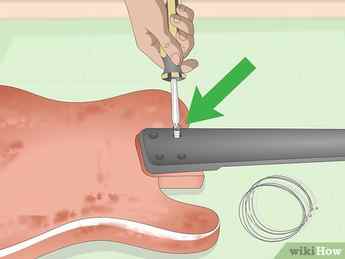
- If there is a faceplate over your volume knobs, you’ll have to remove the plastic portions of the knobs before you can lift the faceplate off.
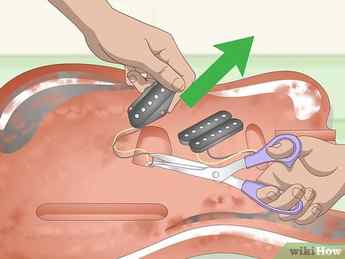
- Make sure all the electrical wiring is removed from the guitar before you start painting it.
Advertisement

- Do not hold the heat gun in one spot for too long or you may burn the wood that’s under the paint.

Lift off the old paint with a putty knife. Start by scoring a small location on the softened paint. Use your putty knife to lift off the old finish and don’t worry if it cracks off. Continue to scrape the paint and remove the old finish without damaging the wood under it. If the paint isn’t coming off, use the heat gun again to soften it. Once you’re done removing the finish, you should see the wood grain under it. [4] X Research source
- Use a sanding block if the sandpaper is hurting your hands.
- Bondo is a popular type of automotive filler. [5] X Research source

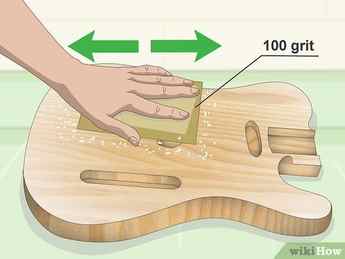
Sand the automotive filler so it lies flush with the guitar’s surface. Once you’ve filled in all divots and the guitar is relatively smooth, you’ll have to do one last sanding with the 100 grit sandpaper. Continue to sand until the automotive filler lies flush with the body of the guitar. [6] X Research source
- Debris or dust left on the guitar will get sealed into the paint job.
Advertisement
Part 2
Part 2 of 3:
Sealing the Guitar
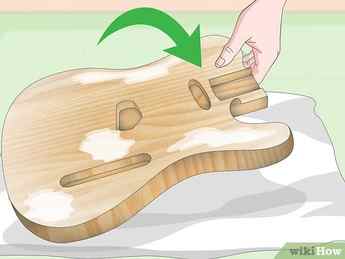
Lay the guitar down on a flat surface. Lay down drop cloths under the guitar so that the paint doesn’t stain the surface that you’re painting on. Rest the guitar on top of the drop cloths with the back of the guitar facing up. [7] X Research source
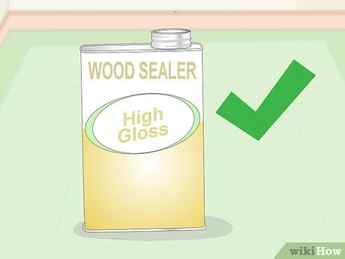
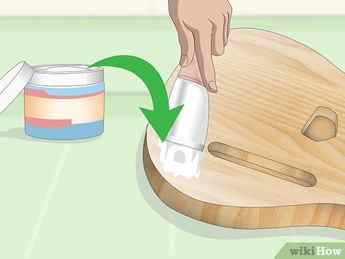
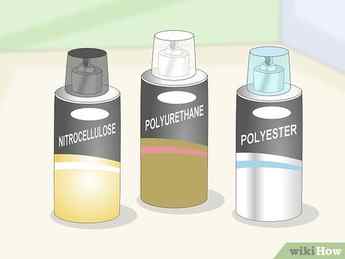
Choose a wood sealer. You can purchase wood sealer online or at a hardware store. Purchase a water based wood sealer that has a high gloss. Use a white sealer if you’re painting your guitar a lighter color. If you’re painting it a dark color, apply a gray sealer.
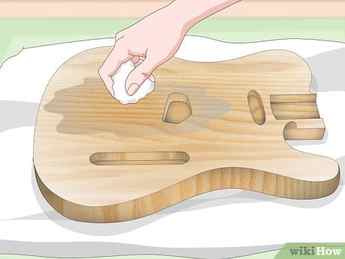
- Once your rag looks dirty, dispose of it and use another, clean rag. Remove the shielding in the electronics bay, Apply the sealer into all pickup and electronics cavities and neck pocket, being careful not to let it puddle in these areas. These areas are often overlooked and allow moisture to enter the wood.
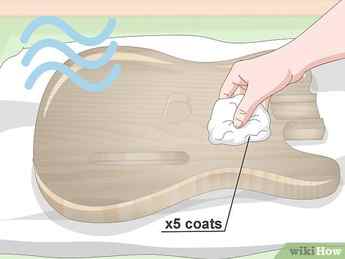
- Remember to let the sealer dry for an hour or two in between each new application.
- Once the guitar is properly sealed, the wood grain will be a much darker color.
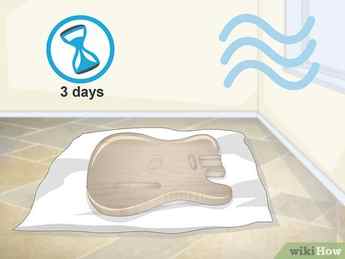
Let the sealer dry for three days. Feel over the sealer to make sure that it’s no longer wet or sticky. Make sure that the guitar dries in a well-ventilated area so no one gets sick from the sealer’s fumes.
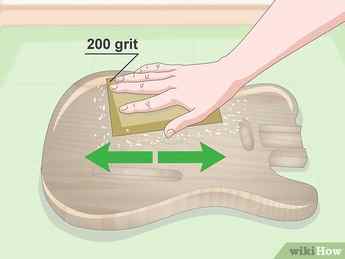
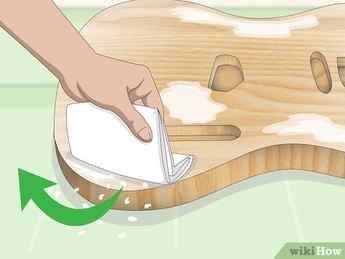
Sand off the shiny portions of the sealer. Using a 200 grit sandpaper, carefully sand over the shiny parts of the sealer. Make sure not to sand too hard or you may expose the wood grain underneath. If you do do this, simply reapply more coats of sealer to the guitar and allow it to dry before moving on. When you’re done, the guitar should have a dull white or gray color. [10] X Research source
Advertisement
Part 3
Part 3 of 3:
6+ Cool Guitar Painting Tutorials and Ideas
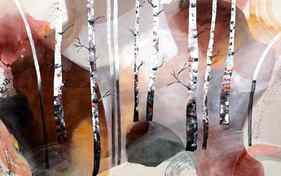
Painting guitar with abstract concepts doesn’t have a rigid rule as painting is an art form and like any other art, it gives you complete freedom to experiment. There are some basic concepts when it comes to coloring, and one needs to know which are suitable for the wooden base of the guitar. Some paint their guitar to protect the exterior, while some paint just to give their creativity a vent.

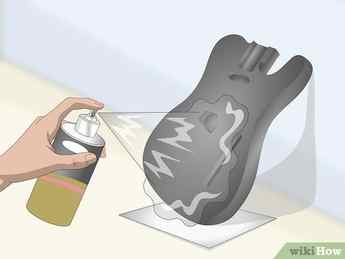
The spray painting on the guitar is wisely done using some tapes. The tapes are to be on the parts you don’t want to have paints on and then this way the rest of the body will be painted smoothly. After your spraying is over, let the color set for a while and then remove or peel off the tapes.
The combination of blue and white makes the guitar more attractive. It takes multiple hours to be completely painted and dried. However, you should be careful about dust particles, and they can spoil the painting and create a bubble on the guitar body, so paint your guitar inside a clean room.

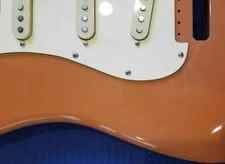
To give a new look to your used guitar, paint with some bright shades. You will need epoxy, wood fillers, sandpaper and paint obviously.
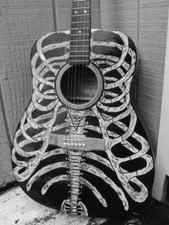
The guitar is painted with two basic shades for this gothic appearance. People with a preference for heavy metal songs love such designs on their instruments. The tutorial will help you understand the basic method, following which, you can have your desired patterns on any guitar.
The trick of spray painting is elaborately done on this tutorial and it will encourage many who are willing to paint. Take around 10 minutes to watch the video and start painting your guitar.

Swirl painting is another way of emerging abstract painting on the surface of the guitar. It mostly involves two or more shades together for a successful painting session.
A Few More Guitar Painting Ideas
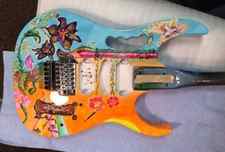
This floral motif on the guitar is quite captivating, more so because of the bright color contrast as painted with orange, black, sky blue, pink, and green.
This is another design that you could try at home. This is a blue-based pattern, but you can use orange, red, black, or any other shade as per your liking.
The robust coloration of this bass guitar is vibrant, and it has a specific flavor to it. Similarly, you can have your own version, mixing with multiple shades.
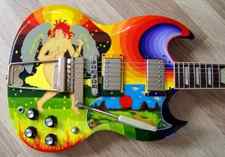

The psychedelic design on the guitar reflects the pop culture of the ’60s. Make yours trendy or vintage, it’s your call.
Painting an old guitar means changing or renovating it for a brand new appearance. These tutorials are more about giving a fair instruction regarding basic steps and ingredients required for painting on a guitar than the given design tutorials themselves. In the later part of this article, there are some ideas to take inspirations from.
Published on August 13th 2020 by Suzanne Kane