Adding varnish to a canvas print allows your memories to shine forever. This helps to protect the colors and draws more attention to your canvas prints for years to come. Thank you to NeuroSoup for providing the wonderful video tutorial, and we can’t wait to see your custom canvas prints shine!
How to Varnish Your Canvas Print

Your gallery-quality canvas print has arrived, and it is everything you expected and more. The colors pop, the custom cotton blended canvas is smooth, and it is fashioned on a handmade support frame built from 100% American materials . However, you want to give your canvas print an exclusive and unique look that you can only find in museums.
How a Varnish Layer Helps Your Canvas Print
A simple and easy way to further elevate your canvas print is by applying a layer of varnish. Applying varnish to your canvas print not only makes the colors stand out and pop, but even more, a varnish layer also creates a non-porous layer that lays atop the print itself.
A varnish layer does a few important things. Firstly, it protects the image from dirt, grime, dust, and even from cigarette smoke accumulating on the image and further fading it. Secondly, the varnish layer also creates a waterproof seal and will prevent yellowing if left in a sunny room. Finally, a varnish layer also reduces the amount of glare on your canvas print.
Applying Varnish to Your Canvas Print: Step by Step
You need no experience and only four inexpensive materials to varnish your canvas print, and it will be looking like a high-dollar piece of fine art in no time. The best part is that it is such a simple project that you can do it yourself. We will walk you through the steps needed to varnish your custom canvas print. The best part is that this process is scalable and can be applied to our canvas collages, wall displays, and triptychs too!
Materials Needed
Assuming you have already received your personalized canvas print, there are only four key materials.
- High-gloss varnish
- Paint roller
- Safety mask
- Silicone or latex gloves
Step One
Start by setting up your workstation and organizing your materials. Once the varnish is applied, it is challenging to remove the varnish. Be sure to set up on a surface that can get dirty, or cover the surface in painter’s plastic to protect the surface.
Most consumer varnishers are toxic, so it is crucial to have ventilation while you are working. Open your windows and turn on a fan to help air circulate. It is inadvisable to do this outdoors, as debris may easily blow into the varnish while it is still wet, and become attached to your canvas print.
After you have set up your workspace, it is important to follow the proper safety precautions before opening and applying the varnish. Use a filtering mask to protect yourself from breathing in the harmful fumes and wear latex or silicone gloves to keep the varnish off of your hands.
Step Two
Now that you have set up your workspace and taken the necessary safety precautions, you are ready to apply the first coat of varnish to your canvas print. Start by pouring a small amount of the varnish onto the print. The amount needed will vary by the size of the canvas print.
Using your foam roller, spread the varnish across the print, adding more as needed. After you have applied a thin, but even layer to the top of your canvas print, you are ready to apply varnish to the sides of your print.
Since most canvas prints come pre-stretched to the frame, you will have to carefully lift your canvas print to varnish the sides. While wearing gloves, carefully grab the unvarnished sides of the canvas and stand it upright. Apply a small amount to one of the sides and use your roller to spread the varnish to all four sides.
Upon applying the varnish to the sides, carefully place your canvas print face-up on the table and allow the first layer to dry for one hour. Be sure to immediately rinse your paint roller with water to keep the varnish from drying on your roller.
Step Three
After you have allowed the canvas print to dry for an hour, you are ready to apply the second coat. Start by evaluating the first coat and determining if there are any streaks or missed spots. If so, be mindful to address these areas while applying the second coat.
Follow all of the instructions from the previous step to apply the second coat. This will fix any blemishes from the first coat and it guarantees a perfect shine at the end. After the second coat has dried for one hour, you are ready to hang your custom canvas print back on the wall.
Coating a canvas print with paint
Fine Art quality Printing
using Epson Inkjet printers & UltraChrome K3 inks
PICTURE FRAMING ▼
Custom-made Frames
Mats, Plexis & more
Custom-mades.
ART SUPPLIES ▼
Readymade
Custom Made
SERVICES ▼
Services
Digital Effects
PROS ▼
CONTACT US ▼
Q2 : Can I add my own coating to my canvas print?
It is certainly possible to add your own coating to your print once you have received it. However, since the print will already be coated with our ClearShield canvas guard (unless otherwise requested, which is not recommended), it is a good idea to speak with our technician about the type of coating you intend to use. If there is a concern that it may interfere with our coating, we are happy to supply you with a sample piece to test.
Order online: ClearShield canvas coating. Acrylic gel medium will be available for purchase soon.
| Q3 : Can I get a canvas print with a hard surface? Resin is the coating for you, in this case. When set, a resin coating is as hard and protective as fifty layers of varnish. It dries crystal clear and because it is applied directly to your print, it adds saturation to the colors and creates a three-dimensional effect. Your canvas will be hard to the touch. Order online to DIY: EX-74 Epoxy Resin | link |
| Q4 : I need a reproduction printed, but I don’t want to lose the original texture of the painted brush strokes. Gel embellishment is the best way to enhance a canvas reproduction of a painting. By brushing this clear gel over the image in the same direction as the original brush strokes, the print becomes an original of its own. | link |
Q5 : What is the difference between your resin and gel coatings?
Resin dries very hard, with a crystal clear, high gloss finish that enhances the color of your image and gives it a three dimensional look. The coating can be anywhere from 1/8″ to 1/4″ or thicker, depending on the number of coats you want. When dry, resin is has a similar effect to 50 layers of varnish.
A gel coating gives dimension and texture to your print, but maintains the flexibility of the canvas. Depending on how it is applied, gel embellishment can mimic the original brush strokes from a painting, or highlight significant areas with added depth. Like resin, gel medium dries to a gloss finish (though matte finishes do exist).
Visit our Canvas Print Coatings page for a comprehensive comparison.
Order online: Epoxy Resin, bulk. Acrylic gel medium will be available for purchase soon.
| Q6 : What is ClearShield Canvas Guard? ClearShield canvas guard is a protective coating that is formulated specifically for Giclée canvas prints. It does not inhibit the flexibility of the canvas, allowing the prints to be sprayed prior to stretching. It contains UV-inhibitors, just like the ink, that prevent fading or yellowing over time. The coating also protects from scratches and scuffs, and enhances the color and brilliance of the image. Order online: Clearshield Canvas Guard | link |
Q7 : Can I order a canvas print with absolutely no coatings at all?
It is possible to order your print with no coatings including the ClearShield canvas guard. However, without this basic coating, the inks on the canvas will scratch off very easily, even just during shipping. If you decide on no coating, we recommend having your prints rolled (instead of stretched) for extra protection. We cannot guarantee an uncoated canvas will not arrive scratched.
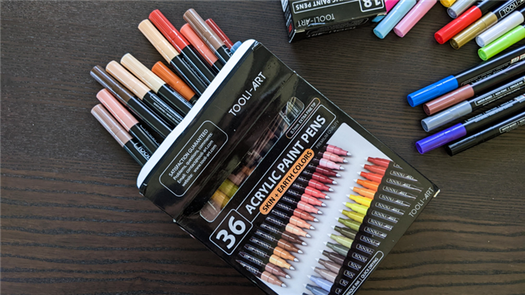
If you plan to paint on your canvas print, the ClearShield coating will not be a problem for acrylic or oil paints.
USA Giclee On Canvas, Fine Art Printing – Art Scanning & Reproductions – Handmade Oil Paintings – Custom Wood Panels, Metal Picture Framing – Block/Plaque Mountings, Large Format Dry Mounting & Lamination – Art Supplies: Stretcher Bars, Cradled Wood Panels and Artist Canvas – Collages On Canvas – Plexi/Acrylic Face Mounts – Block Acrylics, Fabric Printing, Dye Sublimation – Cityscape Skyline Prints, Resin, Photo Gifts and more.
How to Care for Canvas Wall Art
Canvas wall art is a beautiful addition to any home. Modern print technology means that canvas prints retain their vibrance for longer than ever. If you have a canvas print you’re particularly fond of, then there are a few things you can do to keep it in excellent condition for years to come. Whether you’re an art collector or have just purchased your first piece, here are some tips for caring for canvas wall art.
Dust Regularly
Dust can accumulate on canvas wall art, so it’s important to dust it regularly to prevent build-up. Use a soft, lint-free cloth or a feather duster to gently wipe the surface of the canvas. Avoid using water or cleaning products as they can damage the paint and canvas.
Keep Out of Direct Sunlight
Whilst modern ink and print technology means that the colours on canvas prints have excellent lightfastness, one way to prolong the life and vibrance of your canvas wall art prints is to keep them out of direct sunlight. If you wish to do this, it’s advisable to hang the canvas away from windows and direct sunlight. If you want to display the canvas in a sunny room, consider using UV-protective glass to help reduce the risk of damage or ensure you purchase a print with UV-protective coating on the surface. All Louise Mead canvas prints are made to order by a premium fine-art printer in the UK with a UV-protective coating as standard.
Avoid Humidity and Moisture
Humidity and moisture can cause the canvas to warp or the paint to crack, so it’s advisable to keep canvas wall art in a dry environment. Avoid hanging the canvas in areas of high humidity, such as a bathroom or a kitchen. If the canvas does become wet, allow it to air dry in a well-ventilated area.
Handle with Care
When moving or handling canvas wall art, it’s essential to do so with care. Always use two hands to lift the canvas and avoid touching the surface of the canvas as much as possible. When transporting the canvas, wrap it in acid-free paper or bubble wrap to protect it from damage.
Professional Restoration
If your canvas wall art becomes damaged or dirty, seeking professional restoration is recommended. A professional restorer can clean the canvas, repair any damage and restore the painting to its original condition. Attempting to clean or restore the canvas yourself can cause further damage and reduce the value of the artwork.
Canvas wall art requires special care to ensure it stays in good condition. By dusting regularly, keeping it out of direct sunlight and humidity, handling it with care and seeking professional restoration when needed, you can ensure that your canvas wall art looks beautiful for years.