You’ve probably never painted such a beautiful flower in such a short time!
Make your own Cotton Bud Flower Art
We show you how to make your own cotton bud flower art. Make beautiful pictures using cotton buds (an “alternative brush”).
Thanks to Cristina, who sent in this great cotton bud flower art idea. Let’s take a look at it…
What did you do?
Our project today was painting flowers using cotton buds.
After using all of our toilet paper rolls and doing butterflies, fish, monsters and owls.. we needed something new to do.
And I know they love painting.
We already did the hand-prints canvas and we thought to do some flowers.
For this project you need:
– paint
– cotton buds
– elastic band
– imagination and patience
Instructions:
1. We took some cotton buds and tight the together with an elastic band.
2. Choose your paint colours, you can have 2 or 3 for the same flower.
3. Take the paper sheet and start painting.
You can do the stems and leaves first and if you have smaller toddlers you can draw with pencil the shape of flowers and they can use the cotton buds dipped in pain to do the flowers.
You put one side of the buds in a colour first and then the second end of the buds for the other colour.

Do you have any other projects planned?
We find that we did a lot more craft since in lockdown than before, we did lots of painting and activities and some outdoor activities too. Eva learned to cycle without the stabilizers too.
We did lots of baking too…
Tell the Housebound With Kids community a bit about yourself…
I am Cristina, mother of Eva 6yrs old next month and Rita 4 and half.
Has this website and community helped you?
The Housebound with Kids community on Fb helped a lot with new ideas and things to do with the kids.
You will need the following material:
- Connector paint box with opaque white
- Clic & Go water cup
- Brush
- Grip felt-tip pen
- Drawing pad
- Cotton buds
- Rubber bands
- Optional: Canvas

Step 1
Make two bundles of 10-12 cotton buds by tying them tightly together with a rubber band. Make sure the ends of the cotton buds are level.
Then mix yellow, orange and magenta with plenty of water in separate fields of the transparent paint box lid. The water ratio should be such that the cotton buds can soak up and still release colour well.
Now dip one of the two cotton bud bundles into yellow and stamp a circular flower head onto the paper.

Step 2
Now dip the other side of the cotton bud bundle into orange and dab it onto about half of the yellow. The colours should be allowed to run into each other, the effects are magical!
Now, dip the second bundle of cotton buds into magenta. Dab the colour a little more sparingly on the lower edge to create a beautiful, spatial impression of the flower.

Flower Garden Using Stamp And Cotton buds Artwork Tutorial
Create beautiful art inspired by a flower garden with just stamps and cotton buds. Learn how to use these simple tools to create amazing and unique artwork that will be a stunning addition to your home.
Flower stamp artwork is a great leisure time activity for people of all ages. This not only varnishes your boredom but also enhances your creativity skills. A vibrant flower garden is pretty easy to make and can be made by everyone. This step-by-step tutorial will guide you through the easiest steps with the materials present in your house. So, without any delay let’s begin with our artwork.
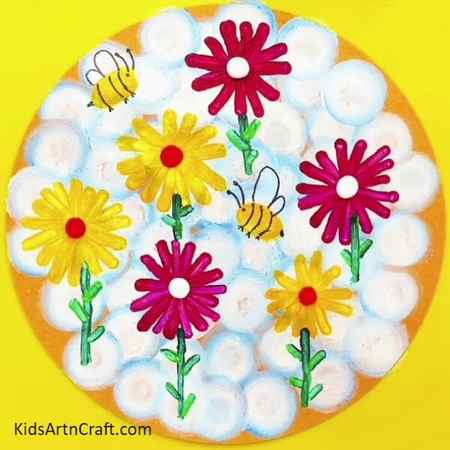
Beautiful Flower Garden Artwork For Kids

- Stamp
- Cotton Buds
- Cotton Ball
- Acrylic Paint Of Different Colors
- A Circular Cardboard Sheet
- Glue
- Marker
Procedure
Step 1: Take A Cotton Ball, Stick It On The Cardboard Sheet, And Stamp On It With A Sky Blue Color

On a circular cardboard sheet stick a cotton bud with the help of glue, take a stamp of small size dip the sides of the stamp in blue acrylic paint, and press it on the cotton bud. Next, take a cotton bud and spread the paint in a circular motion as shown in the image above.
Step 2: Stick More Such Cotton Buds On The Cardboard Sheet And Create Impressions With The Stamp
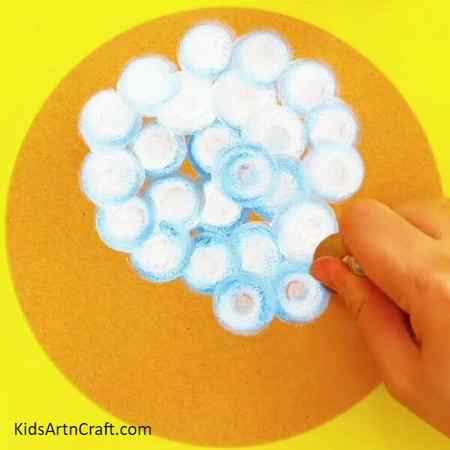
Take more such cotton buds and paste them on the cardboard sheet with the help of glue. With the stamp make impressions on the cotton balls by pressing it. Then spread the paint with the help of a cotton bud as you did in the previous step.
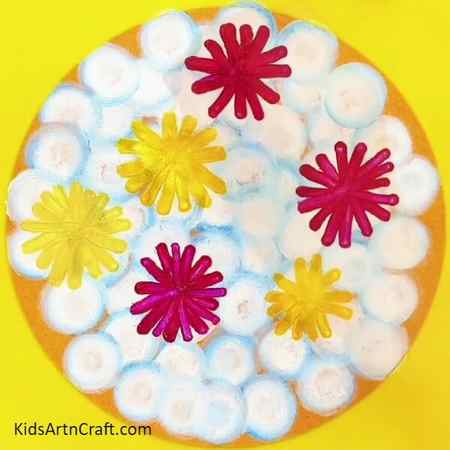
Step 3: Place Cotton Balls All Over The Cardboard Sheet And Design A Pattern The Same As The Previous One
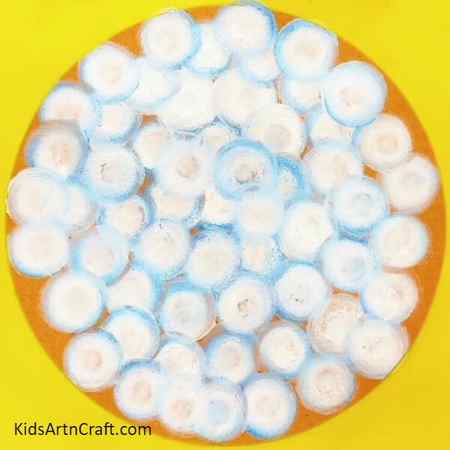
Fill the cardboard sheet with the cotton balls and paint them in a similar pattern thoroughly.
Step 4: Paint Flowers On The Cotton Balls With The Help Of A Cotton Bud
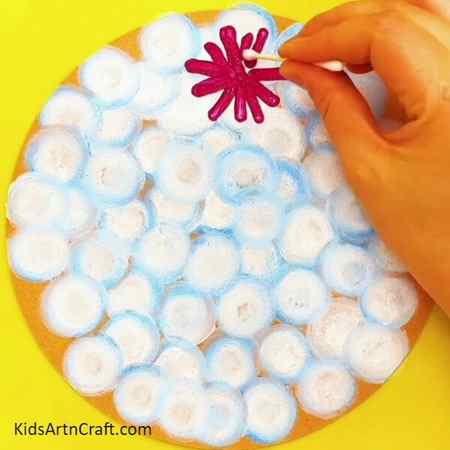
Take a cotton bud, dip it in red acrylic paint, and paint flowers on the cotton balls with the help of the cotton bud as shown in the image above.
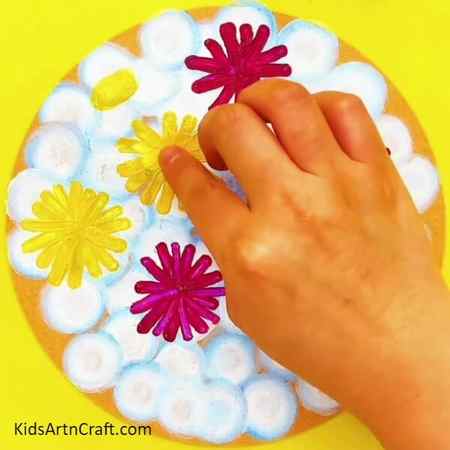
Step 5: Paint Yellow Flowers On The Cotton Bud With The Help Of Yellow Acrylic Paint And Cotton Bud
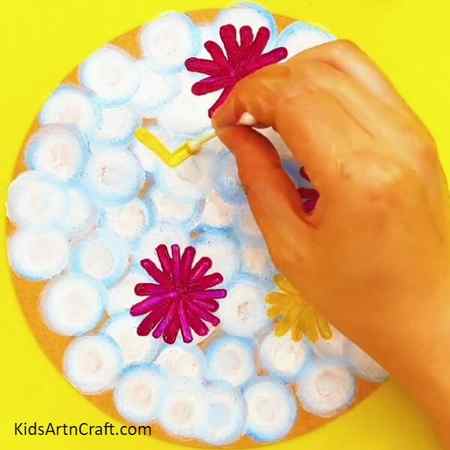
Take a cotton bud and dip it in yellow acrylic paint. Design flowers on the cotton balls nicely.
Step 6: Make More Such Flowers Of Red And Yellow Color To Make Your Garden Look More Attractive
With the help of cotton buds, make more flowers of different colors to make your garden look more beautiful and appealing.
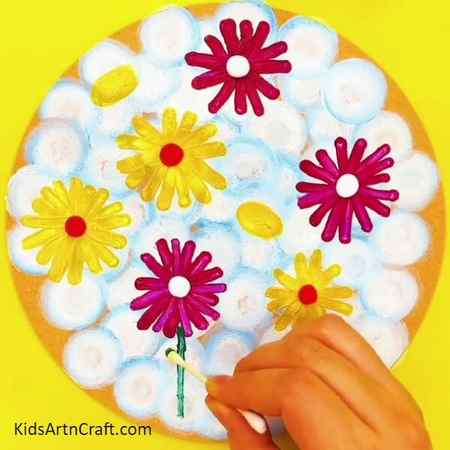
Step 7: Stamp On The Center Of The Flowers To Define Their Features
Take a small stamp, dip it in white paint, and press it in the center of the red flowers. Then dip the stamp in red paint and press it in the center of the yellow flowers. This step will define and highlight the features of your flower. Dip a cotton bud in yellow paint and draw the structure of bees with it.
Step 8: Make Leaves Of The Flowers With Green Acrylic Paint
Take a cotton bud and dip it in green acrylic paint, make leaves of the flowers with the cotton bud.
Step 9: Take A Black Marker And Draw Honey Bees With It
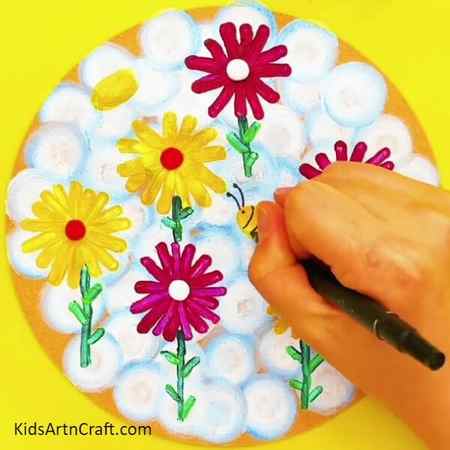
For the last step, take a black marker and draw the eyes, antennae, wings, and stripes on the body of the honey bee.
Finally, We Have Completed Our Craftwork!
With some hard work and patience, we have successfully made our craft in no time.
I hope you’ve had super fun and created some long-lasting memories while creating this artistry. Share your experience and opinions with us in the comments section. For more such easy and fun art and crafts tutorials check out our website.
Follow us on Youtube for art and craft tutorials and much more.
More Articles from Kids Art & Craft
- DIY Doll Making Step-by-Step Easy Tutorial for Kids
- Easy to Make Doll with Yarn and Tissue Paper
- Watermelon Crafts For Kids Easy Tutorial
- Popsicle Stick Shark Craft Tutorial For Kids
- Easy Peanut Penguin Crafts for Kids
Related posts:
- Bubble Wrap Printed Pomegranate Craft For Kids
- Stamping Flower Art Ideas
- Easy Painting Video Tutorial for Beginners
- Rainbow Sunflower Painting Art For Kids – Step by Step Tutorial
- Apple Stamping Art Ideas for Kids
- Okra Stamping Art Ideas for Kids
- Bubble Wrap Stamping Art Ideas for Kids
- Easy Leaf Art and Craft Step by Step Tutorial For Kids


