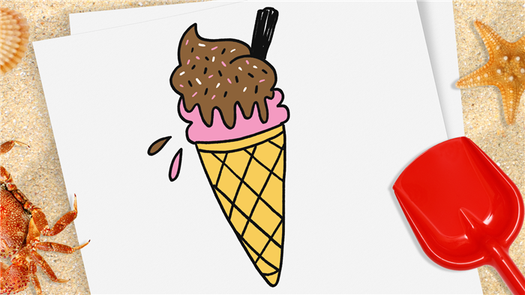
In this easy video tutorial, we’ll draw a triple-scoop ice cream cone. We’ll add sprinkles and a distressed and grunge texture to top it off. The texture adds a creamy look to the scoops and a waffled look to the cone.
Draw ICe Cream Drawing For Kids
It’s difficult to locate a summertime snack that can keep you cool Drawing For Kids than a delectable ice cream cone!
These tasty, icy treats come in a wide range of forms, flavours, and variations. Because there is so much room for creativity, Drawing For Kids learning how to sketch an ice cream cone can be even more enjoyable.
This teacher will teach you everything you need to know so that you can draw your own unique ice cream cone.
With the aid of this step-by-step tutorial on how to sketch an ice cream cone in just 6 easy steps, you’ll see how easy and enjoyable it can be!
How to Draw an Ice Cream Cone, Starting Now!
- To start off our drawing lesson for an ice cream cone, let’s start with the cone part of the equation. The first step will be much easier if you have a measure with you.
- At the bottom of the cone, where there is a slight curve, draw two horizontal lines that meet.
- Let’s move on because this will function as the framework for your cone and we’ll add a lot more detail to it later.
- Step two is to draw some ice cream on the cone.
- It wouldn’t be an ice cream cone if there wasn’t any ice cream in the image! In the next step, we will therefore add some to the image.
- To start, we’ll draw a curved, rounded line over the cone and top it with a beautiful, substantial dollop of ice cream.
- To show how the ice cream extends past the edge of the plate, draw two additional, smaller curved lines beneath the top one.
- Draw a perpendicular line across the cone, just below the ice cream, to finish the cone’s top before continuing to step two.
- Start enhancing the cone’s details at this stage.
- We mentioned adding some detailing to the cone in the previous part of our tutorial on how to draw an ice cream cone, so we will do that in this step as well.
- For this design, we drew a sequence of diagonal lines across the ice cream cone, as seen in the reference image.
- The boundaries will also be very close together.
- Once the pattern is complete, your patience and steady hand will be repaid, but it will take some time.
- Completely form the cone.
- Even though the ice cream cone you drew in your sketch looks great already, you still need to add a few finishing touches before colouring it.
- In this part, we’ll finish the pattern on the cone itself. In essence, you go back and repeat the previous process this time going the other way.
- This will result in a pattern that resembles the cross-hatch pattern in the example picture.
- The outcome will be fantastic, but this step will also take patience.
- This is where you can put the finishing touches on your ice cream cone creation.
- Since your ice cream cone is basically done and ready for coloring, you can now finish the details in this section of our tutorial on drawing an ice cream cone.
- At this point, if you choose, you can integrate some of your components.
- In our example, we represented sprinkles and other toppings with a sequence of dots, but there are a lot of other things you can do with this image.
- In your artwork, you visualise how the perfect ice cream cone would appear in your mind.
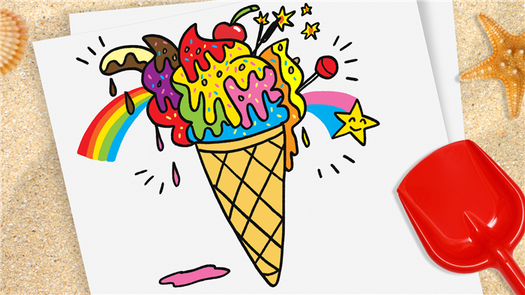
- It would make a cool background for your ice cream cone and you could top it with cherries or candy bits.
- What decorations and toppings would you add to the perfect ice cream cone?
- To finish your ice cream cone creation, add colour in step 6.
- Now we’re getting to the fun part of sketching your ice cream cone. Drawing your own ice cream cone and adding your own garnishes and variants is one way to customise it.
- The feeling of your image will be greatly influenced by the colours and art mediums, so this is the stage where you should let your imagination run wild.
- Since ice cream cones come in a variety of vibrant and romantic hues, there are no limitations on what you can do.
- To make colours stick out, you could use vibrant markers and coloured pencils. If you prefer an image that is less vibrant, use red coloured pencils and watercolour paint for a more muted appearance.
- Using stickers and other crafts as the ice cream’s toppings would help give it a neat 3D look if you have any on hand!
First things first.

Get some stuff to make some art with. We’re using coloured pens but you can use whatever inspires you to get creative – pens, paper, pencils, glue, jam, charcoal, ketchup, sticky, an old sausage. Pick whatever you want and make yourself comfy. Okay, settled now?Well then, we’re ready to draw!
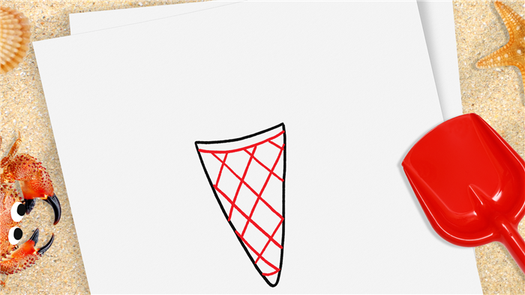
Okay, after drawing a thin line at the wide end of the triangle, draw some diagonal lines on the main bit of your triangle to give it a criss-cross effect. And don’t worry if you get it wrong! You can always have another go…
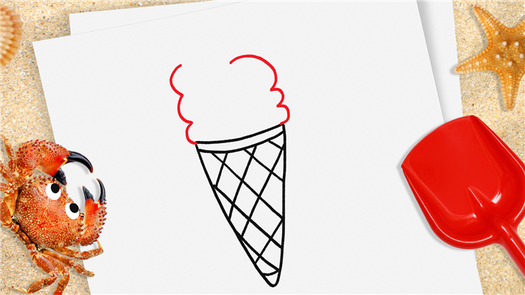
Right, for this bit you can start drawing the ice cream! All you need to do for this bit is draw some wavy lines – a bit like a cloud, or a very fluffy dog, maybe.
STEP 4
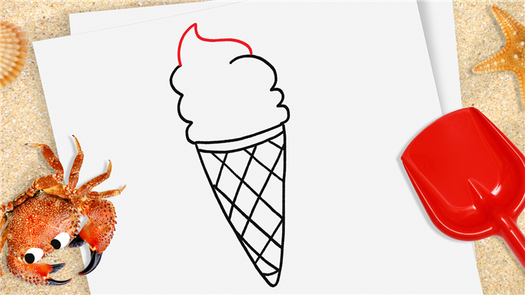
This is the tip of the ice cream! It looks a bit like the fringe on someone’s hair, but it’s a lot more delicious. And well done, because you’ve just drawn an ice cream! But what flavour is it? Well, you can decide and it could be absolutely anything.
WATCH the quick ice cream drawing video
And we’ll only use basic shapes, which are circles and rectangles.
In less than 30 minutes, you’ll have an ice cream cone that looks good enough to eat. The finished design can be used for SVG projects or printed for sublimation design projects.
We’ll use Inkscape for this drawing. The shortcuts that I use in the video can all be found in my Inkscape Ready Set Go! Ebook.
Scroll to the bottom for the free color palette
I get commissions for purchases made through some of the links in this post. There is no extra cost to you. See my full disclosure here.
Hello Summer Drawing Challenge
This is the first lesson in my Hello Summer drawing challenge. See the list below to find out what to draw each week.
- Week 1 – How to draw ice cream.
- Week 2 – How to draw sunglasses.
- Week 3 – How to draw a tropical drink.
- Week 4 – How to draw a summer gnome.
Are you ready to make your own artwork for fun and original crafts? If so, you’ll want to join me in my Hello Summer drawing challenge every Friday.
We’ll use the same color palette for each drawing in the challenge. Scroll to the bottom of the post and sign up to get it for free.
You’ll become a member of my VIP club, where you’ll be the first to hear about the upcoming courses and lessons!
Too busy to watch the video lesson now? Save it to your drawing tutorials board on Pinterest for later.

Drawing Supplies
Check out the supplies we’ll be using below. You can also use whatever you have if you prefer another program.
Here is a list of digital drawing supplies that I use for all of my Inkscape projects.
This is the same tablet that I used when I started learning how to make graphics and still works great.
The Inkscape Ready Set Go ebook has my favorite essential shortcuts to help you learn the program faster.
They are both easy to use and budget-friendly.