Sketch out the ball. Draw a large, even ball, which is located on the stand.
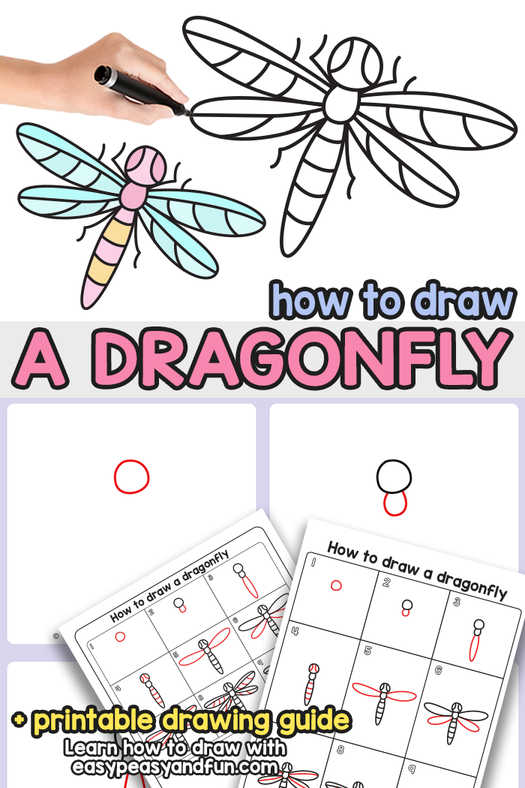
How to Draw a Snow Globe


In this tutorial, I will show you how to draw a snow globe. This is another exciting creative activity that will give you pleasant emotions.
Now you will learn how to draw a snow globe step by step. This is a popular Christmas souvenir, which is a glass ball, inside of which there is a small figurine and small particles of sparkles that resemble snowflakes. This is a very beautiful souvenir.
Figurines inside the ball can be different – these are miniature buildings, coniferous trees, the figure of Santa Claus, and other holiday attributes. In this lesson, there is a cute snowman inside the ball. It looks very cute and evokes pleasant emotions.
- Pencil
- Paper
- Eraser
- Coloring supplies
Time needed: 25 minutes
How to Draw a Snow Globe

-
Draw the stand for the ball. Depict two horizontal lines, with the bottom line being longer.

Add the sides of the stand. Sketch out connecting lines on the sides to make a trapezoid shape.

Sketch out the ball. Draw a large, even ball, which is located on the stand.

Depict the snowman’s head. Add a small circle in the middle of the ball.

Draw the torso of the snowman. Depict two smooth rounded lines that connect the snowman’s head and stand.

Add details. With the help of a few straight and rounded lines draw the hat. Add the eyes and the mouth.

Depict the arms and buttons on the torso. With jagged lines draw two arms, and add two small circles.

Sketch out the snowflakes. Add small circles around the snowman.
Color the snow globe. Color the hat dark grey, the base grey, and the ball blue.
I suggest downloading a short version of the lesson as a PDF file. This will help you go back to this lesson and repeat it as needed.
Premium Tutorial: Vector Snow Globe


Christmas is around the corner and in this illustrator tutorial you will learn how to draw a vector snow globe with a winter landscape and a small town inside. This is a great way to learn creative methods and tricks on how to use different brushes to create the snow look and the snowfall. Also by the end of it you will know how to draw a lodge, a snowman and I will explain my way of drawing a fir tree using a personalized fir-tree branch Art Brush.
Difficulty: Intermediate
Requirements: Adobe Illustrator
What will you get?
- Instant download of PDF e-book (36 steps)
- Detailed step by step tutorial
- Learn to create snow globe
- Comes with Ai file for easy reference
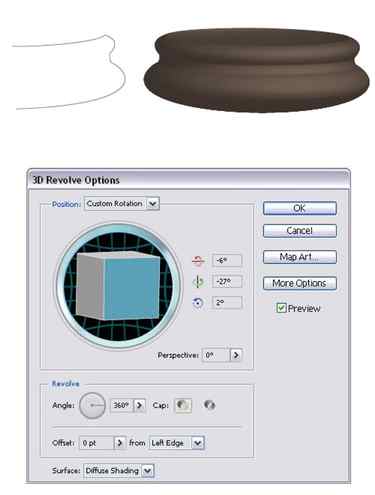
1. Open a new document. Take the Pen Tool and draw a path like the one in the image below then go to Effect > 3D > Revolve and set the values shown below to obtain the base of the globe. The color that I used to stroke the path is brown (R=115, G=99, B=87). Select Object > Expand Appearance when you are done.
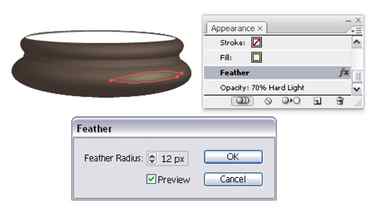
2. Now draw an oval shape using the Ellipse Tool at the top of the base and fill it with white. Take the Pen Tool and draw an oval shape for the reflection. Fill it with (R=255, G=250, B=203) then go to Effect > Stylize > Feather and apply a 12 px Feather Radius. Change the Blending Mode to Hard Light and lower the Opacity to 70%.
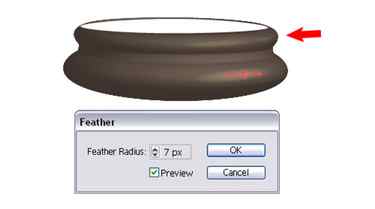
3. Duplicate the shape made above, scale it and change the Feather Radius value to 7 px and keep the other appearances the same. Make more reflections in the same way.
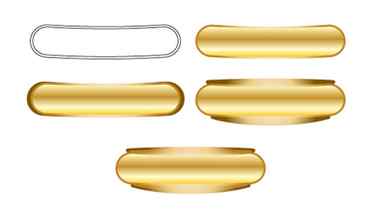
4. Next take the Rounded Rectangle Tool and draw a long rectangle like the one in the image below then go to Effect > Warp > Arc and apply a -5% Horizontal Bend. Now go to Object > Path > Offset Path and set the Offset value to -2 px to obtain the smaller rectangle inside. The gradient used for the first rectangle is called Brass Radial and the one used for the smaller one is Gold. You can find them both by opening the Swatch Libraries Menu > Gradients > Metals.
Now Copy and Paste in back the first rectangle and drag the sides to make it slightly wider. Change the fill to a radial gradient using the following colors: (R=244, G=232, B=217), (R=237, G=208, B=137) and (R=127, G=83, B=2). Go to Effect > Warp > Squeeze and apply a 77% Horizontal Bend then Expand Appearance. Use again Offset Path to make a smaller shape inside selecting a -2 px Offset value and change the fill gradient to Brass Radial.
5. Draw 2 small circles on the sides like below then type the text. Expand it and fill it with a linear gradient using brown tones: (R=84, G=21, B=19), (R=215, G=177, B=138), (R=141, G=80, B=39) and (R=156, G=83, B=13). Duplicate the text, send it behind and scale it a bit and change the fill gradient to Brass Radial. Group all the shapes made and the text and place them on top of the base.