This tutorial is slightly different from most here on EasyLineDrawing in that a large part of the drawing does not have a hard outline but is instead done with color. As already mentioned drawing the mountains in such a way will give them a more natural appearance. Outlining the bottom of the mountains can make it look like their bottoms have been cut off.
Easy How to Draw Mountains Tutorial and Mountains Coloring Page


Here’s why it’s helpful to have your students learn how to draw mountains.
First, drawing mountains is an easy and accessible skill for students of all ages and skill levels. It’s a great way to introduce your students to the joys of drawing, especially if they are new to it.
Moreover, drawing mountains can be incredibly cute and cool. With simple techniques like using pastels or drawing a cute animal on top of a mountain, students can create adorable and eye-catching art. This can be a fun way for students to explore their creativity and create something that they can be proud of.
Drawing mountains can also help students develop important drawing skills, such as drawing straight lines, shading, and perspective. By practicing these skills in the context of a mountain drawing, students can improve their overall drawing abilities and feel more confident in their abilities. These skills can be applied to many other types of drawings and can be a great foundation for future art projects.
Finally, drawing mountains can be a great source of inspiration for simple drawing ideas. Once students have mastered the basics, they can take their mountain drawing skills to the next level by drawing landscapes, seascapes, or even other planets. This can be a fun and engaging way to expand their creativity and explore new ideas.
Use the Button below to Download a PDF Tutorial

Save me to your Pinterest Board!

- Drawing Paper. This is the good stuff you can buy in bulk for a good price.
- Pencils. I like how this brand always makes nice dark lines.
- Black Marker. A permanent marker will give you a dark black color.
- Crayons. The larger packs are nice for more color choices.
- Note: All of the above are Amazon affiliate links.
Step 1 – Draw an Outline of the Front Mountain
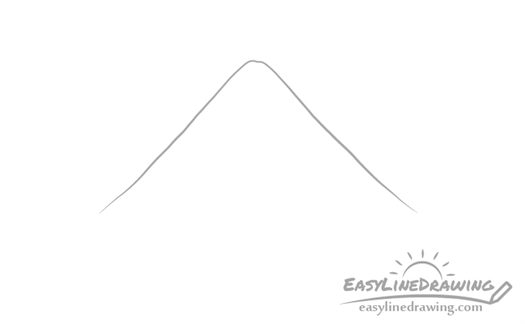
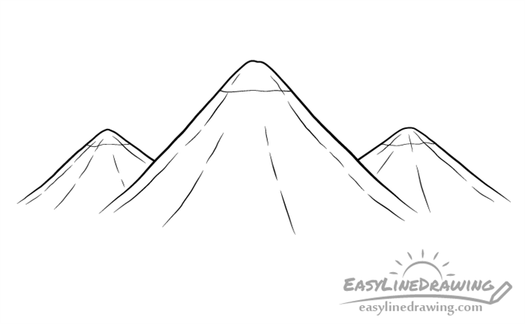
In this case there will be three mountains in total. One larger one in the front and two more distant ones behind it.
Draw the larger mountain first as shown in the example. Make it wide at the bottom and narrower towards the top as you would generally expect a mountain to look like but don’t make the top overly pointy. You should also deliberately make your lines a little wobbly as mountains tend to have uneven surfaces.
Leave the bottom of the mountain open with no outline. Adding one there will make the drawing seem odd like the mountain has been cut off.
Step 2 – Draw the First Side Mountain
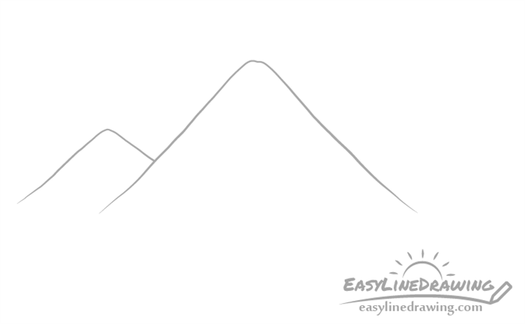
To one side of the larger mountain and partially hidden behind it add a smaller mountain. You can draw it a similar way with slightly wobbly lines.
Step 3 – Draw the Second Side Mountain
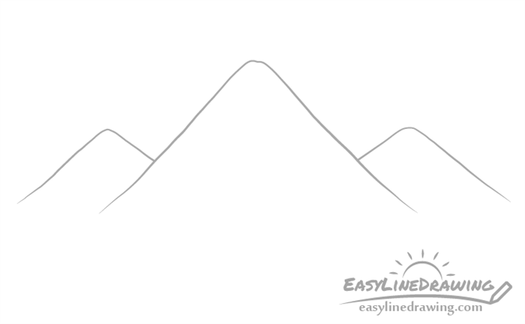
Add a second smaller mountain on the other side of the first one. Make it just a tiny bit different in shape but try and keeps it’s overall size the same as the first smaller mountains so that your drawing looks more balanced.