“I really liked this website. It helped me make a snowman. I didn’t know that what to keep in his body, then I understood that we can use rocks. This is a cool website. ” . ” more
How to Make a Snowman
This article was co-authored by wikiHow Staff. Our trained team of editors and researchers validate articles for accuracy and comprehensiveness. wikiHow’s Content Management Team carefully monitors the work from our editorial staff to ensure that each article is backed by trusted research and meets our high quality standards.
wikiHow marks an article as reader-approved once it receives enough positive feedback. This article has 13 testimonials from our readers, earning it our reader-approved status.
This article has been viewed 686,891 times.
When winter comes with heavy snow, it’s time to get out there and build a snowman! It’s simple to roll up three snowballs, one large, one medium, and one small. Stack them up with the biggest on bottom and the smallest on top for the head. Then let your creative side run wild by decorating the snowman with a face, clothing, arms, and any accessories that you want!
Steps
Part 1
Part 1 of 3:
Finding Wet Snow and a Flat Spot
-
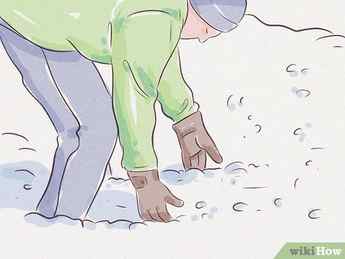
If the snow falls apart, it’s no good for making a snowman. If you are making the snowman close to a building also provides shade for some of the day.

Advertisement
Part 2
Part 2 of 3:
Rolling up a Snowman
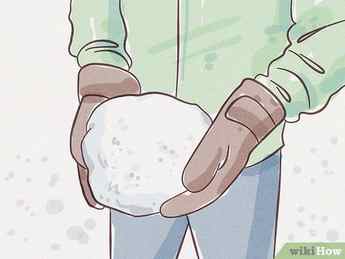
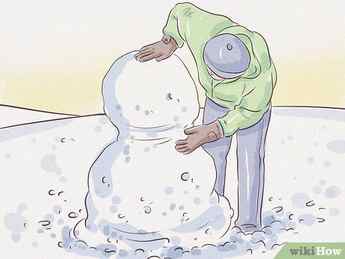
- Make sure you are wearing warm, waterproof gloves, or your hands will start to hurt from handling the snow.
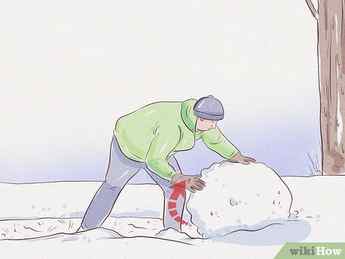
- Stop rolling the snowball in the spot where you want the snowman to be. Make sure you start somewhere near that spot, and roll the ball so that you end up there.
- It often works well to roll the ball in a large spiral, but take note that this will leave an obvious pattern in the snow.
- Pat your snowball together every so often to keep excess snow from falling off.
- Roll the snowball in a circle around the bottom section, or in a straight line away from it and back to it. This way when you finish the ball you won’t have to carry it a long way to the bottom section.
- It helps if you flatten the top side of the bottom ball and flatten the bottom side of the middle ball. This helps the middle section sit firmly on the bottom section.
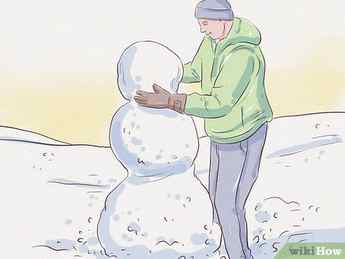
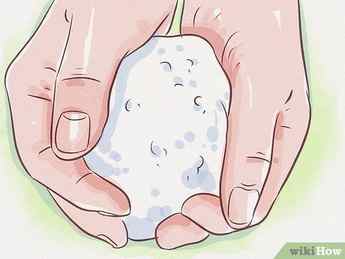
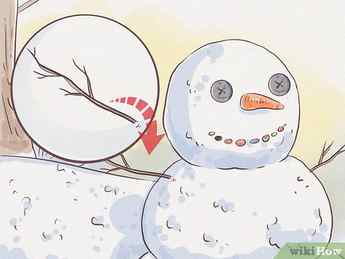
Make a one foot (30.5 cm) snowball for the head. Scoop up one last ball of snow for the head. Pack it with your hands until it is about one foot (30.5 cm) wide. You should be able to make the head without rolling it, but it’s okay to roll it if you want to. When you finish, carefully place it on top of the snowman’s body.
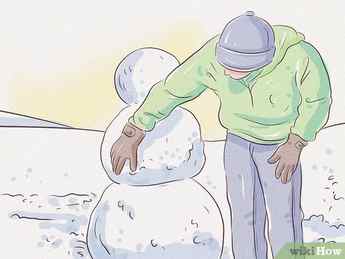
Pack some snow between the sections. Once the three sections are in place, scoop up more snow and pack it between each section. This will give the snowman a uniform look from top to bottom, rather than looking like three snowballs piled on top of each other.
Advertisement
Part 3
Part 3 of 3:
Decorating Your Snowman

- Making the snowman your own is all about creativity. If you have something else that you think would look cool as a nose, use that instead.

- Other options to use for eyes are yellow ping-pong balls, blue rubber bouncy balls, or large green plastic gems.
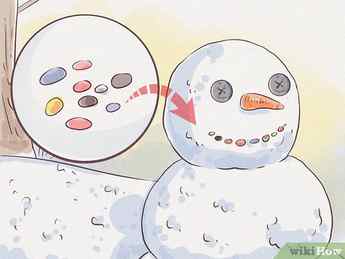
- Cut a mouth out of felt, stick some fake plastic teeth in the face, or bend a piece of rubber tubing into a smile.
- Before the arms, if you want, put a shirt or coat of some kind around the body of the snowman.
- Also use old broom sticks, golf clubs, or fake skeleton arms!
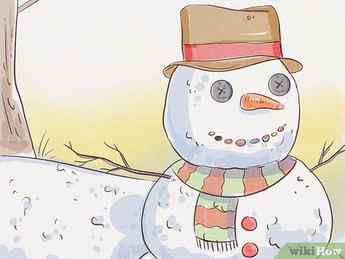
- Add a tie, sunglasses, or any other accessories to make the snowman stand out from the rest.
Advertisement
Community Q&A
Search
Question
How can I add color to my snowman?
Community Answer
Add a few drops of food coloring to a spray bottle full of water, secure the lid, and shake thoroughly. Then, spray the food coloring mixture onto the desired areas of your snowman.
Thanks! We’re glad this was helpful.
Thank you for your feedback.
As a small thank you, we’d like to offer you a $30 gift card (valid at GoNift.com). Use it to try out great new products and services nationwide without paying full price—wine, food delivery, clothing and more. Enjoy! Claim Your Gift If wikiHow has helped you, please consider a small contribution to support us in helping more readers like you. We’re committed to providing the world with free how-to resources, and even $1 helps us in our mission. Support wikiHow
Question
Can I make a snowman have an icicle as a nose?
Community Answer
Yes, just get the icicle and put it in where your want the nose to be do the same as you would do with a carrot.
Thanks! We’re glad this was helpful.
Thank you for your feedback.
As a small thank you, we’d like to offer you a $30 gift card (valid at GoNift.com). Use it to try out great new products and services nationwide without paying full price—wine, food delivery, clothing and more. Enjoy! Claim Your Gift If wikiHow has helped you, please consider a small contribution to support us in helping more readers like you. We’re committed to providing the world with free how-to resources, and even $1 helps us in our mission. Support wikiHow
Question
I tried last year, but every time I tried to roll it, some snow fell off. Why?
Community Answer
It may be because the snow wasn’t compact enough or moist enough. You can add freezing water to fluffy snow to help it stay in one piece.
Thanks! We’re glad this was helpful.
Thank you for your feedback.
As a small thank you, we’d like to offer you a $30 gift card (valid at GoNift.com). Use it to try out great new products and services nationwide without paying full price—wine, food delivery, clothing and more. Enjoy! Claim Your Gift If wikiHow has helped you, please consider a small contribution to support us in helping more readers like you. We’re committed to providing the world with free how-to resources, and even $1 helps us in our mission. Support wikiHow
Ask a Question
200 characters left
Include your email address to get a message when this question is answered.
Advertisement
Video .
By using this service, some information may be shared with YouTube.
Tips
Submit a Tip
All tip submissions are carefully reviewed before being published
Thanks for submitting a tip for review!
How to
Build a Snow Cave
How to
Go Sledding
How to
Build an Igloo
How to
Build a Snow Fort
Advertisement
References
- ↑http://www.momtastic.com/parenting/171249-how-to-build-the-perfect-snowman/#/slide/1
- ↑http://www.post-gazette.com/sports/outdoors/2010/01/17/Ten-steps-to-building-the-perfect-snowman/stories/201001170158
- ↑https://qz.com/153318/the-science-behind-the-art-of-building-a-snowman/
Snowman css challenge, how to put eyes in a head
I want to draw snowman. I have the head done, but the eyes won’t appear to me. should I use grid or flex ? #e1 #e2 are the eyes and I put them with head circle in a container cnt-head.
body < height: 100%; width: 100%; >#container < width: 400px; height: 300px; background: #dd6b4d; >.sman < margin: auto; >#hat < background: #0E1F2B; width: 30px; height: 12px; >#hat-white < background: #FFFFFF; width: 30px; height: 8px; >#hat-long < background: #0E1F2B; width: 45px; height: 4px; >#cnt-head < height: 30px; width: 45px; overflow: hidden; /* This hide the div under another */ >#head < background: #FFFFFF; position: relative; width: 45px; height: 45px; border-radius: 50px; top: -5px; >#e1 < height: 8px; width: 8px; border-radius: 50px; background: #0E1F2B; >#e2
Every answer will be good thanks, and is it possible to draw the whole snowman in 1 div? Or at least 3 divs for every body part? Current-Target
Follow
271 3 3 silver badges 11 11 bronze badges
asked Dec 28, 2021 at 11:51
Marinos TBH Marinos TBH
55 6 6 bronze badges
3 Answers 3
Sorted by: Reset to default
If you right click on the element then select inspect, then in the code hover on your eye div you can see that they are there but below your snowmans head. In this case I would reccomend using a pseudo-element on your head to make the eyes start in the top left position inside that div. Plus that you now can remove the div if you dont wanted it.
body < height: 100%; width: 100%; >#container < width: 400px; height: 300px; background: #dd6b4d; >.sman < margin: auto; >#hat < background: #0E1F2B; width: 30px; height: 12px; >#hat-white < background: #FFFFFF; width: 30px; height: 8px; >#hat-long < background: #0E1F2B; width: 45px; height: 4px; >#cnt-head < height: 30px; width: 45px; overflow: hidden; /* This hide the div under another */ >#head::before, #head::after < content: ""; height: 8px; width: 8px; left:12px; top:15px; border-radius: 50px; background: #0E1F2B; position: absolute; >#head::after < left:26px!important; >#head
Sidenote: remember to make id’s unique:)
Description
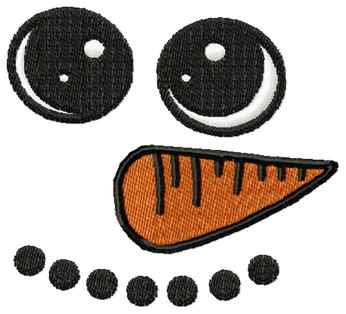
THIS IS A DIGITAL DOWNLOAD. YOU WILL NOT RECEIVE AN ACTUAL PATCH, YOU MUST OWN AN EMBROIDERY MACHINE TO USE THIS DIGITAL EMBROIDERY DESIGN. Buyer will receive one embroidery design download of a snowman face with big eyes.
The Design is for 4×4 and 5×7 hoops. Formats available: PEC, PES, XXX, JEF, EXP, VIP, DST, VP3, HUS. Customers will receive all formats in a compressed zip folder.
INSTANT DOWNLOAD: Files are available for download immediately after purchase. You can download your patterns from Etsy after your payment clears by clicking on the purchases page and receipt page.
*Please note that changing the size of the design can alter how it stitches on the machine. I cannot be responsible for altered, changed or resized designs.
We do custom orders!! If you would like a name, phrase or anything else added to this design, please let us know.
IMPORTANT NOTES
**********************
These are NOT patches.
I CAN NOT guarantee the quality of this design if it is altered or resized in any form.
I recommend using cutaway stabilizer for the best design quality, especially for shirts.
You will need an Embroidery Machine for my designs and the hardware & software to transfer the files to your embroidery machine.
NO Refunds will be given due to receipt of Instant Download. However, if there is a problem with the design, please email me. I will be happy to help in any way I can to resolve it. Even if that means going back and editing the design again. Our goal is to ensure that our buyers are 100 percent satisfied.
All of the embroidery designs sold by CRAFTY MOTHER HUSTLER are the property of CRAFTY MOTHER HUSTLER. They may not be copied, shared, traded, borrowed or altered. You may use these designs for personal use or on items that you sell, but may not resell our digital designs. A lot of time and effort goes into our designs.


