Our team are ready and willing to support you with your requirements whether it is protecting your newly laid deck or renovating a luxury yacht, whatever the application Owatrol has the solution you are looking for.
Paint Pouring Tips and Tricks

✓ Showcase your talent and win big in Artists Network prestigious art competitions! Discover competitions in a variety of media and enter for your chance to win cash prizes, publication in leading art magazines, global exposure, and rewards for your hard work. Plus, gain valuable feedback from renowned jurors. Let your passion shine through – enter an art competition today!
Pouring Acrylic Paint Like a Pro

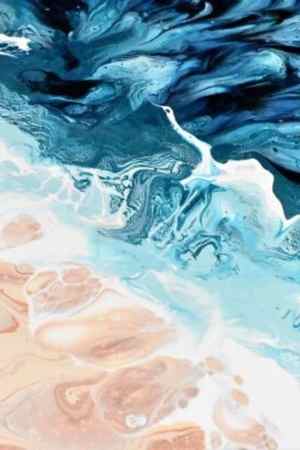
Contemporary paintings often showcase a wide variety of special effects — especially when the imagery is abstract. Think Jackson Pollock, Morris Louis, and Helen Frankenthaler. Many of those effects can be achieved by pouring acrylic paint.
Pouring is a great way to smooth out unwanted texture, get marbleized effects, rich colored glazes and add some fun to your painting process. Although pouring is a relatively simple technique, it is not always easy.
There are two categories for pouring acrylic paint: coated pours and wash pours. Each requires a different process and will produce different effects.
The following helpful tips and tricks for pouring acrylic paint can help you navigate around the most common pouring problems, starting with a great demo on intuitive pours to get you in the spirit of this free-flowing process.
Tips for Coated Pours
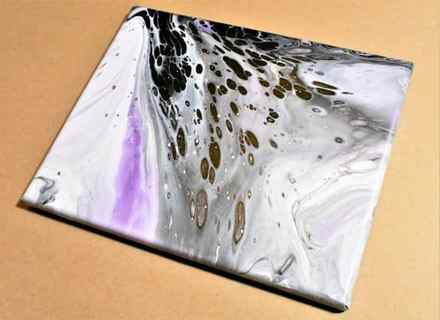
A coated pour can resemble oil paint. It will intensify colors because glossy binders reflect light.
Coated pours generally use a combination of acrylic paint and medium, with little to no water added. The paint creates a fluid shape or layer that sits upon the painting surface, as in Jackson Pollack’s layered drips and high-gloss finishes.
- For best results, use a pouring medium and keep any water additions to less than 40%.
- Pouring mediums come in both thin and thick viscosities. Each will produce different effects. To determine quantities, a good rule of thumb is to plan on about 2 ounces of thin pouring medium to cover an 8” x 10” (20cm x 20cm) surface, and three ounces for thicker pouring mediums.
- Avoid haphazardly adding water to thin pouring mediums. Try using the medium on its own first to determine whether adding water is necessary.
- Allow any excess medium to spill over the sides of the painting surface by propping up the surface with containers or blocks at all four corners.
- Use a leveling device to ensure the pour will remain level while drying.
- Use a rigid substrate to prevent buckling while pouring acrylic paint. If using stretched canvas, be sure to prop up the center to keep it from sinking.
- Before pouring, apply a stain sealer, then prime with gesso. This will prevent stains from coming through the surface into the poured layer.
Hair dryer
The large flowers created by Rinske Douna are beautiful statement pieces. The simplicity of the pour combined with her use of tools (mainly a hair dryer) and creative eye makes for some fantastic pieces.
This unique style of paint pouring by Olga Soby is so creative and fun. We love the fact that it is essentially two pours on one canvas. The above video is a detailed guide as to how you can create your very own planet/space pour.
Acrylic pouring combined with traditional painting
We love the idea of combining the fluidity of a paint pour with the rigidity of traditional painting. AB Creative does this in a really fun and interesting way and explains her process step by step so you can also try it for yourself.
We love different tools being used in both the pouring process (see below) as well as after the paint has hit the canvas. Fiona’s art used the back of plastic scoops to create wonderful dimension and texture to this piece above. It goes to show that even a standard tool can create such interesting results.
Using a dustpan to create the pour
We love how this piece turned out! Brad Kasten poured his paint into a dustpan and then emptied the dustpan onto the canvas. Such an everyday tool that can create such wonderful effects!
For more information into the wonderful world of acrylic paint pouring, take a look at a few of our previous posts:
- Essential acrylic paint pouring supplies
- FAQs about using Floetrol in your acrylic paint pouring
- Creating cells with Floetrol
What is acrylic pouring?
For our paint pouring beginners, in order to explain exactly what acrylic pouring is, we first need to discuss fluid art. Fluid art includes art forms where the medium is a liquid or a fluid. Media of fluid art include resin, alcohol ink, acrylic paints.

In acrylic pouring, the acrylic paint is thinned down with what’s called a medium. Basically, this is the substance that allows the paint to flow across the canvas. Rather than being applied with a brush, as in traditional painting, the paint in acrylic paint pouring is applied by being poured onto the canvas (hence the name “acrylic pouring”).
The results of acrylic pouring vary widely depending upon the acrylic pour technique used to apply the paint. This comprehensive paint pouring technique guide will cover nearly all of the ways that you can create acrylic pouring art and the types of results you can expect based upon the acrylic pour technique used.
What do you need for acrylic pour painting?
The supplies needed for each of the different acrylic pour techniques vary slightly, but there is a basic set of supplies that you’ll need for any acrylic flow painting technique, which I’ll list below under basic supplies. You’ll find any additional supplies needed for a specific acrylic pour technique in the description for that type of pour below.
Basic Supplies
- Acrylic Paint
- Medium: Common mediums include Floetrol, Liquitex Pouring Medium, Elmer’s Glue-All, and PVA glue
- Water: Water is usually used to some degree in thinning the paint.
- Canvas: This can be an actual canvas or anything else you wish to paint.
- Cups: You need to have something to mix your paints in, and they’re handy for elevating your paintings so they don’t stick to whatever they’re drying on.
- Stir Sticks: Popsicle sticks are the most accessible stir sticks.
- Table Cover: This can be a messy art form, so you’ll want to protect your table. Some things that you can use are plastic tablecloths, trash bags, butch paper, or if you’re planning on doing a few paintings, you can repurpose a tupperware bin to pour in.
- Gloves: This is a messy art form, so you may choose to wear gloves.
- A place for the painting to dry for at least a few days, at least until the paint is dry to the touch.
If you’re looking to expand your medium horizons, check out my How to Thin Acrylic Paint for Acrylic Pouring post, which also lists every pouring medium that I could possibly find to help you see what your options are all in one place!
If you want to know more about the tools I use and love, grab my FREE acrylic pouring tool guide, where I share my 10 favorite tools. They’re cheap and save a lot of time and hassle!
Optional Supplies
If you spend any amount of time studying acrylic pour painting, you’ll find that there are a number of additives that people introduce to their paints to achieve different effects, generally cells (pockets of color that are different from the surrounding paint color). I personally have not used these as I haven’t had a problem with achieving these effects with the recipe I outline below. However, if you’re looking to experiment, I will list some additives I’ve seen people use below.
- Dimethicone silicone
- Silicone Oil
- Isopropyl alcohol
If you’re interested in learning more about additives for acrylic pouring, check out this blog post on the Best Additives for Acrylic Pouring over at acrylicpouring.com. Just be sure to take care when you are using additives because many of them need to be cleaned off of the painting once it’s dry and could possibly affect the archival nature of your paint.
You can also create cells and get different effects by using a torch on your paint. I’ve played with this a little bit, and it’s pretty fun. I honestly just don’t pull out the fire too much because kids.
- Butane torch (the small ones that they use for cooking is generally what’s used)
Here’s an article about How to Use a Butane Torch for Acrylic Pouring Art, if you’re curious about that as well.

Mixing your Paint
There are many different “recipes” out there for acrylic paint pouring, and really, this is something that if you stick with this art form, you’ll adjust as time goes on and fit it to your style and preferences.
Here’s the basic acrylic pouring recipe that I use:
- 1 part paint
- 2 parts Floetrol (that’s my medium of choice currently)
- Splash of water
Here’s the thing, this is going to vary depending on the type of paint you’re using. Different brands have different consistencies. What I do is mix the paint and the Floetrol in the ratios above and then add just a slight bit of water until I reach the consistency I like. I prefer my consistency to be something like pancake batter for most acrylic pour techniques.
I use tap water, despite some people’s recommendations to use distilled because I’ve never had an issue and it’s easy. I encourage you to use your best judgement and do some research on it for yourself if you’re concerned about it. Maybe I’ll add it to the list of experiments I want to do in the future.
Tips
A couple of notes before we get started with all of the acrylic pour techniques. Some of these require a base coat of paint on the canvas to help your paint flow more easily, but you can add a base coat to any of these to do the same thing and it won’t hurt. In fact, it will probably only help your pour.
Most of these videos are from my 30-day color theory series that I did. It’s a really fun series, so you should grab your free printable Color Wheel and 8 Color Scheme Guides and follow along! It’s also a great tool if you’re not always sure how to match colors or if you’re looking for some new color combos you may not have otherwise thought of. You can also check out my color theory post for more information on choosing colors for your pours.
If you’re interested in a particular pour from one of my videos and the paints and supplies I used, I’ve linked to the post for that video in the title of the pour.
Acrylic Pour Techniques
Now that we’ve got down what acrylic pouring is and the tools you need to do it, we can get into the fun stuff and talk about all of the different ways to make beautiful art! I have compiled this list of as many acrylic pour techniques as I could, and I am going to try to keep this as up-to-date with new acrylic pour techniques as possible, but if you think I’m missing something, let me know and I will totally look into it!
Clean/Traditional Pour
A clean or traditional pour is the most simple type of pour. It is achieved by pouring different colors of paint onto a canvas separately and then moving and tilting the canvas until the desired result is achieved.