Pin this for later!
Maple Leaf SVG Free (DIY Acrylic Sign For Fall)

After making my DIY acrylic sign for fall last week, I had to give this simple fall craft project another go with one of these leaf SVG files I illustrated!
My daughter actually suggested that I draw leaves on that first sign but I had my heart set on the quote. I think I might give her this one to decorate her bedroom for fall since she was so set on the idea.
Honestly, this DIY acrylic sign turned out even better than my last one!
It’s such a satisfying craft project to do (who doesn’t love mixing paints?!) and using an SVG file makes the sign design so much easier than the hand lettered version of this project.

Let’s talk about this line art leaf SVG free cut file! Last year I drew these line art leaves for my free printable fall to-do list.
I have loved the design since and am so excited to be offering them as an SVG bundle now! So I actually have 5 leaves that I created SVGs of.
I totally love them as a set, so put those in my shop. You can see the bundle of 5 line art fall leaves SVGs here (limited commercial use available) but wanted to give one of them to you guys as a free download (personal use!) and show you how you can make something rad with it!
I chose the maple leaf (how Canadian of me!) as the free SVG file leaf for this project. You can snag that leaf svg free file below.
Now… let’s talk about this DIY acrylic sign we’re making with the fall leaf SVG! These are really simple to make as long as your acrylic is the right size. This time around I wanted a smaller sign so had to cut mine. I’ve done this before so knew what to do. You can check out this post right here if you’re needing to cut acrylic!
If you’re not up for cutting acrylic (fair enough), just buy yourself a picture frame with acrylic instead of glass in the right size and pop that right out of the frame!
Alright… ready for the maple leaf svg free file + DIY acrylic sign tutorial? I thought so 😉

If you missed my last acrylic sign, that one goes into a little more detail I think but it’s a super easy DIY decor project. I selected a few shades of acrylic craft paint in fall colors to make a kind of ombre design on my acrylic.
I love darker, moodier colors for pretty much anything, but especially in fall. I’ll take these dark burgundy tones and burnt oranges over those typical fall colors any day!

I painted those on to the acrylic for the sign and blended them using a craft paint brush. The toughest part is making sure they’re blended beautifully from the front of the acrylic.
The side you are painting is NOT the finished side of this project. Make sure you flip it over to look at as you go to make sure you’re getting the look you love!
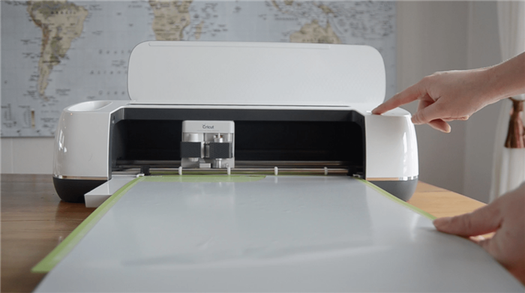
Next, you’ll need to cut out your line art maple leaf SVG free file!
I used my Cricut and permanent adhesive vinyl in white for this. SVG cut files are super versatile, you can use a Silhouette cameo, Cricut Explore, Brother Scan Cut or any cutting machine you have.
How to Download This Free Maple Leaf SVG
To download this line art maple leaf free SVG file, all you need to do is enter your email below and have it sent to your inbox. When you click the confirm button on the email you receive, it will open the digital file directly.
Some browsers will start download immediately, others you’ll need to right click and save.
The SVG file is uploaded as a compressed folder (zip file). Double click the zipped/compressed folder to ‘unzip’ it and see your SVG file. Once it’s in your downloads folder, you can upload it to your Cricut Design Space, Silhouette Studio or whatever cutting machine software you are using.
This Maple Leaf SVG file is free for personal use. Think making projects for yourself, your classroom or as gifts. NOT for commercial purposes like logo design.

Line Art Leaves Mini SVG Bundle
$ 5.99 USD
If you want to grab the whole set of SVGs along with PNG file and DXF file versions of the leaves with limited commercial license to make physical products to sell, you can do that in my shop RIGHT HERE.

How do I Upload a Free Cut File to Cricut Design Space?
Once you’ve downloaded your free maple leaf SVG file, it’s time to upload it to your cutting machine software so you can use it any of your creative projects.
I use my Cricut to cut out my SVG files, but you could also use your Silhouette or other brand of cutting machine. To upload an SVG file to Cricut Design Space and most other cutting machines is super straight forward.
Open up Cricut Design Space and start a new project. In the left hand panel, select ‘upload’ and search for your file. You can add a name to your file at this point then upload it and insert it into your project. That’s it.

The SVG file has all the layers separated for you and Cricut reads all that information for you.
If you’re new to uploading your own images to Cricut and would like more information on the different types of files you can cut with your Cricut, this video walks you through all the different types and how to upload them to Cricut Design Space to use them in your projects.


I cut my maple leaf SVG design out of the glossy permanent vinyl from Cricut with Cricut regular transfer tape but any vinyl would work.
Weed your cut vinyl leaf design and transfer it to your acrylic sign once the paint is dry!
If you are unsure if your paint is totally dry (I’m impatient like that!) put your piece on wax paper instead of cardboard or your counters.
That’s it! It’s SO freaking beautiful (if you ask me!). I can’t wait to get the rest of my house all decorated for fall now!


Leaf Painting – How to Paint Galaxy Painted Leaves

Fall is the perfect time of year to try leaf painting. There are so many different ways to paint leaves and pretty much any art supply you use on paper you can use to decorate leaves. I’m a big fan of painting galaxies on rocks and wood and I couldn’t wait to try making galaxy painted leaves.
RELATED: Check out some of my other leaf painting crafts for more ideas and inspiration: watercolor leaves, puffy paint leaves and metallic leaves.
Supplies for Galaxy Painted Leaves (affiliate links provided for convenience)
- Pressed Leaves – See below for directions on how to press leaves. If you can’t find leaves to try this craft on, you could always draw a leaf on card stock, cut it out and follow the same directions.
- Acrylic Paint – Some of my favorite acrylic paint brands are Folk Art Multi-Purpose Acrylic Paint and the Arteza acrylic paints.
- Paint Brushes – Typically I use inexpensive brushes for painting large areas like the background and then nicer, small round brushes for painting details like the moon and stars.
- Round Foam Brush– Round foam brushes are the secret weapon for creating beautiful galaxy backgrounds.
- Black Paint Marker– I love the the Artistro brand of black paint markers. You can buy just a set of black or there is also a black in their colored paint marker set.
- Toothbrush
- Nail Dotting Tool(optional) – I love these tools for making perfect round circles. I use them for making shooting stars.

Before You Start: How to Press Leaves for Leaf Painting

- Gather your leaves. You want leaves that are fresh and not already dry.
- Put the leaves between newspaper or card stock and then put heavy books or anything else heavy on top. I usually let the leaves sit for 2-3 days before crafting to make sure the moisture is all out and the leaves are completely dry.
Watch the galaxy leaf painting video and then see the full step-by-step directions below:
Directions for Galaxy Painted Leaves
See below for full details and instructions, or follow this quick step by step along with the video tutorial.
- Cut out a cardstock heart and tape it to the middle of the leaf.
- Paint the leaf black.
- Add galaxy colors with a dabbing brush.
- Paint stars by flicking a brush covered in white paint over the leaf.
- Use a brush and/or nail dotting tool to add more details.
- Outline the leaf with a black paint marker.
- Optional: seal the leaf with a spray.
1. Add the Heart
Cut out a heart from card stock and tape it to the leaf.
2. Paint a Base Coat
Paint the leaf black around the cutout heart.
3. Add Colors
Using a round foam brush, start by adding colors by lightly pouncing directly onto the leaf.

4. Add Stars
Add stars by applying a small amount of white acrylic paint to a tooth brush. Keep the bristles pointed away from you (you want them facing the rock), and run you finger up the bristles, gently flicking the paint onto the wood slice. It’s easier to control where the paint goes by getting closer to the rock and flicking slowly.

5. Add Details
Add additional details like a moon and larger stars using a small round paintbrush.

6. Use a Nail Dotting Tool
To add shooting stars and other larger round stars, dip a nail dotting tool (see supply list) into white paint and gently press down on the rock without touching it all the way. You just want the paint to touch. More pressure for larger dots and less pressure to make the dots smaller.

7. Let Dry and Clean Up
Once your design is complete, let the paint dry completely and then remove the paper heart. You can clean up the edges of the heart and give the lines a crisp, clean look by using a black paint marker.
8. Optional: Seal Your Galaxy Leaf Art
I don’t typically seal my leaves, but if you want you could brush some mod podge on your finished leaf.

If you’re looking for more painted galaxy inspiration check out this post on painted galaxy rocks, this one on how to paint a galaxy wood slice, and my easy no carve galaxy pumpkin painting tutorial.
I’d love to see how your galaxy leaves turn out. Come share with me a picture on Instagram or Facebook! I love showing examples of my tutorials being made!


