1.0 ARTISTIC PERCEPTION
Develop Perceptual Skills and Visual Arts Vocabulary
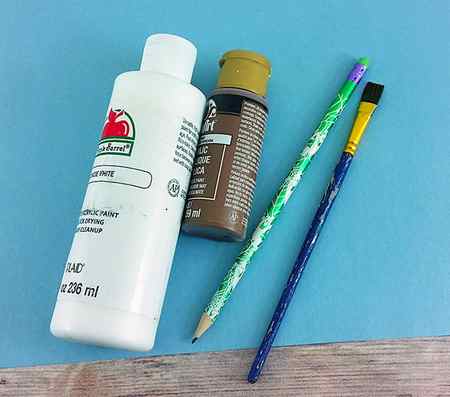
1.2 Name art materials (e.g., clay, paint, and crayons) introduced in lessons.
3.0 HISTORICAL AND CULTURAL
Understanding the Historical Contributions and Cultural Dimensions of the Visual Arts
3.2 Identify and describe various subject matter in art (e.g., landscapes, seascapes, portraits, still life)
4.0 AESTHETIC VALUING
Make Informed Judgements
4.4 Give reasons why they like a particular work of art they made, using appropriate art vocabulary.
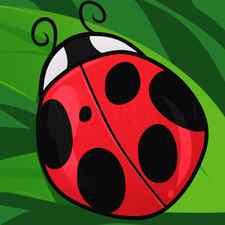
How to Draw a Ladybug for Kids

Draw out and color in different shaped spots like so, and then draw the twirled antenna as well as the eyeball lines. Erase nothing because there was no guides to draw in step one.
Step 4.
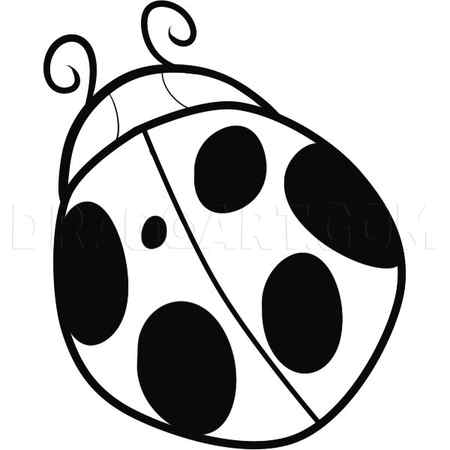
Here is the ladybug when you’re done. Color it in and you have finished your drawing already. See how fast that was.
Comments (0)
More From Dawn


Related


Details
Description: For the last time today I will be uploading another ‘For Kids’ tutorial, and this time it’s going to be an insect instead of a four or two legged animal. Let’s get started as you will learn “how to draw a ladybug for kids“, step by step. This red colored bug is a signature insect linked to the beginning months of spring and summer. If you’re not sure what that means, let me explain. Ladybugs start making themselves known around the spring and summer months. When you start to see ladybugs outside, it is a sure sign that either spring or summer is here. This tutorial on “how to draw a ladybug for kids” is going to be easy, colorful, and very fast to complete. I do hope you guys have a blast, even though it’s just a bug, it will still be fun to draw something easy. Adios people and peace out!
Login
Not a member?
Leaving Dragoart for External Site
We temporarily stopped you from leaving Dragoart so you could confirm
The site above is not affiliated with Dragoart in any way. Please continue at your own risk. Don’t enter any passwords or personal information from a site claiming to be Dragoart or its affiliates.
step-by-step instructions
Easy to follow instructions below;

1. draw a horizontal line – below center of page – use a permanent marker or a black crayon

2. above the line drawn create a 1/2 circle

3. extend the bottom, horizontal line out to the left

4. adda 1/2 circle above horizontal line drawn

5. draw 2 curve lines with dots on ends

6. draw 3 small lines, spaced as shown for legs on one side of bug – explain that the other 3 legs are on the other side of the bug

7. draw a 2nd line, attached to prior lines to serve as legs bent

8. draw 3 circles on body spaced as shown

9. draw a large curve under bug illustration

10. connect that one to a curve above the bug to form a leaf

11. draw 2 parallel lines off 1 end extending to edge of page for leaf stem

12. paint the body red watercolors – get the color strong + vibrant

13. paint the background a light, wash blue

14. paint the leaf stem brown

15. paint leaf green

16. leave the darkest color to paint last – paint the black, or use the sharpie to color the black prior to painting

17. finished artpiece
objective
Students will be able to recognize + illustrate a profile of a ladybug on a ;leaf. Students will have knowledge of how to properly use watercolor + care for the materials. Students will be able to daw + outline + paint a final art piece.
- 9″x12″ white watercolor paper
- watercolors
- cups /containers for water
- paper towels or rags
- watercolor brushes
- pencils
- erasers
- black permanent markers or black crayons
instructions
- show students the photographs of actual ladybugs.
- explain to students that they will illustrate the side view of a single bug
- explain how to properly care for + proper use of watercolors + brushes
- dip brush in water prior to using cake type watercolors
- students should gently roll the brush in the color desired
- the more water, the lighter the color + the less water, the longer roll to a brush in color, the darker the color
- follow step-by-step instructions above to complete art project
- leave ample time for clean-up
- give younger students jobs for clean-up
- Balance – Visual equilibrium in a composition; achieved by organizing the weight and attention of all elements in an artwork. Types of balance are symmetrical, asymmetrical, radial, and crystallographic.
- Color – The visual sensation dependent on the reflection or absorption of light from a given surface. The three characteristics of color are hue, value. and intensity. Color Harmony; The use of compatible colors to help unify a composition.
- Elements of Art – Sensory components used to create works of art ; line, color, shape, texture, value, space.
- Media – Plural of medium, referring to materials used to make art; categories of art (e.g. painting, sculpture, film).
- Primary Colors – Refers to colors red, yellow, and blue. From these all other colors are created.
- Secondary Colors – Colors that are mixtures of two primaries. Red and yellow make orange, yellow and blue make green, and blue and red make violet.
- Space – An area in which objects or images can exist.
- Watercolor – Transparent pigment mixed with water. Paintings done with this medium are called watercolors.