Now it’s time to make your first fold. You’ll repeat this same fold over and over again to cover the ornament. Here’s how:
- Fold the square you have pinned to the ball upward horizontally, forming a rectangle. The fold will now be on the bottom.
- Fold the top corners inward to the middle to form a triangle.
- Take four pins and place two just on the other side of the bottom middle to hold the flaps down, then pin one on each of the two outside bottom triangle corners to secure it to the Styrofoam ball.
How to Make a Large Christmas Star
wikiHow is a “wiki,” similar to Wikipedia, which means that many of our articles are co-written by multiple authors. To create this article, 11 people, some anonymous, worked to edit and improve it over time.
wikiHow marks an article as reader-approved once it receives enough positive feedback. In this case, 91% of readers who voted found the article helpful, earning it our reader-approved status.
This article has been viewed 137,342 times.
This article explains how to quickly and cheaply make a 5 foot (1.5 m) Christmas star to put the exclamation point on your Christmas light display.
Steps
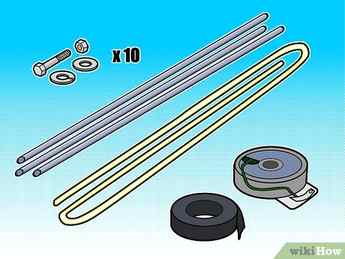
Gather the parts. You will need: 3 – 10′ sections of 1/2″ plastic conduit, 10 – 1/4″ X 3″ galvanized bolts, 10 1/4″ galvanized fender washers, 10 1/4″ lock washers, 10 1/4″ galvanized nuts, 2 strings or more of 100 count mini lights, plastic ties or electrical tape.

Cut the conduit in half so you have 6–5 feet (1.8–1.5 m) tubes.
Advertisement
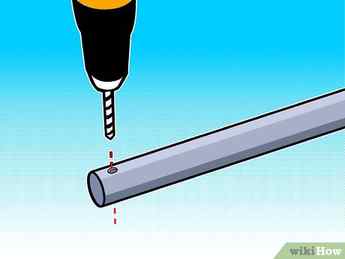
Drill a 3/8″ hole through one end of 5 pieces of conduit 1″ from one end
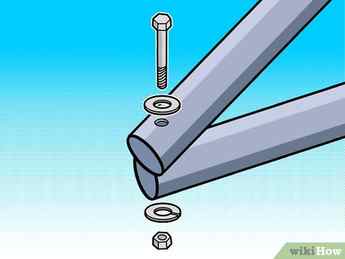
Bolt two pieces of conduit together using the 3″ bolt. With the bolt through the conduit slide the fender washer on followed by the lock washer then the nut. Finger tighten.
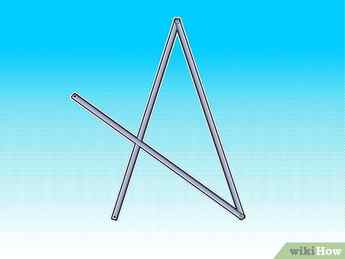
Lay this “V” onto the ground and lay the drilled end of another 5 feet (1.5 m) section on the one end of the “V”. You are now forming the star. Drill through the pre-drilled conduit into the undrilled conduit. You do it this way to make sure the holes line up and the bolt will fit through. With the bolt through the conduit slide the fender washer on followed by the lock washer then the nut. Finger tighten.

Continue with the remaining 2 pieces of conduit until you have bolted all five corners of the star together. The star will have play in it so shape the star until you are happy with the way it looks.

Notice that you have 5 points inside the star where the conduit crosses. Drill these spots and bolt them one by one so that your star holds its shape.

Wrap the star with the lights. Keep in mind that there are 10 pieces of the star that need to be wrapped. (5 on each side) if you put Twenty lights on each side, your star will be uniformly lit. Attached the lights using electrical tape and/or plastic tie wraps.

To gain height, you can put a 10 feet (3.0 m) 1/2″ metal conduit a foot inside a 10 feet (3.0 m) 3/4″ metal conduit. Drill a hole though both pieces of conduit and secure with a cotter pin. Your pole should now be about 19 feet (5.8 m) long. Drill another hole one inch down from the end of the 1/2″ conduit. Replace the top bolt on the star with a 4.5″ bolt and run the bolt through the conduit to secure it in place. Mount the pole to a chimney, tree, playhouse, wall or whatever you have to put your star in the sky! Have fun!
Advertisement
Community Q&A
Search
Question
If I go to a 6′ measurement for a star, will it come out the same as a 5′ star?
Top Answerer
The shape will be the same. The size will be about 20% larger.
Thanks! We’re glad this was helpful.
Thank you for your feedback.
As a small thank you, we’d like to offer you a $30 gift card (valid at GoNift.com). Use it to try out great new products and services nationwide without paying full price—wine, food delivery, clothing and more. Enjoy! Claim Your Gift If wikiHow has helped you, please consider a small contribution to support us in helping more readers like you. We’re committed to providing the world with free how-to resources, and even $1 helps us in our mission. Support wikiHow
Question
What’s the perimeter of the 5-foot star? How many feet of lights do I need?
Top Answerer
The perimeter is roughly 20 feet. That’s how much lighting you’ll need if you simply run the lights along the perimeter. If you wind the lights along the perimeter, you’ll need more, depending on how “tight” the winding is.
Thanks! We’re glad this was helpful.
Thank you for your feedback.
As a small thank you, we’d like to offer you a $30 gift card (valid at GoNift.com). Use it to try out great new products and services nationwide without paying full price—wine, food delivery, clothing and more. Enjoy! Claim Your Gift If wikiHow has helped you, please consider a small contribution to support us in helping more readers like you. We’re committed to providing the world with free how-to resources, and even $1 helps us in our mission. Support wikiHow
Question
How do I make a big star without metal?
Revad
Community Answer
You could cut the star shape out of heavy cardboard and wrap in foil for a silver star, or get a gold metallic paper to wrap for gold star.
Thanks! We’re glad this was helpful.
Thank you for your feedback.
As a small thank you, we’d like to offer you a $30 gift card (valid at GoNift.com). Use it to try out great new products and services nationwide without paying full price—wine, food delivery, clothing and more. Enjoy! Claim Your Gift If wikiHow has helped you, please consider a small contribution to support us in helping more readers like you. We’re committed to providing the world with free how-to resources, and even $1 helps us in our mission. Support wikiHow
Five Point Star Templates
In this section, you can download a simple, blank, 5-point star outline in a range of sizes from 1″ to 8″. Click any image or label to download your free printable star outline.


1.5″ Star Template


8″ Star Template

Mixed Sizes Star Shapes
Christmas Star Template for Holiday Crafts
In this section you can download our Christmas star templates to use in your Holiday crafts and creations!

1″ Christmas Star Outline
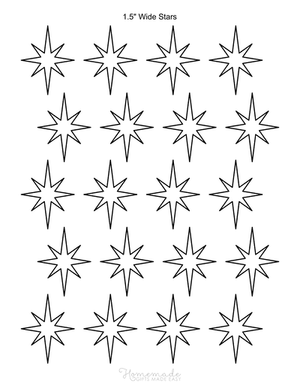
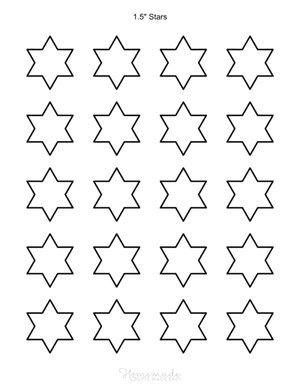
1.5″ Christmas Star Template
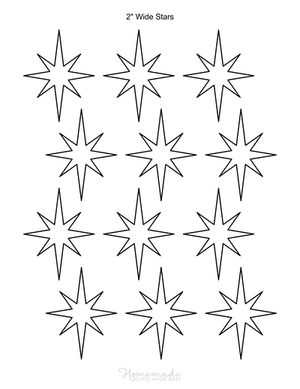
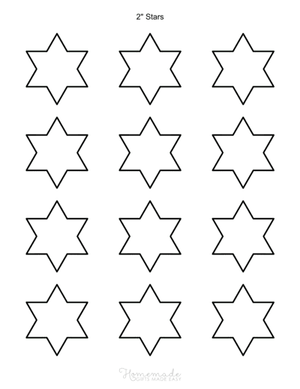
2″ Christmas Star Shapes
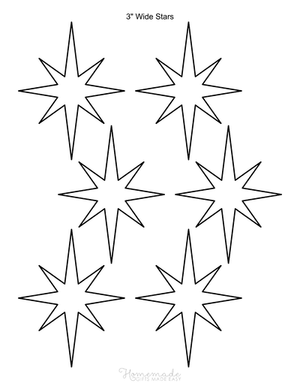
3″ Christmas Stars

4″ Christmas Star Outline

5″ Christmas Star Shape
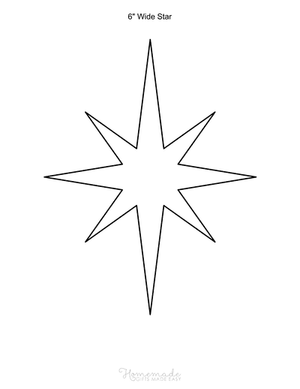
6″ Christmas Star Stencil
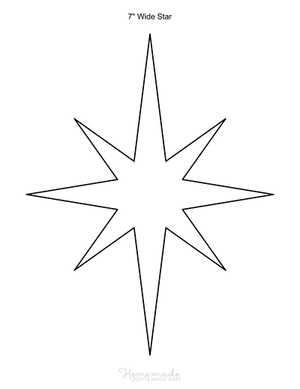
7″ Christmas Star Outline

8″ Christmas Star Template

Mixed Sizes Christmas Star Shapes
Six Point Star Templates
In this section, you can download a 6-point star outlines to use in your arts and crafts projects, or use them as coloring pages.

2″ Star Template


5″ Star Template


Mixed Sizes Printable Blank Stars
Begin the Second Fabric Layer

Take the second fabric (middle layer) and follow Step 3 to find the center. Pin the center of the fabric 1/2-inch down from the top of any first-layer triangle, keeping the center fold lines even.

Attach three more middle fabric squares 1/2-inch down on the center lines of each original triangle. Next, place four new squares at a diagonal to the other middle-layer triangles. Pin new triangles on the lines that divide the first layer 1/2-inch down from the center.
Add the Final Layer of Fabric Squares

Repeat Steps 7 and 8 to add the final layer of fabric squares.

Repeat Steps 3-9 to complete the opposite side of the ornament, being careful to line everything up evenly.
Pin Ribbon Around Ornament

Now that all fabric triangles are secured to the Styrofoam ball, it’s time to cover up the sides where your last layers ended. Take 12 inches of ribbon and wrap it around the center. You can pin this or use a hot glue gun to attach it. Alternatively, you can also use a strip of any layer of fabric or even burlap to cover the middle.

Make a loop or bow from ribbon or string and attach it to the top of the ornament with pins or a hot glue gun (a mixture of both will be most secure). Your ornament is now ready to decorate your tree!